

Strawberry Earthquake Cake stacks a ripe strawberry layer through swirls of tangy cream cheese atop a buttery cake crust, studded with white chocolate chips and coconut for every tempting bite. Each crack and fissure reveals pockets of fresh strawberry goodness alongside creamy cheese ribbons, making every slice a mosaic of flavors. Whether you’re hosting a summer gathering or craving something decadent with your afternoon coffee, this layered dessert bar promises to impress. Get ready to shake up your baking routine and dive into a slice that’s as fun to make as it is to devour!
Key Ingredients
Gather up these vibrant components to build your Strawberry Earthquake Cake:
- 1 box (15.25 oz / 432 g) strawberry cake mix (regular, not with pudding added if possible): forms the buttery cake crust that binds all layers and delivers sweet strawberry flavor.
- 1/2 cup (115 g) unsalted butter, melted: adds rich moisture and helps the cake mix come together into a sturdy base.
- 1 large egg, room temperature: ensures the crust holds its shape and stays tender after baking.
- 1 teaspoon vanilla extract: enhances the strawberry notes and deepens the crust’s flavor.
- 8 oz (225 g) cream cheese, softened to room temperature: creates the tangy, creamy swirl that balances the sweetness.
- 1/2 cup (115 g) unsalted butter, softened: combines smoothly with cream cheese for a lush, dollop-able topping.
- 3 cups (360 g) powdered sugar, sifted: sweetens and thickens the cream cheese mixture into glossy peaks.
- 1 teaspoon vanilla extract: lends warm, aromatic depth to the cream cheese layer.
- 1/4 teaspoon fine sea salt: cuts sweetness and amplifies the creamy swirl’s flavor.
- 2 cups (about 300 g) fresh strawberries, hulled and chopped (small pieces): deliver juicy pops and natural berry sweetness.
- 1 tablespoon granulated sugar (optional, for macerating berries if they’re not very sweet): draws out extra juices for plumper, sweeter strawberry bites.
- 1 tablespoon cornstarch: thickens berry juices during baking to prevent a soggy cake.
- 1 cup (170 g) white chocolate chips: disperse melty pockets of creamy sweetness throughout the bars.
- 1/2 cup (60 g) sweetened shredded coconut (optional but recommended): adds tropical crunch and snappy texture.
- 1/2 cup (60 g) chopped pecans or sliced almonds (optional): contributes nutty flavor and extra crispness.
- Extra sliced strawberries for garnish (optional): brightens each slice with fresh color.
- Powdered sugar for dusting on top (optional): provides a delicate finish and hint of sweetness.
- Fresh mint leaves for serving (optional): offer a pop of color and refreshing herbal note.
How To Make Strawberry Earthquake Cake
Let’s walk through the process of building and baking this show-stopping dessert. You’ll start by preparing a sturdy strawberry-flavored crust, layer on melty white chocolate, coconut, nuts and fresh berries, then swirl on a luscious cream cheese topping. As it bakes, you’ll coax out those signature fissures that reveal juicy strawberry pockets and create the “earthquake” effect we all love.
1. Prepare the pan
Preheat your oven to 350°F (175°C). Lightly grease a 9×13-inch baking pan with butter or nonstick spray. For easier slicing, line the bottom and two long sides with parchment paper, leaving an overhang to lift the bars out later.
2. Prep the strawberries
Hull and chop the fresh berries into small, bite-size pieces. If they lack sweetness, toss them with 1 tablespoon granulated sugar and let sit 5–10 minutes. Sprinkle with 1 tablespoon cornstarch, gently folding to coat, which will thicken juices and keep the bars from getting soggy. Set aside.
3. Make the strawberry cake crust
In a large bowl, combine the dry strawberry cake mix, melted butter, egg, and vanilla extract. Stir until a thick, slightly sticky dough forms—think cookie dough, not liquid batter. Transfer to the pan and use lightly greased hands or a spatula to press it into an even layer across the bottom.
4. Add white chocolate, coconut, and nuts
Evenly sprinkle the white chocolate chips over the crust. If using, add the shredded coconut and chopped nuts, then scatter the prepared strawberries on top, gently pressing them so they nestle into the mix-ins.
5. Make the cream cheese mixture
In a clean bowl, beat the softened cream cheese and butter with a mixer on medium until smooth and lump-free, about 2–3 minutes. Add vanilla extract and salt, then gradually blend in the powdered sugar—1 cup at a time—starting on low speed and increasing to medium until you have a thick, glossy mixture.
6. Create the “earthquake” swirl
Dollop large spoonfuls of the cream cheese mixture randomly over the berry layer. Without spreading it flat, use a butter knife or skewer to drag through the mixture in a few broad, slow swirls, leaving visible pockets and streaks.
7. Bake the cake
Place the pan on the center rack and bake 35–45 minutes. The edges should be set and lightly crisp, and the center still slightly jiggly in the cream cheese areas. A toothpick in a non-cheese spot should come out with moist crumbs. Tent with foil if the top browns too quickly.
8. Cool properly
Transfer the pan to a wire rack and cool 45–60 minutes so the cream cheese layer firms. For neat squares, chill in the refrigerator 1–2 hours before cutting.
9. Garnish and serve
Lift the bars out using the parchment overhang. Cut into squares with a sharp knife, wiping between cuts. Dust with powdered sugar and top with fresh strawberry slices and mint leaves. Serve slightly chilled or at room temperature.
10. Storage
Store leftovers in an airtight container in the refrigerator up to 4 days. Let slices sit 10–15 minutes at room temperature before serving, or freeze wrapped bars up to 2 months and thaw overnight in the fridge.
Serving Suggestions
Once your Strawberry Earthquake Cake is baked and cooled, these serving ideas will elevate every slice:
- Serve warm with vanilla ice cream for a delightful contrast between slightly warm bars and cold, melting ice cream.
- Dust with powdered sugar just before plating to add a touch of elegance and an extra whisper of sweetness.
- Pair with fresh berries on the side for a burst of color and juicy tartness that complements the creamy layers.
- Garnish with mint leaves to introduce a refreshing herbal note and make each slice look picture-perfect.
Tips For Perfect Strawberry Earthquake Cake
Nailing this recipe is all about the quality of your berries, the swirl technique, and small tweaks to suit your sweetness preferences. Make sure your strawberries are ripe and vibrant, experiment with jam swirls for an extra punch, and don’t worry if the cream cheese dollops aren’t uniform—that’s exactly what creates the dramatic cracks! If you’re hosting a party, chilling the bars solidly will give you neat, bite-sized pieces that hold their shape beautifully. Trust the cornstarch to keep things from going soggy, and play around with chocolate chip varieties and toasted toppings to customize every batch.
- Use very ripe, fragrant strawberries for maximum flavor; under-ripe berries give a weaker strawberry note.
- You can substitute frozen strawberries (thawed and well-drained) in a pinch; pat them dry and still coat with cornstarch.
- For a stronger strawberry punch, add 1–2 tablespoons strawberry jam or preserves in small dollops on top of the crust before the cream cheese layer and lightly swirl.
- If you prefer less sweetness, reduce powdered sugar in the cream cheese mixture to 2–2½ cups; texture will be slightly looser but still delicious.
- Swap the white chocolate chips with semi-sweet or milk chocolate chips for a different flavor profile.
- Toast the coconut and nuts lightly before adding to deepen their flavor and add extra crunch.
- For a firmer bar-style dessert (great for parties), chill completely, then cut into small bars and serve straight from the fridge.
- For a Valentine’s or special-occasion look, cut cooled cake with a heart-shaped cookie cutter and garnish each heart with a fresh strawberry slice.
How To Store It
To keep your Strawberry Earthquake Cake tasting fresh and maintaining its perfect texture, follow these easy storage methods:
- Refrigerate in an airtight container to preserve moisture and prevent the cream cheese layer from drying out.
- Let slices come to room temperature for 10–15 minutes before serving to restore that fudgy, cheesecake-like feel.
- Freeze individual slices by wrapping them tightly in plastic wrap and aluminum foil; thaw overnight in the fridge for up to 2 months.
- Use parchment or plastic wrap directly on the cake surface if you’re storing it in the pan, preventing it from sticking and keeping it neat.
Frequently Asked Questions
Here are answers to the questions I get most about this fun, crackly dessert:
- Why is this dessert called “Strawberry Earthquake Cake”?
The name comes from the dramatic cracks and swirls that form in the cream cheese topping as the cake bakes and settles. The uneven, shattered look resembles tectonic plates shifting, with bright pink cake and berries peeking through creamy white fissures—hence the “earthquake” effect.
- Can I substitute frozen strawberries for fresh ones?
Yes. Thaw the frozen strawberries completely, then drain and pat them very dry to remove excess moisture. Toss them in the granulated sugar and cornstarch just as you would fresh berries to help absorb juices and prevent a soggy cake layer.
- How can I prevent my cake from becoming soggy around the fruit layer?
Coating the chopped strawberries in cornstarch is essential—it thickens their juices during baking. You can also macerate with a little sugar ahead of time to draw out excess liquid, then drain any excess syrup. Be sure to press the cake crust firmly and bake until the edges are set and slightly crisp.
- What’s the best method for cutting neat, clean slices?
Allow the cake to cool completely, then chill in the refrigerator for at least one hour so the cream cheese layer firms up. Use a sharp knife wiped clean between cuts, or dip the blade in hot water and dry it before slicing. Lining the pan with parchment paper helps you lift the cake out for even edges.
- How do I store leftovers, and how long will they keep?
Store any uneaten bars in an airtight container in the refrigerator for up to four days. For the best texture, let slices sit at room temperature for 10–15 minutes before serving. You can also wrap individual pieces tightly in plastic wrap and freeze for up to two months, then thaw overnight in the fridge.
- How do I achieve the signature cream cheese “earthquake” swirl?
Dollop large spoonfuls of the cream cheese mixture randomly over the fruit and chip layer without spreading. Then, gently drag a knife or skewer through the batter in a few broad strokes—avoid overmixing. You want distinct pockets and streaks of cream cheese, not a uniform top, so the cracks form during baking.
- Can I customize the mix-ins or toppings?
Absolutely. Swap white chocolate chips for semi-sweet or milk varieties, toast the shredded coconut and nuts for extra crunch, or add a few dollops of strawberry jam beneath the cream cheese layer for intensified berry flavor. You can also garnish with fresh mint or dust with powdered sugar to suit your taste.
What Makes This Special
This Strawberry Earthquake Cake works because it layers contrasting textures and flavors—tender strawberry-flavored crust, juicy berry pockets, melty white chocolate, crunchy coconut and nuts, plus tangy cream cheese ribbons that crack open like tectonic shifts. It’s equal parts rustic fun and elegant dessert, perfect for parties or a cozy night in. The dramatic swirls make every piece Instagram-worthy, and the taste keeps your fork diving back for more. Feel free to print this guide, save it for your next baking adventure, and let me know in the comments how your cake turned out or if you have any questions along the way!
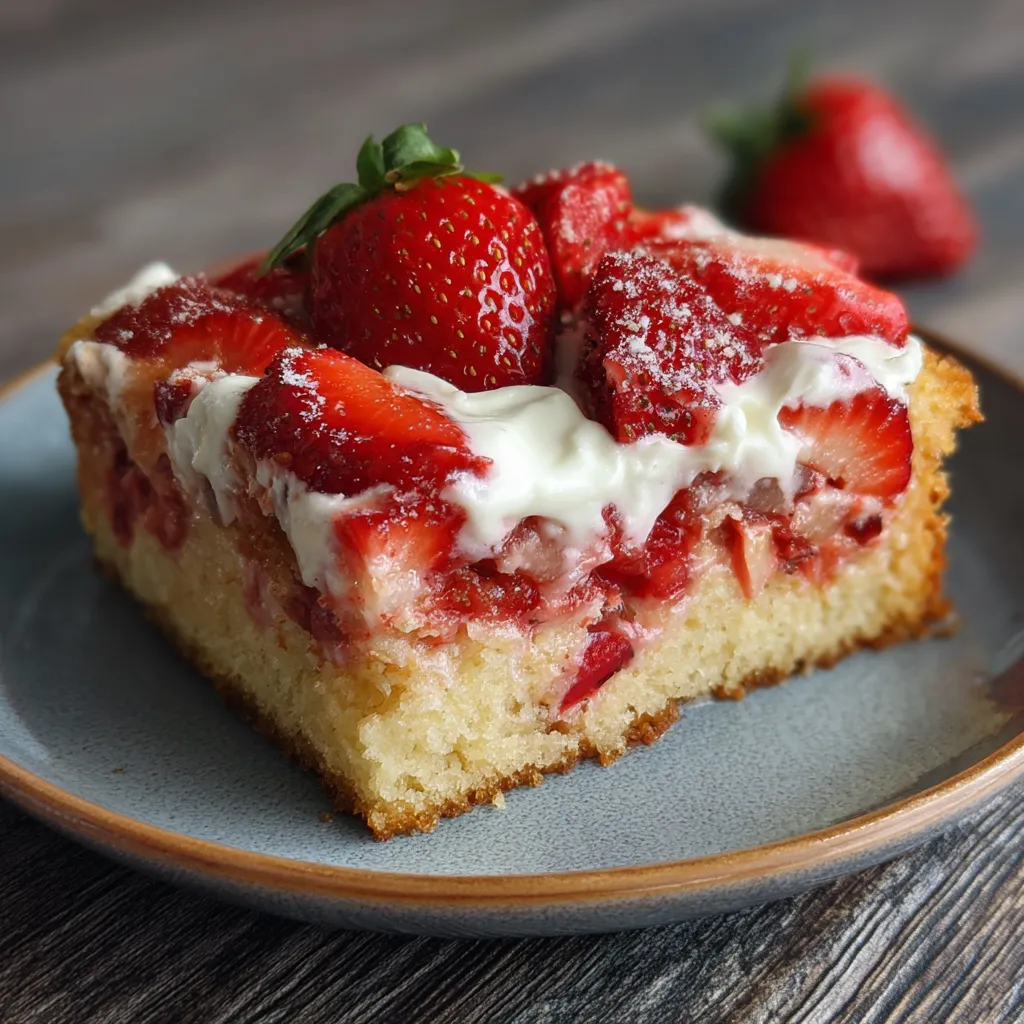

Strawberry Earthquake Cake
Description
Juicy strawberry pieces mingle with tangy cream cheese swirls on a buttery crumb crust, dotted with white chocolate chips, coconut, and nuts. Each slice cracks into a mosaic of flavors and textures that’ll make your taste buds dance.
Ingredients
Instructions
-
Prepare the pan:
-
- Preheat your oven to 350°F (175°C).
-
- Lightly grease a 9x13-inch (23x33 cm) baking pan with butter or nonstick spray.
-
- For extra ease in cutting, line the bottom and two long sides with parchment paper, leaving overhang as “handles.”
-
Prep the strawberries:
-
- Hull and chop the strawberries into small, bite-size pieces.
-
- If your strawberries are not very sweet, toss them with 1 tablespoon granulated sugar and let sit 5–10 minutes to release juices.
-
- Sprinkle the strawberries with 1 tablespoon cornstarch and gently fold to coat. This helps thicken their juices while baking and keeps the cake from getting soggy. Set aside.
-
Make the strawberry cake crust:
-
- In a large mixing bowl, add the strawberry cake mix (dry), melted butter, egg, and vanilla extract.
-
- Stir with a spatula or wooden spoon until a thick, slightly sticky dough forms. It will be more like cookie dough than pourable cake batter.
-
- Transfer this dough to the prepared pan.
-
- Using lightly greased hands or the back of a spatula, press the dough evenly across the bottom of the pan into a smooth, even layer, reaching all corners.
-
Add white chocolate, coconut, and nuts:
-
- Sprinkle the white chocolate chips evenly over the cake crust.
-
- If using, sprinkle shredded coconut and chopped pecans or sliced almonds evenly on top.
-
- Scatter the prepared chopped strawberries evenly over everything, gently pressing them down just slightly so they nestle into the toppings.
-
Make the cream cheese mixture:
-
- In a large bowl, beat the softened cream cheese and softened butter together with a hand mixer (or stand mixer with paddle) on medium speed until completely smooth, creamy, and lump-free, about 2–3 minutes. Scrape down the bowl as needed.
-
- Add the vanilla extract and salt; beat to combine.
-
- Gradually add powdered sugar, 1 cup at a time, beating on low speed at first to avoid a sugar cloud, then increasing to medium until fully incorporated.
-
- Continue beating for another minute until the mixture is thick, glossy, and spreadable. It should be looser than frosting but thicker than cake batter.
-
Create the “earthquake” swirl:
-
- Dollop large spoonfuls of the cream cheese mixture all over the top of the strawberry and white chocolate layer. Do not spread it into one even sheet.
-
- Using a butter knife or skewer, gently drag through the cream cheese and berries in a few broad, slow swirls. You want visible pockets and streaks of cream cheese, not a perfectly blended top—this unevenness creates the classic “earthquake” look as it bakes and cracks.
-
Bake the cake:
-
- Place the pan on the center rack of the preheated oven.
-
- Bake for 35–45 minutes, depending on your oven, until:
-
- The edges are set, deeply golden, and slightly crisp.
-
- The center is mostly set but still a bit jiggly from the cream cheese (it will firm as it cools).
-
- A toothpick inserted into a cakey edge (not the cream cheese pocket) comes out with a few moist crumbs, not wet batter.
-
- If the top is browning too quickly near the end, loosely tent the pan with foil for the final 5–10 minutes.
-
Cool properly:
-
- Transfer the baked cake pan to a wire rack.
-
- Let it cool at least 45–60 minutes in the pan. The cream cheese layer needs time to set so slices hold together.
-
- For very clean squares, cool to room temperature, then chill in the refrigerator for 1–2 hours before cutting. The texture will be fudgy and cheesecake-like.
-
Garnish and serve:
-
- Once cooled and set, use the parchment handles to lift the cake out of the pan, if lined.
-
- Cut into squares or rectangles with a sharp knife, wiping the blade between cuts for neat slices.
-
- If desired, dust lightly with powdered sugar just before serving.
-
- Garnish each slice with fresh strawberry slices and a mint leaf for a polished look.
-
- Serve slightly chilled or at cool room temperature. The flavors are brightest when not ice-cold.
-
Storage:
-
- Store leftovers covered in the refrigerator for up to 4 days.
-
- For best texture, let refrigerated slices sit at room temperature for about 10–15 minutes before serving.
-
- You can also freeze tightly wrapped slices for up to 2 months; thaw overnight in the refrigerator.
Note
- Use very ripe, fragrant strawberries for maximum flavor; under-ripe berries give a weaker strawberry note.
- You can substitute frozen strawberries (thawed and well-drained) in a pinch; pat them dry and still coat with cornstarch.
- For a stronger strawberry punch, add 1–2 tablespoons strawberry jam or preserves in small dollops on top of the crust before the cream cheese layer and lightly swirl.
- If you prefer less sweetness, reduce powdered sugar in the cream cheese mixture to 2–2½ cups; texture will be slightly looser but still delicious.
- Swap the white chocolate chips with semi-sweet or milk chocolate chips for a different flavor profile.
- Toast the coconut and nuts lightly before adding to deepen their flavor and add extra crunch.
- For a firmer bar-style dessert (great for parties), chill completely, then cut into small bars and serve straight from the fridge.
- For a Valentine’s or special-occasion look, cut cooled cake with a heart-shaped cookie cutter and garnish each heart with a fresh strawberry slice.

