

Every time I think about a dessert that feels both elegant and fun, Strawberry and Kiwi Pavlova instantly steals the spotlight. It’s like a sweet little cloud that you can slice into, revealing a soft, marshmallow-like center surrounded by the most satisfying crisp shell. Over the years, I’ve made this pavlova for birthday brunches, garden parties, and even cozy solo evenings when I just needed a treat to brighten my week. Balancing those tart slices of vibrant kiwi and juicy strawberry atop fluffy whipped cream makes every bite feel like a celebration of fresh, seasonal flavors.
Last summer, I remember racing home from the farmer’s market, eager to whip up something that would highlight the day’s best produce. The afternoon light was streaming through my kitchen window as I measured out sugar and carefully separated egg whites. By the time that 60-minute bake was up and the oven door cracked open, the entire room filled with a sense of triumph: my pavlova had puffed up perfectly! Topping it with green and red jewels of fruit, I felt a burst of pride—and a little giddiness—knowing I was about to share something truly special with my family. This intermediate-level recipe might ask a bit of patience, but it rewards you with a dessert that’s as stunning as it is delicious.
KEY INGREDIENTS IN STRAWBERRY AND KIWI PAVLOVA
Before we dive into the mixing bowl, let’s shine a spotlight on the ingredients that make this pavlova truly unforgettable. Each component has an important job, from creating that crisp, airy shell to layering on bursts of fresh, fruity flavor.
- Egg whites
These are the backbone of our meringue. When whipped to soft peaks, they trap air and expand in the oven, creating that signature cloud-like texture.
- Granulated sugar
Aside from adding sweetness, it helps stabilize the egg whites, giving the meringue its glossy finish and enough structure to hold its shape.
- White vinegar
A small splash of acidity helps the egg whites hold onto air more effectively, ensuring a sturdy meringue that doesn’t collapse.
- Cornstarch
This pantry staple contributes to the contrast between a crispy exterior and a marshmallowy interior by absorbing any excess moisture during baking.
- Vanilla extract
A touch of pure vanilla deepens the flavor profile, bringing warmth and a hint of floral sweetness that complements the fruit.
- Heavy cream
Whipped to soft peaks, this luscious cream becomes the canvas on which your strawberries and kiwi will shine.
- Powdered sugar
Sifted into the cream, it adds a subtle sweetness and helps the whipped cream hold its shape longer.
- Strawberries
Fresh, hulled, and sliced, they bring juicy acidity and vibrant red hues that sparkle against the white cream.
- Kiwis
Their bright green flesh and slight tang provide a refreshing contrast and a pop of tropical flair.
- Fresh mint leaves (optional)
A final sprinkle of mint elevates the dessert with a hint of herbal freshness and a lovely visual accent.
HOW TO MAKE STRAWBERRY AND KIWI PAVLOVA
Let’s roll up our sleeves and transform these ingredients into a show-stopping pavlova. Follow each step carefully, and you’ll end up with a perfectly crisp shell yielding to a tender, cloud-like center.
1. Preheat your oven to 300°F (150°C). Line a baking sheet with parchment paper and use a pencil or food-safe pen to draw a 9-inch circle. This guide will help you shape the meringue evenly.
2. In a large, clean bowl, whip the egg whites on medium speed until they hold soft peaks. This means the peaks will just bend over at the tips when you lift the whisk.
3. Gradually add the granulated sugar, one tablespoon at a time, while continuing to whip. Aim for a glossy meringue that forms stiff peaks, meaning straight, firm tips that stand upright.
4. Using a spatula, gently fold in the white vinegar, cornstarch, and vanilla extract. The trick is to combine everything without deflating your fluffy meringue.
5. Spoon the meringue onto the parchment, following your circle outline. Spread it out evenly, then create a slight indentation in the center—this is where the cream and fruit will nestle later.
6. Bake in the preheated oven for 60 minutes. Once the time is up, turn off the oven and crack the door open slightly. Let the pavlova cool completely inside, which helps prevent cracks and shrinking.
7. Meanwhile, in a chilled bowl, whip the heavy cream and powdered sugar together until soft peaks form. Be careful not to overbeat; you want a smooth, spreadable texture.
8. When the pavlova is fully cooled, transfer it gently to a serving platter. Spread the whipped cream over the center, filling that shallow well.
9. Arrange the sliced strawberries and kiwis on top of the cream in a pretty pattern. Feel free to layer or fan them out for a stunning effect.
10. Garnish with fresh mint leaves if desired. Serve immediately to enjoy the contrast of textures—the crunchy shell, airy interior, silky cream, and juicy fruit.
SERVING SUGGESTIONS FOR STRAWBERRY AND KIWI PAVLOVA
Bringing this pavlova to the table is always a delightful moment of anticipation. Its vibrant colors instantly grab attention, and every slice reveals that magical blend of textures. As you prepare to serve, think about how you can elevate the experience with thoughtful presentation and complementary flavors. Whether you’re hosting an elegant dinner party or a casual weekend brunch, these ideas will help you showcase your pavlova in all its sweet glory.
- Serve on a chilled platter to help keep the meringue crisp and the whipped cream cool, ensuring each bite stays true to its ideal texture.
- Add a dusting of powdered sugar just before serving for a lightly frosted look that makes the fruit’s colors pop like tiny jewels.
- Offer a side of homemade berry coulis or passion fruit syrup drizzled in a small pitcher, so guests can customize their pavlova with extra tangy sweetness.
- Pair each slice with a flute of sparkling wine or a refreshing iced tea infused with mint, which cuts through the richness and complements the fruit’s brightness.
HOW TO STORE STRAWBERRY AND KIWI PAVLOVA
Longing to make your pavlova a day ahead? You’re in luck—proper storage can preserve most of that crisp-meets-marshmallow charm. Since pavlova is happiest when freshly topped, I’ll share strategies to keep components at their peak until serving time. With a bit of planning, every element stays vibrant, and you avoid any dreaded soggy surprises.
- Store the meringue base in an airtight container at room temperature for up to 24 hours. This prevents moisture from seeping in and keeps the shell crisp.
- Keep the whipped cream in a separate covered bowl in the refrigerator. Rewhip for a few seconds before assembling if it loses a touch of firmness.
- Place the sliced strawberries and kiwis in sealed containers in the fridge. If they release any juice, drain it off to avoid wetting the pavlova base.
- Assemble the pavlova just before serving. If time is tight, you can pre-soothe flavors by sprinkling a tiny pinch of sugar on the fruit an hour ahead to intensify their juices, then blot any excess liquid.
CONCLUSION
Baking a Strawberry and Kiwi Pavlova is like creating edible art—you mix simple pantry staples, transform them with careful techniques, and crown your masterpiece with jewel-toned fruit. From the first crack of the delicate shell to the slow melt of whipped cream, every step feels special and worthwhile. This recipe strikes a beautiful balance between crisp and tender, sweet and tangy, making it an unforgettable dessert for any occasion. With a preparation time of about 30 minutes, an hour in the oven, and an hour to cool, you can easily fit this creation into your weekend plans or holiday festivities. Remember, you can bake the base up to a day ahead and keep toppings fresh until the last moment, allowing your final assembly to be both stress-free and spectacular.
Feel free to print this article and save it in your recipe binder—each page is packed with tips, serving ideas, and storage hacks to ensure success. Below, you’ll find a FAQ section that addresses common questions and troubleshooting advice, so you can dive right back in whenever your dessert cravings strike. If you try this Strawberry and Kiwi Pavlova, I’d love to hear how it went: drop a comment, share any twists you added, or ask me anything if you need a hand. Your kitchen triumphs are what make writing these recipes so rewarding, and I can’t wait to see how your pavlova turns out!
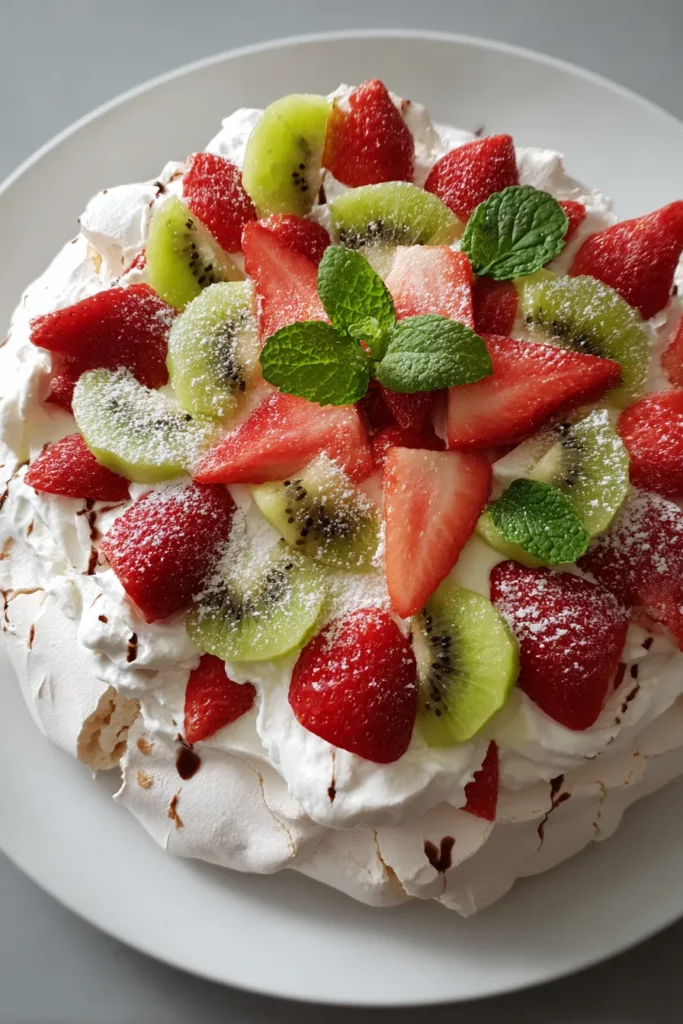

Strawberry And Kiwi Pavlova
Description
This pavlova features a crunchy meringue base topped with luscious whipped cream and a vibrant array of strawberries and kiwi, creating an irresistible treat.
Ingredients
Instructions
-
Preheat your oven to 300°F (150°C). Line a baking sheet with parchment paper and draw a 9-inch circle on it as a guide.
-
In a large, clean bowl, whip the egg whites on medium speed until they form soft peaks. Gradually add the granulated sugar, one tablespoon at a time, while continuing to whip until the mixture is glossy and stiff peaks form.
-
Gently fold in the white vinegar, cornstarch, and vanilla extract using a spatula.
-
Spoon the meringue mixture onto the prepared baking sheet, spreading it into the circle and creating a slight indentation in the center to hold the filling later.
-
Bake in the preheated oven for 60 minutes. Turn off the oven and allow the pavlova to cool completely inside the oven with the door slightly ajar.
-
Whip the heavy cream and powdered sugar together until soft peaks form.
-
Once the pavlova has cooled, transfer it to a serving platter. Spread the whipped cream over the center of the pavlova.
-
Arrange the sliced strawberries and kiwis on top of the whipped cream.
-
Garnish with fresh mint leaves if desired.
-
Serve immediately and enjoy the delightful textures and flavors of your homemade pavlova.
Note
- Ensure your bowl and whisk are completely free of grease for the eggs to whip properly.
- Pavlova can be baked a day in advance. Store it in an airtight container and add toppings just before serving.
- Experiment with different fruits such as raspberries, blueberries, or passion fruit pulp for varying flavors.
- The addition of vinegar and cornstarch helps create a crispy exterior and a marshmallow-like interior.

