

The delicate interplay of floral rose water and rich cream cheese custard, laced with vibrant pistachio paste, makes Rose Pistachio Cheesecake Ice Cream a truly enchanting treat. Every spoonful carries the gentle caress of rose petals, balanced by the earthy crunch of toasted pistachios and the tangy creaminess of cheesecake-inspired custard. This ice cream doesn’t just satisfy your sweet tooth; it transports you to a cozy summer evening where dessert feels like an elegant flourish—a perfect way to end a dinner party or elevate an afternoon snack into something truly memorable.
I still remember the first time I served this at a friend’s gathering. The moment I lifted the lid, a soft fragrance of rose water wafted through the room, followed by gasps at its dreamy hue. Friends dipped their spoons in, and there were immediate “oohs” and “ahhs” at the creamy texture and delightful pistachio crunch. One friend even declared it “the love child of cheesecake and gelato”—and I couldn’t agree more. Whether you’re an ice cream purist, a cheesecake devotee, or simply someone who craves a floral twist on a classic dessert, this recipe checks all the boxes. With homemade pistachio paste, a velvety custard base, and just the right hint of rose, it’s a special-occasion scoop you’ll find yourself making again and again.
KEY INGREDIENTS IN ROSE PISTACHIO CHEESECAKE ICE CREAM
Every component in this recipe plays a crucial role in building layers of flavor and texture. From the nutty depth of pistachios to the tangy cream cheese richness and the delicate floral note of rose water, these ingredients come together to create a truly unique ice cream experience.
- Unsalted Pistachios
These nuts are toasted to heighten their natural aroma, then ground into a paste that swirls throughout the custard, delivering that signature pistachio crunch and vibrant green color.
- Whole Milk
Provides a silky base and ensures that the ice cream has just the right body—light enough to showcase the pistachio flavor yet rich enough to feel indulgent.
- Heavy Cream
Raises the fat content for a luxuriously creamy mouthfeel, mimicking the decadent texture of a cheesecake filling while keeping the churned ice cream smooth.
- Sugar
Balances the tang of the cream cheese, the floral bite of rose water, and the earthiness of pistachios, all while ensuring the frozen dessert remains scoopable rather than icy.
- Rose Water
Infuses a subtle, romantic floral note that harmonizes beautifully with the nuttiness of the pistachios—adjust to taste for a gentle or more pronounced rose accent.
- Cream Cheese
Softened and whisked into the hot custard, it adds tangy richness that echoes the essence of cheesecake, lending both flavor and structure to the custard base.
- Egg Yolks
The backbone of any custard-based ice cream, egg yolks lend stability, smooth texture, and that signature velvety finish that coats the palate.
- Vanilla Extract
Enhances all the other flavors with its warm, sweet undertone and rounds out the floral and nutty notes for a well-balanced profile.
- Lemon Zest
A pinch of citrus brightness cuts through the richness, lifting the flavors and adding a fresh dimension that keeps each scoop lively.
- Salt
A simple pinch amplifies sweetness, heightens pistachio character, and prevents the dessert from tasting one-dimensional.
- Honey (optional)
For those who love extra depth of sweetness, a touch of honey adds a floral complexity and helps keep the texture ultra-smooth.
- Crushed Pistachios (for garnish)
Sprinkled on top just before serving, they add a final layer of texture, color contrast, and nutty aroma.
- Dried Rose Petals (optional garnish)
Delicate and visually stunning, they turn each bowl into a fragrant work of art—perfect for special occasions.
HOW TO MAKE ROSE PISTACHIO CHEESECAKE ICE CREAM
Let’s turn these star ingredients into the creamiest, most aromatic cheesecake ice cream you’ve ever tasted. Follow each step carefully to build a custard base that’s thick, silky, and packed with pistachio flavor, then churn and freeze for that perfect scoopable texture.
1. Begin by toasting the pistachios: Place the shelled pistachios in a dry skillet over medium heat. Stir occasionally for 3–4 minutes until they release their nutty aroma and take on a slightly deeper hue. Transfer to a plate and let cool completely.
2. Once the nuts are cool, blend them in a food processor or blender until they form a fine grind, then continue processing into a creamy paste. This paste will be folded into your custard for an intense pistachio swirl.
3. In a medium saucepan, combine the whole milk, heavy cream, and sugar. Heat the mixture over medium heat, stirring now and then until the sugar dissolves and the liquid is hot but not simmering.
4. Meanwhile, whisk the egg yolks in a separate bowl until smooth. To temper the yolks and avoid scrambling, slowly drizzle in about half of the hot milk mixture while whisking constantly. When warmed, pour this yolk mixture back into the saucepan.
5. Return the pan to low heat and stir constantly with a wooden spoon until the custard thickens enough to coat the back of the spoon (around 5–7 minutes). Keep the temperature low—do not let it boil to ensure a silky texture.
6. Remove from heat and whisk in the softened cream cheese, rose water, vanilla extract, lemon zest, and a pinch of salt until the mixture is completely smooth and glossy.
7. Strain the custard through a fine-mesh sieve into a large mixing bowl. This will catch any tiny curdled bits and guarantee a perfectly smooth base. Let the mixture cool to room temperature.
8. Stir in the ground pistachio paste and honey (if using) until fully incorporated and the custard takes on a soft green hue dotted with specks of nutty goodness.
9. Press a piece of plastic wrap directly onto the surface of the custard to prevent a skin from forming. Refrigerate for at least 4 hours, or preferably overnight, so the flavors meld and the base chills thoroughly.
10. Pour the chilled custard into your ice cream maker and churn according to the manufacturer’s directions until it reaches a soft-serve consistency.
11. Transfer the freshly churned ice cream into a lidded container and freeze for a minimum of 4 hours, or until the texture firms up for easy scooping.
12. Just before serving, sprinkle with crushed pistachios and scatter a few dried rose petals on top for an elegant, Instagram-worthy presentation.
SERVING SUGGESTIONS FOR ROSE PISTACHIO CHEESECAKE ICE CREAM
This ice cream shines when celebrated with the right accompaniments and presentation. Whether you’re hosting a summer soirée or simply treating yourself after a long day, these serving ideas will elevate each scoop.
- Offer it in elegant glass bowls and garnish each scoop with a scattering of crushed pistachios and a few dried rose petals for a refined look and added crunch.
- Create a floral dessert plate by pairing spoonfuls of ice cream with fresh raspberries or strawberries— the tart berries complement the rich cheesecake base and highlight the rose notes.
- Assemble an ice cream sandwich by spreading the chilled ice cream between two thin almond or rose-flavored cookies. Freeze briefly for a fun handheld treat.
- Present a mini tasting trio alongside small glasses of sparkling rose lemonade or prosecco. The effervescence and citrusy zing cut through the creaminess for a balanced palate experience.
HOW TO STORE ROSE PISTACHIO CHEESECAKE ICE CREAM
Proper storage is key to preserving that velvety texture and nuanced flavor profile. Whether you plan to enjoy it over a weekend or save it for a special event, follow these tips to keep your ice cream at its best.
You’ll want to place your ice cream in a freezer-safe, airtight container to prevent freezer burn and staling. Press a piece of plastic wrap directly onto the surface before sealing the container, as this extra layer minimizes air exposure and keeps the top scoop as smooth as the first.
- Store in the coldest part of your freezer, away from the door, to maintain a consistent temperature and prevent fluctuations that can lead to iciness.
- Use heavy-duty plastic wrap beneath the lid for an additional barrier against air and moisture. This simple step ensures that every scoop stays creamy.
- Label and date your container to keep track of freshness. Ideally, consume within two weeks to enjoy the vibrant pistachio-green hue and delicate rose aroma at their peak.
- If you notice any ice crystals forming, let the container sit at room temperature for a minute before scooping. This makes it easier to serve without diluting the flavor.
CONCLUSION
This Rose Pistachio Cheesecake Ice Cream recipe is more than just a scoopable dessert—it’s a celebration of textures and scents that transforms your kitchen into a mini artisan gelateria. From toasting pistachios and crafting a silky custard to the final garnish of crushed nuts and rose petals, each step is designed to build layers of flavor that surprise and delight. You’ll love how the tang of cream cheese melds with the warm nuttiness, and how a whisper of rose water elevates every spoonful into something almost magical. I encourage you to print out this article or save it to your favorite recipe folder—having it on hand means you can revisit this floral, nutty indulgence whenever you need a sweet escape.
Below you’ll also find an FAQ section to troubleshoot any questions you might have, so you can confidently tackle techniques like tempering your eggs or adjusting the rose water intensity. And of course, if you give this recipe a whirl, please leave a comment or reach out with any feedback! I love hearing about your adaptations, troubleshooting tales, or simply how many “oohs” and “ahhs” it earns at your next gathering. Your questions, tips, or flavor twists might inspire the next version of this luscious treat—and I’m here to help you every scoop of the way.
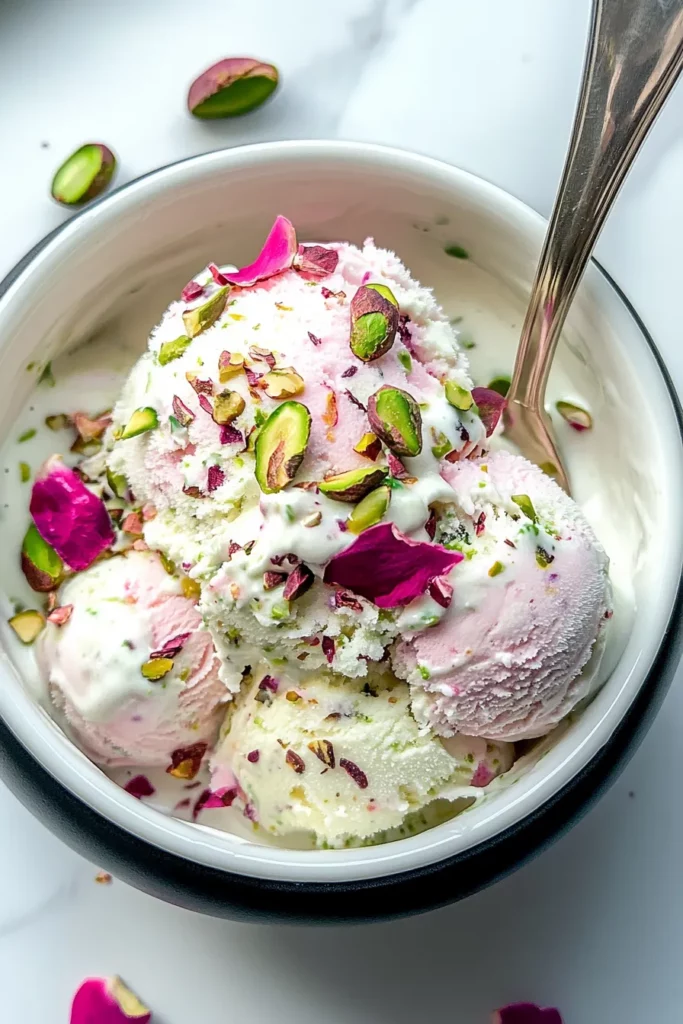

Rose Pistachio Cheesecake Ice Cream
Description
The delicate aroma of rose water mingles with rich cream cheese custard, swirled with toasted pistachio paste for a creamy, floral, nutty treat that's perfectly elegant and irresistibly smooth.
Ingredients
Instructions
-
Begin by toasting the pistachios: Place the shelled pistachios in a dry skillet over medium heat. Toast for 3-4 minutes, stirring occasionally until fragrant. Set aside to cool.
-
Once cooled, blend the pistachios in a food processor or blender until finely ground, almost like a paste. Set aside.
-
In a medium saucepan, combine the whole milk, heavy cream, and sugar. Heat over medium heat until the mixture is hot but not boiling, stirring occasionally to dissolve the sugar.
-
In a separate bowl, whisk the egg yolks until smooth. Slowly pour about half of the hot milk mixture into the egg yolks while whisking constantly, to temper the eggs. Once combined, slowly pour the egg yolk mixture back into the saucepan.
-
Cook the mixture over low heat, stirring constantly with a wooden spoon until it thickens enough to coat the back of the spoon (about 5-7 minutes). Do not let it boil.
-
Once thickened, remove the saucepan from the heat and stir in the cream cheese, rose water, vanilla extract, lemon zest, and a pinch of salt. Whisk until smooth.
-
Strain the mixture through a fine-mesh sieve into a large bowl to remove any curdled bits and ensure smoothness. Allow the mixture to cool to room temperature.
-
Once cooled, mix in the ground pistachio paste and honey (if using). Stir until the pistachio paste is fully incorporated into the custard.
-
Cover the bowl with plastic wrap, ensuring it touches the surface of the custard to prevent a skin from forming. Refrigerate for at least 4 hours, or overnight if possible, to chill.
-
Once chilled, pour the mixture into an ice cream maker and churn according to the manufacturer's instructions.
-
After churning, transfer the ice cream to a lidded container and freeze for at least 4 hours or until firm.
-
Before serving, garnish with crushed pistachios and rose petals, if desired.
Note
- The rose water adds a subtle floral note to the ice cream, but you can adjust the amount depending on your preference for floral flavor.
- Toasting the pistachios enhances their flavor, so don't skip this step!
- If you don’t have an ice cream maker, you can place the chilled mixture in a lidded container and freeze it, stirring every 30 minutes for the first 3 hours to break up any ice crystals.
- Rose petals are optional for garnish, but they provide a lovely touch of elegance if you’re serving this for special occasions.
- This ice cream has a rich and creamy texture due to the combination of cream cheese and egg yolks, similar to a custard-based ice cream.

