

When the sun dips below the horizon and the evening air carries a whisper of cool breezes, few dishes warm the soul quite like a hearty pot of Mexican Chili Con Carne. With every spoonful, you’ll taste the rich, savory embrace of ground beef mingling with vibrant bell peppers, aromatic onions, and garlic that have been lovingly sautéed in olive oil. This dish isn’t just a recipe; it’s a culinary hug that brings people together around the dinner table. Whether you’re craving a comforting meal after a long day or you’re hosting friends for a laid-back gathering, this chili delivers layers of flavor, from the subtle smokiness of paprika to the bright zing of fresh lime juice at the end. It’s a beginner-friendly recipe, so even if you’re new to the world of chili-making, you’ll feel like a seasoned chef by the time you ladle that first steaming bowl.
For those who love a good flavor explosion, this Mexican Chili Con Carne really lives up to its reputation. Ground beef, vibrant veggies, and a harmonious mix of beans simmer together in a medley of spices that includes chili powder, cumin, and oregano—creating a dish that’s as comforting as it is exciting. With a total prep time of just 15 minutes and about 40 minutes of simmering, you’ll have a cozy dinner on the table in under an hour, plus a 10-minute resting period to let all the flavors meld. At around 450 calories per serving, it’s an indulgent yet balanced meal that works perfectly for lunch or dinner. As someone who always keeps the ingredients for this chili stocked in the pantry and fridge, I can tell you it’s the kind of crowd-pleaser that transforms an ordinary weeknight into a memorable feast.
KEY INGREDIENTS IN MEXICAN CHILI CON CARNE
Before we dive into the cooking steps, let’s explore the star players that make this chili a true flavor sensation. Each ingredient contributes its own character—some build the foundation, others add depth, and a few bring that finishing flair that turns a simple dish into a crowd-favorite comfort food.
- Ground beef
Provides the hearty protein base and rich umami flavor that supports all the spices and textures in the chili.
- Onion
Adds natural sweetness and depth, softening as it sautés to create a flavorful foundation.
- Garlic
Offers aromatic intensity and a delicious bite that elevates every spoonful.
- Red bell pepper
Brings a hint of sweetness and vibrant color, balancing the deeper tones of the beef.
- Green bell pepper
Adds a mild, slightly grassy flavor and pleasing crunch when lightly cooked.
- Kidney beans
Contribute creamy texture and fiber, also absorbing the chili spices for satisfying bites.
- Black beans
Offer an earthier taste and extra protein, mingling with the kidney beans for more substance.
- Diced tomatoes
Supply acidity and juicy brightness, helping to deglaze the pot and enhance the sauce.
- Tomato paste
Intensifies the tomato flavor, lending thickness and a touch of sweetness to the chili base.
- Beef broth
Helps create a luscious, well-rounded sauce that coats every ingredient with savory goodness.
- Olive oil
Used for sautéing, it carries the flavors of the aromatics and prevents sticking.
- Chili powder
The signature spice blend that provides warmth and classic chili flavor.
- Cumin
Adds an earthy, slightly nutty note that’s essential in Mexican-style dishes.
- Smoked paprika
Infuses a subtle smokiness that deepens the savory profile of the chili.
- Oregano
Offers herbal undertones that round out the spice blend gracefully.
- Ground cayenne pepper
(Optional) Gives an extra kick of heat for those who love spicy dishes.
- Salt
Balances flavors and helps all ingredients shine.
- Black pepper
Provides a gentle heat and enhances the overall spiciness.
- Fresh lime juice
Brightens the chili at the end, cutting through richness and adding a citrusy lift.
- Fresh cilantro
(For garnish) Delivers a burst of green freshness and herbal aroma.
- Shredded cheddar cheese
(Optional) Melts on top for a creamy, tangy finish.
- Sour cream
(Optional) Adds a cool, tangy contrast to the warm, spicy chili.
HOW TO MAKE MEXICAN CHILI CON CARNE
Bringing together these ingredients is easier than you might think. With simple steps and a single pot—whether it’s a sturdy Dutch oven or a heavy-bottomed saucepan—you’ll transform raw ingredients into a soul-soothing meal. Here’s how to turn spices, veggies, and beans into a delicious pot of chili that’s ready to share.
1. In a large pot or Dutch oven, heat the olive oil over medium heat. Add the chopped onion and minced garlic, and sauté for about 3–4 minutes until the onion is softened and the garlic becomes fragrant, releasing its aromatic oils.
2. Add the ground beef to the pot. Break it up with a wooden spoon or spatula and cook until the meat is browned and cooked through, about 5–7 minutes. If there’s excess fat, carefully drain it from the pot to keep the chili from becoming greasy.
3. Stir in the diced red and green bell peppers and cook for an additional 2–3 minutes, just until they begin to soften and show their bright colors.
4. Sprinkle in the chili powder, cumin, smoked paprika, oregano, cayenne pepper (if using), salt, and black pepper. Stir well so the spices evenly coat the meat and vegetables. Cook for about 1 minute more, allowing the dry spices to toast and release their full flavor.
5. Pour in the diced tomatoes, tomato paste, and beef broth. Stir to combine thoroughly, scraping any browned bits from the bottom of the pot. Increase heat slightly until the mixture comes to a simmer.
6. Add the kidney beans and black beans. Give everything a good stir, then reduce heat to low. Let the chili simmer uncovered for 30–40 minutes, stirring occasionally, until the sauce thickens and the flavors marry.
7. Once the chili has thickened and the flavors have deepened, remove the pot from heat and stir in the fresh lime juice for a burst of brightness.
8. Serve the chili hot, garnished with fresh cilantro, a dollop of sour cream, and a sprinkle of shredded cheddar cheese if desired.
SERVING SUGGESTIONS FOR MEXICAN CHILI CON CARNE
Elevating your Mexican Chili Con Carne from delicious to unforgettable often comes down to how you present and pair it. Whether you’re dishing it out for a casual family night or a festive gathering with friends, these ideas will help you showcase each spoonful’s rich flavors. Think about colors on the plate, textures alongside the chili, and complementary tastes that bring out the best in every ingredient. With a few simple touches, you can turn a bowl of chili into a feast that feels both special and comforting—perfect for lunch or dinner, any time you need a little cozy satisfaction.
- Serve with warm tortilla chips for dipping, letting guests scoop up every last bit of chili and delight in the crunchy-soft contrast.
- Spoon over fluffy white rice or cilantro-lime rice to soak up the sauce, turning each mouthful into a satisfying combination of textures.
- Accompany with fresh cornbread—either honey-drizzled or jalapeño-studded—for a slightly sweet and spicy side that complements the chili’s robust spices.
- Top each bowl with avocado slices, additional fresh cilantro, and a squeeze of lime for vibrant color, creamy richness, and a hint of tang.
HOW TO STORE MEXICAN CHILI CON CARNE
One of the best things about making a big pot of chili is that it keeps beautifully. In fact, chili often tastes even more flavorful the next day as all the spices and juices continue to meld. If you’re meal-prepping, planning for leftovers, or just want to save time on future busy evenings, proper storage will ensure your chili stays fresh, safe, and delicious.
- Refrigerate in an airtight container once it has cooled to room temperature. Kept in the fridge, your chili will stay fresh for up to four days—just reheat gently on the stove or in the microwave.
- Freeze in portion-sized containers or heavy-duty freezer bags after the chili cools completely. Label each container with the date, and store for up to three months. Thaw overnight in the refrigerator before reheating.
- To reheat, warm the chili over low to medium heat on the stove, stirring occasionally. You can add a splash of beef broth or water if it’s too thick, restoring that perfect saucy consistency.
- For a convenient grab-and-go lunch, fill mason jars with chilled chili and freeze. When you need a quick meal, just thaw, reheat, and enjoy straight from the jar.
CONCLUSION
After walking through every step—from browning the ground beef in that first swirl of olive oil, to tasting the final squeeze of lime juice—you’ve got a powerful, comforting dish that’s as easy to make as it is delicious. Mexican Chili Con Carne brings together sweet bell peppers, hearty beans, and a blend of spices that sings with every bite. This recipe is beginner-friendly but yields results that are sure to impress family and friends. You’ve learned how to layer flavors, manage texture, and create a meal that’s perfect for lunch or dinner, all while keeping things efficient: 15 minutes of prep, 40 minutes of cooking, and just a 10-minute rest before serving. With roughly 450 calories per serving and options to garnish with cheddar cheese or sour cream, you can customize each bowl to suit your cravings.
Feel free to print this article or save it in your recipe collection for those cozy evenings when you crave something warm, hearty, and full of flavor. Below you’ll find a handy FAQ section to address any questions you might have about substitutions, spice levels, or storage tips. If you decide to try this recipe, I’d love to hear how it turned out—leave a comment, share your tweaks, or ask any questions if you need a hand. Your feedback and stories bring this recipe to life, and I can’t wait to see how you make this Mexican Chili Con Carne your own. Happy cooking!
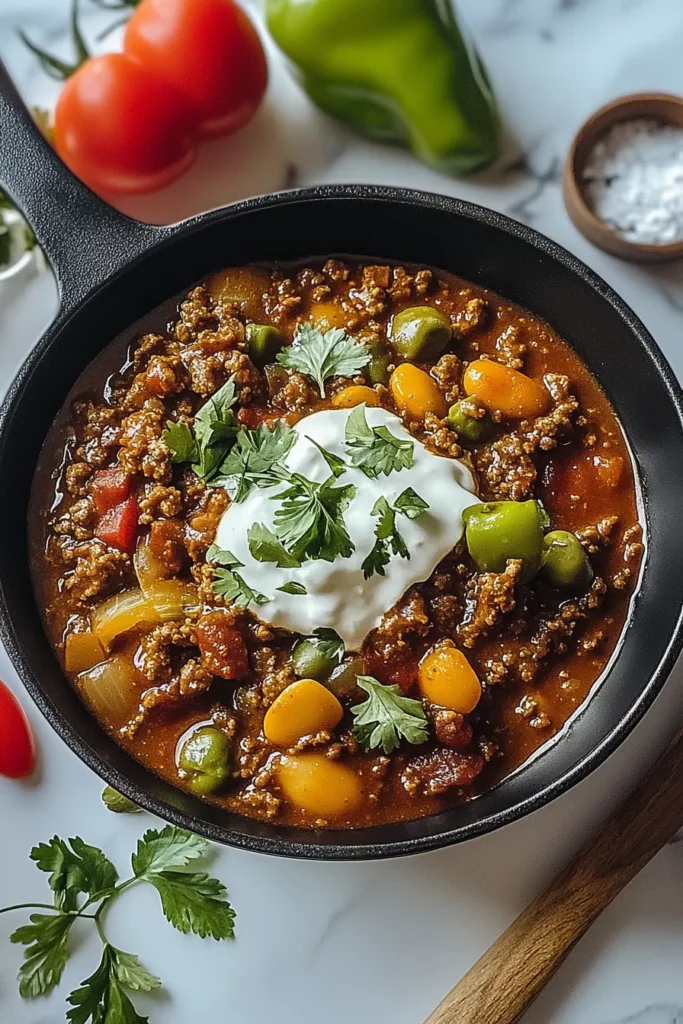

Mexican Chili Con Carne
Description
This Mexican Chili Con Carne is a flavor explosion! Ground beef, vibrant veggies, and a mix of beans simmer together in rich spices, making a perfect dish for sharing or cozy nights in.
Ingredients
Instructions
-
In a large pot or Dutch oven, heat olive oil over medium heat. Add the chopped onion and minced garlic, and sauté for about 3-4 minutes until softened and fragrant.
-
Add the ground beef to the pot and cook, breaking it up with a spoon, until browned and cooked through, about 5-7 minutes. Drain any excess fat if needed.
-
Stir in the diced red and green bell peppers and cook for an additional 2-3 minutes until softened.
-
Add the chili powder, cumin, smoked paprika, oregano, cayenne pepper (if using), salt, and black pepper. Stir to coat the meat and vegetables evenly with the spices and cook for another minute until fragrant.
-
Pour in the diced tomatoes, tomato paste, and beef broth. Stir to combine all the ingredients and bring to a simmer.
-
Add the kidney beans and black beans, and stir to incorporate. Let the chili simmer on low heat, uncovered, for 30-40 minutes, stirring occasionally. The flavors will meld together and the chili will thicken.
-
Once the chili has thickened and the flavors have developed, add the lime juice and stir well.
-
Serve the chili hot, garnished with fresh cilantro, a dollop of sour cream, and a sprinkle of shredded cheddar cheese if desired.
Note
- For a richer flavor, you can substitute ground beef with ground pork or a combination of beef and pork.
- If you prefer a spicier chili, add extra cayenne pepper or even some diced jalapenos while cooking the onions and garlic.
- This chili can be made ahead of time and actually tastes even better the next day as the flavors continue to develop.
- Serve the chili with tortilla chips, cornbread, or over a bed of rice for a hearty meal.

