

As soon’t you dive into a slice of these Rhubarb Dream Bars, your taste buds will be greeted by a delightful symphony of tangy and sweet notes that dance together in perfect harmony. The buttery, melt-in-your-mouth crust provides a tender foundation, while the jewel-toned rhubarb filling offers that signature bright pop of flavor. As home cooks, we all know the thrill of turning simple ingredients into something extraordinary, and these bars are no exception. Whether you’re firing up the oven on a lazy Sunday afternoon or looking for a crowd-pleasing dessert for your next potluck, these bars bring a touch of elegance and nostalgia to every occasion.
From the very first stir of sugar and eggs to the moment that golden top emerges from the oven, this recipe feels like a warm hug in your kitchen. Even if you’re a complete beginner—this is a friendly, approachable recipe with just a handful of steps and easy-to-find ingredients. With a quick 15 minutes of prep, 45 minutes of baking, and a brief 10-minute rest, you’ll have a tray of sensational bars that slice neatly into 12 generous servings (about 200 calories each). So roll up your sleeves, grab your favorite mixing bowl, and let’s embark on a baking adventure that celebrates fresh rhubarb in the most dreamy way possible.
KEY INGREDIENTS IN RHUBARB DREAM BARS
Every great dessert starts with the right ingredients. In these Rhubarb Dream Bars, each component plays a starring role, coming together to create layers of flavor and texture that are hard to resist.
- All-purpose flour
This versatile pantry staple forms both the crisp, golden crust and lends structure to the creamy filling. The initial cup of flour is cut into cold butter to create those irresistible crumbs, while the extra splash in the filling helps it set beautifully without becoming rubbery.
- Confectioners’ sugar
Finely powdered sugar adds a delicate sweetness and ensures the crust remains tender, rather than gritty. Its silky texture binds effortlessly with flour and butter, resulting in that signature shortbread-style base.
- Cold butter
Chilled and cubed, butter is the magic behind a flaky, meltaway crust. Cutting it in with flour creates little pockets of fat that bake into the crumbly texture we all adore.
- Large eggs
Eggs bring richness, moisture, and a gentle lift to the filling. They’re whisked with granulated sugar until slightly thickened, laying the foundation for a smooth, custard-like layer.
- Granulated sugar
Providing the primary sweetness, granulated sugar balances the tartness of rhubarb and helps thicken the egg mixture when whisked together.
- Baking powder
A small dash of this leavening agent gives the filling a light, tender lift so it doesn’t fall flat or become too dense.
- Salt
Just a pinch sharpens the flavors, accentuating both the sweetness in the crust and the zing in the rhubarb filling.
- Fresh rhubarb
The star of the show, fresh rhubarb brings its unique tang and vibrant color. Chopped into bite-size pieces, it distributes evenly throughout the bars and brightens every forkful.
HOW TO MAKE RHUBARB DREAM BARS
With these simple steps, you’ll transform basic ingredients into a sensational dessert that’s equal parts sweet and tart. Let’s dive into the process:
1. Preheat your oven to 350°F (175°C) and grease a 9×13-inch baking dish thoroughly—this ensures easy removal and clean edges for each bar.
2. In a medium bowl, combine the flour and confectioners’ sugar. Use a pastry cutter or two forks to cut in the cold butter, working quickly until the mixture resembles coarse crumbs studded with pea-sized pieces of butter.
3. Press the crumb mixture evenly into the bottom of your prepared dish, using the back of a spoon or your fingertips to form a smooth, compact crust.
4. Bake the crust for 10–12 minutes, or until it turns a light golden hue. Remove from the oven and let it cool slightly so the filling doesn’t slide off.
5. In a separate large bowl, whisk together the eggs and granulated sugar until pale and slightly thickened—this aerates the mixture for a tender finish.
6. Add the remaining flour, baking powder, and salt to the egg mixture, and stir gently until perfectly smooth.
7. Fold in the chopped fresh rhubarb, ensuring each piece is coated and evenly distributed.
8. Pour the rhubarb filling over your pre-baked crust, spreading it into an even layer with a spatula.
9. Return the dish to the oven and bake for 30–35 minutes, or until the top is set with a faint golden blush.
10. Allow the bars to cool completely in the baking dish—this resting time helps them firm up for neat slicing.
11. Once cooled, cut into 12 squares and serve these dreamy bars at your next gathering!
SERVING SUGGESTIONS FOR RHUBARB DREAM BARS
Serving these bars is just as fun as baking them—you can elevate the presentation and flavors with a few simple touches. Whether you’re hosting a backyard BBQ or indulging in a cozy dessert at home, here are some creative ways to delight your taste buds and impress your guests:
- Serve slightly warm with a generous scoop of vanilla ice cream, allowing the cold cream to meld into the tangy rhubarb filling and soften the buttery crust.
- Dust the tops with a fine veil of powdered sugar using a small sifter for an elegant, snow-kissed finish that highlights the rosy hue of the rhubarb.
- Add a dollop of whipped cream flavored with a hint of vanilla or lemon zest, piping it on with a pastry bag to create pretty swirls that contrast beautifully with the bars’ rustic edges.
- Pair each slice with a steaming cup of herbal tea (like chamomile or mint) or a robust coffee, balancing the bars’ sweet-tart flavor and making every bite feel like a sophisticated café treat.
HOW TO STORE RHUBARB DREAM BARS
Keeping your Rhubarb Dream Bars fresh and flavorful is easy when you follow a few simple storage tips. Proper storage preserves that tender crust and bright filling, ensuring you can enjoy these sweet treats throughout the week:
- Store at room temperature for up to 24 hours by covering the baking dish tightly with plastic wrap or transferring the bars to an airtight container. This short-term method keeps the crust crisp and the filling tender.
- For longer freshness, refrigerate in an airtight container for up to 5 days. Chilling helps the bars set fully and enhances the tangy notes of the rhubarb—but be sure to bring them back to room temperature before serving for optimal texture.
- To enjoy later, freeze individual slices on a parchment-lined tray until firm, then wrap each piece in plastic wrap and place in a freezer-safe bag. They’ll keep beautifully for up to 2 months; thaw in the fridge before reheating.
- Reheat refrigerated or thawed bars in a 300°F oven for 5–8 minutes to revive the crispness of the crust and warm the filling—just enough to take the chill off without drying them out.
CONCLUSION
What began as a simple craving for something sweet and tangy has turned into a recipe you can rely on for unforgettable Rhubarb Dream Bars every time. We’ve walked through the beautiful marriage of a melt-in-your-mouth crust and that vibrant rhubarb custard, highlighted every key pantry staple and fresh stalk that brings these bars to life, and broken down the process into beginner-friendly steps. From preheating your oven and greasing the pan to mastering the perfect folding technique, you now have all the tools and tips to bake with confidence. With just 15 minutes of prep and 45 minutes of baking, you’ll be slicing into 12 servings of pure summer bliss. Don’t forget the fun part—dusting, dolloping, and pairing them with your favorite ice cream or tea to create a truly memorable presentation. Feel free to print this guide and tuck it into your recipe binder or save it for your next seasonal cooking adventure. Below you’ll also find a handy FAQ section to tackle any questions you might have.
Now it’s your turn: I’d love to hear how your Rhubarb Dream Bars turned out! Did you add a special twist, like vanilla in the filling or a dash of cinnamon on top? Drop your comments, questions, or feedback below—whether you need help with a tricky step or simply want to share a photo of your gorgeous bars, I’m here to cheer you on. Let’s keep the conversation going and make every baking journey as joyful and delicious as these dreamy bars deserve to be!
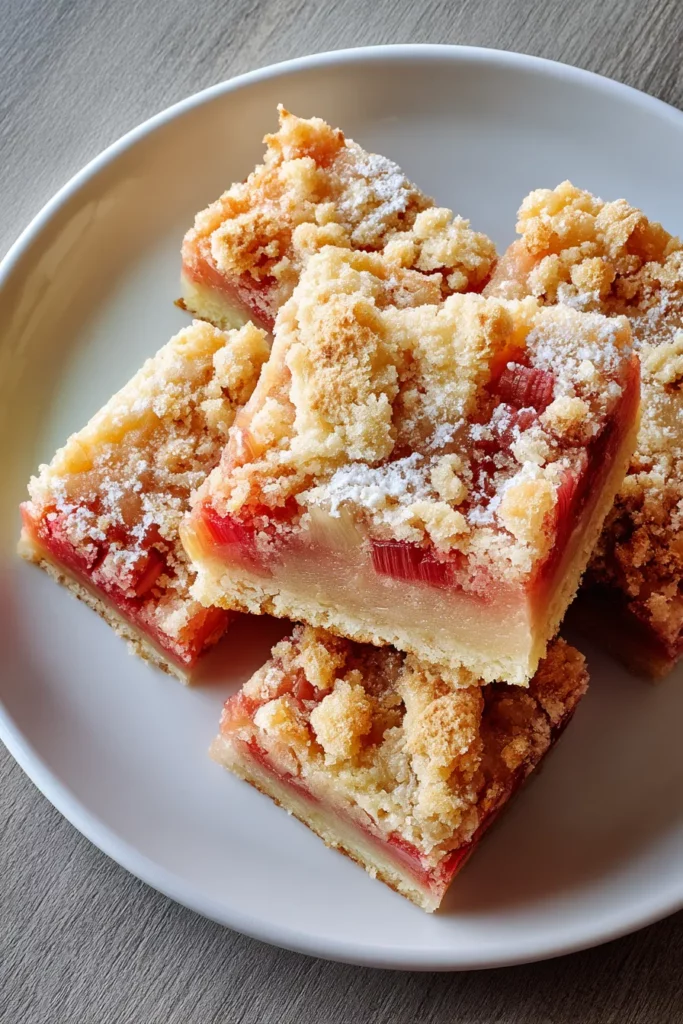

Rhubarb Dream Bars
Description
Experience the perfect blend of tangy rhubarb and a buttery crust in these dreamy bars. They're a fantastic treat for any occasion and sure to impress your guests!
Ingredients
Instructions
-
Preheat your oven to 350°F (175°C) and grease a 9x13-inch baking dish.
-
In a medium bowl, combine 1 cup of flour and confectioners' sugar. Cut in the cold butter using a pastry cutter or two forks, until the mixture resembles coarse crumbs.
-
Press the crumb mixture evenly into the bottom of the prepared baking dish to form the crust.
-
Bake the crust in the preheated oven for 10-12 minutes, or until lightly golden. Remove from the oven and set aside to cool slightly.
-
In a separate large bowl, whisk together the eggs and granulated sugar until well combined and slightly thickened.
-
Add the remaining 1/4 cup of flour, baking powder, and salt to the egg mixture, and stir until smooth.
-
Gently fold in the chopped rhubarb, ensuring the pieces are evenly distributed.
-
Pour the rhubarb mixture over the pre-baked crust, spreading it evenly.
-
Return the dish to the oven and bake for 30-35 minutes, or until the top is set and lightly golden.
-
Allow the bars to cool completely in the baking dish before cutting into squares.
-
Serve the Rhubarb Dream Bars as a delightful dessert or sweet treat at gatherings.
Note
- Rhubarb can be replaced with other tart fruits like raspberries or mixed berries if desired.
- For a richer flavor, add a teaspoon of vanilla extract to the egg mixture.
- Serve with a dollop of whipped cream or a scoop of vanilla ice cream for an indulgent treat.
- These bars can be stored in an airtight container in the refrigerator for up to 5 days.

