

There’s something downright irresistible about a little handheld dessert that packs in layers of flavor, and these Mini Banana Pudding Cheesecakes do exactly that! Each bite is a delicious blend of tangy cream cheese, sweet ripe banana, and the nostalgic crunch of vanilla wafers. Whether you’re looking for a quick snack to cure your late-afternoon sweet tooth or planning a dessert table that wows your guests, these miniature cheesecakes deliver. You’ll love how simple they are to whip up—just 15 minutes of prep, a quick 20-minute bake, and a two-hour chill in the fridge turns basic ingredients into an elegant bite-sized treat. As a self-professed banana pudding fanatic, I can’t help but get excited about how the banana flavor infuses every creamy morsel. And remember, this recipe is ideal for beginner bakers: no fancy techniques, just straightforward steps that yield café-worthy results.
Beyond the convenience, there’s a storytelling element baked into every little cheesecake. I still smile remembering my first batch, when I nervously pressed vanilla wafer crumbs into the muffin tin, only to realize I’d forgotten to soften my cream cheese. A frantic microwave rescue later, I discovered that chatting with friends while beating that cream cheese and sugar mixture made the process fly by—and the laughter somehow made those cheesecakes taste even better. These delightful morsels are the perfect canvas for your own kitchen tales. From afternoon tea to weekend potlucks, they’re guaranteed to spark compliments and curious questions: “How did you get that banana flavor so balanced?” And trust me, once you see friends and family devouring them, you’ll be plotting your next bake before they’ve even finished their first cheesecake.
KEY INGREDIENTS IN MINI BANANA PUDDING CHEESECAKES
Before we dive into the magic of mixing and baking, let’s take a look at the stars of the show. Each ingredient plays a crucial role in creating the delicate balance of flavors and textures that make these mini cheesecakes so irresistible.
- Vanilla wafer crumbs
These golden crumbs form a crisp, buttery foundation that contrasts beautifully with the creamy filling. They capture the essence of classic banana pudding and provide a nostalgic crunch in every bite.
- Unsalted butter
Melted and mixed into the wafer crumbs, butter binds the crust together and adds a rich, velvety mouthfeel without overwhelming the banana flavors.
- Cream cheese
Softened for smooth blending, cream cheese is the heart of the cheesecake filling. Its tangy richness complements the sweetness of the bananas and sugar, creating that signature cheesecake tang.
- Granulated sugar
Sweetens the creamy base, cutting through the tang of the cream cheese and balancing the ripe banana’s natural sugars for a perfectly harmonious filling.
- Vanilla extract
A splash of pure vanilla enhances the overall flavor profile, tying together the sweetness and adding a warm, fragrant note.
- Egg
Provides structure and stability, helping the cheesecake set without turning dense. It also enriches the batter for a custard-like consistency.
- Sour cream
Adds smoothness and a subtle tang, contributing to a soft, creamy texture that distinguishes these cheesecakes from firmer varieties.
- Ripe banana
Mashed banana infuses every bite with fruity sweetness and helps keep the filling moist. The riper the banana, the more pronounced the flavor.
- Whipped topping
A light, airy finish that brightens each mini cheesecake with a cloud-like dollop, adding visual appeal and contrast.
- Banana slices
Fresh garnish that reinforces the banana pudding theme, adding a juicy burst of freshness and vibrant color.
- Mini vanilla wafers
A playful accent to crown each cheesecake, bringing extra crunch and a whimsical touch to your dessert presentation.
HOW TO MAKE MINI BANANA PUDDING CHEESECAKES
Let’s roll up our sleeves and transform those key ingredients into delightful mini desserts. Follow these detailed steps to ensure each cheesecake comes out perfectly creamy, flavorful, and picture-worthy.
1. Preheat your oven to 325°F (162°C) and line a 12-cup muffin tin with paper liners to ensure easy removal and a clean presentation.
2. In a small bowl, combine the vanilla wafer crumbs and melted butter. Stir until the crumbs are evenly coated, creating a uniform sandy texture that will press into a sturdy crust.
3. Divide the crumb mixture evenly among the muffin cups, then press down firmly with the back of a spoon or your fingers to form a solid crust layer at the bottom of each cup.
4. In a large mixing bowl, beat the softened cream cheese and granulated sugar using an electric mixer on medium speed. Continue until the mixture is completely smooth and creamy, scraping down the sides as needed.
5. Add the vanilla extract, egg, and sour cream to the cream cheese mixture. Beat again on low speed until all ingredients are fully incorporated and the batter is silky.
6. Use a spatula to gently fold in the mashed banana, ensuring you don’t overmix but that the banana is evenly distributed throughout the batter.
7. Spoon the banana-cream cheese mixture over each crust, filling the cups nearly to the top for a generous, domed finish.
8. Bake the cheesecakes for 18–20 minutes, or until the centers are just set and slightly jiggly—overbaking can lead to cracks.
9. Allow the cheesecakes to cool in the tin for about 10 minutes. Then, transfer them carefully to a wire rack to cool completely to room temperature.
10. Once cooled, top each mini cheesecake with a dollop of whipped topping, swirling it gently for a decorative flourish.
11. Garnish each cheesecake with a banana slice and a mini vanilla wafer, pressing gently so they adhere to the topping.
12. For the best texture and flavor, chill the cheesecakes in the refrigerator for at least 2 hours before serving, allowing the flavors to meld and the filling to firm up.
SERVING SUGGESTIONS FOR MINI BANANA PUDDING CHEESECAKES
When it comes to serving these bite-sized delights, presentation and pairing choices can elevate the experience from simple snack to show-stopping dessert. Whether you’re hosting an afternoon tea, celebrating a birthday, or simply indulging your cravings, these suggestions will make sure your mini cheesecakes shine.
- Serve on a mirrored tray with alternating banana slices and mint sprigs for a pop of color. The reflective surface highlights the glossy whipped topping and golden wafers, creating a visually stunning dessert display.
- Pair with a light fruit salad featuring berries and kiwi. The tartness of fresh fruit balances the richness of the cheesecakes, offering guests a palate-cleansing contrast between bites.
- Arrange them on individual mini dessert plates, each adorned with a drizzle of caramel or chocolate sauce. Use a small squeeze bottle for precision and create artistic swirls around the plate for that upscale bakery feel.
- Offer alongside iced coffee or a tropical smoothie. The creamy texture of the cheesecake complements cold beverages perfectly, making for a refreshing summer treat or an afternoon pick-me-up.
HOW TO STORE MINI BANANA PUDDING CHEESECAKES
Proper storage ensures your cheesecakes remain as fresh and creamy as the moment you pulled them from the oven. Follow these tips to maintain flavor, texture, and visual appeal, whether you’re saving leftovers or prepping ahead for a big event.
- Refrigerate in an airtight container to prevent moisture loss and protect against other fridge odors. Layer cheesecakes with parchment paper between tiers if stacking is necessary.
- Store in the coldest part of your refrigerator, typically the back, where temperatures stay consistent. Avoid the door compartments, which experience greater temperature fluctuations.
- For longer storage (up to 3 days), tightly wrap each cheesecake in plastic wrap before placing it in a container. This double barrier helps lock in moisture and preserves the gooey banana-cream texture.
- If you need to freeze these mini cheesecakes for up to a month, freeze them on a baking sheet until solid, then transfer to a freezer-safe bag or container. Thaw overnight in the refrigerator and add fresh whipped topping just before serving.
CONCLUSION
I hope this deep dive into Mini Banana Pudding Cheesecakes has you feeling excited to don your apron and start baking! From their crunchy vanilla wafer crusts to the creamy, banana-infused centers, every element is designed to delight both your taste buds and your guests. These little cheesecake bites are perfect for beginner bakers who want to impress without stress—they’re simple, straightforward, and endlessly customizable with fresh fruit, sauces, or even a sprinkle of cinnamon on top. With a mere 15 minutes of prep, 20 minutes in the oven, and a 2-hour chill, you’ll be rewarded with 12 charming mini cheesecakes that cost only about 180 calories each to enjoy.
Feel free to print this article and tuck it into your recipe binder or save it on your device for those moments when you need a quick dessert solution. You can also find a FAQ below to answer any lingering questions about ingredient swaps or troubleshooting tips. I’d love to hear your thoughts: did the crust come out perfectly crisp? Did the banana flavor shine through? Leave a comment, ask any questions, or share your feedback if you give this recipe a try. Happy baking, and may your kitchen always smell of sweet vanilla and ripe bananas!
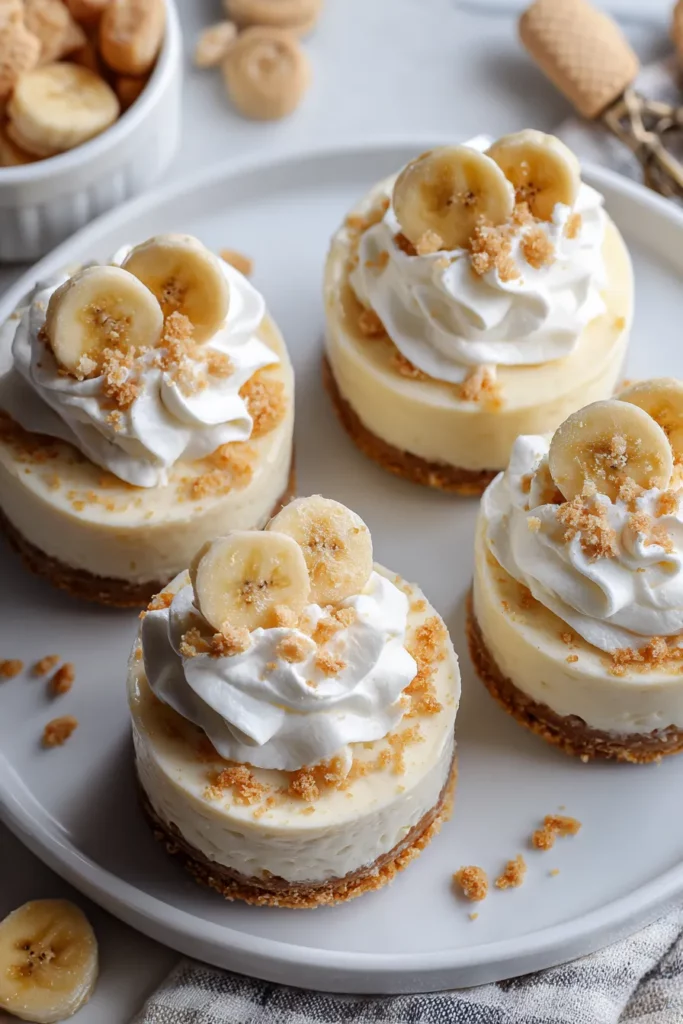

Mini Banana Pudding Cheesecakes
Description
These mini banana pudding cheesecakes blend rich cream cheese and ripe bananas into a delightful bite-sized treat. Perfectly topped with whipped cream and a vanilla wafer, they're a crowd favorite for any gathering.
Ingredients
Instructions
-
Preheat your oven to 325°F (162°C). Line a 12-cup muffin tin with paper liners.
-
In a small bowl, combine the vanilla wafer crumbs and melted butter. Mix until the crumbs are evenly coated.
-
Divide the crumb mixture evenly among the muffin cups, pressing down firmly to create a crust layer at the bottom of each cup.
-
In a large mixing bowl, beat the softened cream cheese and granulated sugar together until smooth and creamy.
-
Add the vanilla extract, egg, and sour cream to the cream cheese mixture. Beat until completely combined and smooth.
-
Fold in the mashed banana using a spatula, ensuring it's evenly distributed throughout the batter.
-
Spoon the cream cheese mixture over the crusts, filling each cup nearly to the top.
-
Bake in the preheated oven for 18-20 minutes or until the centers are set.
-
Allow the cheesecakes to cool in the pan for about 10 minutes, then transfer them to a wire rack to cool completely.
-
Once cooled, top each mini cheesecake with a dollop of whipped topping.
-
Garnish each with a banana slice and a mini vanilla wafer.
-
Chill in the refrigerator for at least 2 hours before serving for best results.
Note
- Ensure the cream cheese is room temperature for the smoothest filling.
- These cheesecakes taste even better the next day once they've had time to set.
- You can substitute Greek yogurt for sour cream if desired.
- Use ripe bananas for the best flavor in the cheesecake batter.
- Perfect for parties, these mini cheesecakes are always a crowd-pleaser.

