

Nothing kicks off a Halloween gathering quite like a platter of spooky and fun mini pizzas that double as edible decorations. These bite-sized wonders bring together the simplicity of a beginner-friendly recipe with the creative spark of little ghouls and boys decorating their own eerie faces. With a preparation time of just 15 minutes, a quick 12-minute stint in the oven, and a cool-down period of 5 minutes, you’ll be serving up these festive treats faster than you can say “trick or treat.” Each mini pizza clocks in at around 250 calories, making them a perfectly portioned appetizer, lunch, or casual dinner for holiday revelers of any age. Bursting with gooey mozzarella, cheddar for extra flair, and vibrant red bell pepper “scars,” these tiny pizzas are as delightful to craft as they are to devour.
One of my favorite childhood memories revolves around crafting these very mini pizzas in my grandma’s cozy kitchen. I still recall the thrill of picking out pepperoni “eyes,” black olive “stitches,” and strips of red pepper for demonic grins. The scent of bubbling cheese mingled with a hint of olive oil as it gently crisped the English muffin bases. As soon as the timer dinged, we’d gather around the oven, our faces painted and our excitement through the roof. That tradition has carried on every October, and now it’s my turn to pass the torch (and the pizza cutters) to my nieces and nephews. Whether you choose ghost-shaped pepperoni or spider-themed olives, these mini canvases invite imagination in every bite.
KEY INGREDIENTS IN HALLOWEEN MINI PIZZAS
Before diving into the fun of decorating, let’s talk about the core ingredients that make these Halloween mini pizzas so irresistible. Each component plays a vital role in delivering that perfect balance of crisp crust, tangy sauce, molten cheese, and spooky toppings. Feel free to adapt quantities to suit your crew, and don’t hesitate to experiment with seasonal or themed variations.
- Mini pizza crusts or English muffins
These form the sturdy, handheld base for your culinary masterpieces. Mini crusts provide a true pizza-like texture, while English muffins offer a charmingly nubby surface that crisps beautifully and holds toppings in place.
- Pizza sauce
The bright, tomato-rich layer that adds both moisture and a savory zip to every mini pie. A good-quality pizza sauce can be seasoned with garlic and herbs or swapped for a spicier version if you’re after an extra kick.
- Mozzarella cheese
Known for its exceptional meltability, mozzarella blankets each mini pizza in gooey, stringy delight. It’s the go-to cheese for achieving that classic pizza pull and golden, bubbly finish.
- Pepperoni
The quintessential pizza topping, sliced to form eerie eyes, grinning mouths, or jagged fangs. Its salty richness contrasts beautifully with the sweetness of the sauce and peppers.
- Black olives
Sliced rounds that double as haunting eye sockets or stitched-up scars. Their slightly briny flavor gives a bold accent that stands up to melted cheese and savory meats.
- Red bell pepper
Thin strips of bright red pepper add a pop of color and crisp texture. They’re ideal for crafting spider legs, jagged mouths, or horror-movie scars.
- Cheddar cheese
Shredded cheddar brings a sharp, tangy note and a vibrant orange hue. Use it sparingly to mimic hair, flames, or additional facial features.
- Olive oil
A light brush of olive oil ensures the crust edges turn golden-brown and prevents the muffin or dough from drying out during baking.
- Optional toppings
Mushrooms, jalapeños, or any creative add-ons invite you to customize each devilish design. Feel free to include ghost-shaped peppers, spider-web drizzles of ranch, or mini candy eyes for extra flair.
HOW TO MAKE HALLOWEEN MINI PIZZAS
Let’s dive into the simple yet thrilling process of assembling these bite-sized Halloween creations. You’ll find that each step is crafted to maximize both flavor and festive fun, whether you’re hosting a party or enjoying a cozy night in with family.
1. Preheat your oven to 375°F (190°C). Ensuring the oven is fully heated before baking helps the cheeses melt evenly and the crust develop that perfect golden-brown edge.
2. Arrange the mini pizza crusts or English muffin halves on a baking sheet lined with parchment paper or a light sprinkle of cornmeal for easy removal and a crisp finish.
3. Lightly brush the tops of the crusts with olive oil. This step prevents any dryness, adds a luscious sheen, and promotes browning on the edges.
4. Spread a tablespoon of pizza sauce over each mini crust, creating a smooth, even layer. Take your time to cover the surface without letting the sauce drip over the sides.
5. Sprinkle a generous amount of shredded mozzarella cheese evenly on top of the sauce. Aim for full coverage but leave a tiny border around the edge for a true pizza feel.
6. Create a fun Halloween theme by arranging pepperoni, black olives, and bell pepper strips to form faces. Use olives as wide, staring eyes and bell pepper strips for jagged mouths, scars, or spider legs—let your creativity run wild.
7. For added spookiness, add some shredded cheddar cheese to mimic hair, ghostly beards, or glowing eyes. The contrast between white mozzarella and orange cheddar enhances the eerie effect.
8. Place the baking sheet in the preheated oven and bake for 10–12 minutes, or until the cheese is fully melted, bubbly, and just starting to brown.
9. Remove from the oven and let the mini pizzas cool on the baking sheet for a few minutes. This resting period helps the cheese set slightly, making them easier to pick up and enjoy.
SERVING SUGGESTIONS FOR HALLOWEEN MINI PIZZAS
After you’ve crafted these adorable little monsters, it’s time to think about presentation. A thoughtful setup can elevate your Halloween gathering from festive to frightfully fabulous. Whether you’re hosting a children’s costume party or a family movie night, these serving ideas will keep everyone coming back for seconds.
- Themed platter display
Arrange your mini pizzas on a large, dark-colored serving tray, then scatter plastic spiders, skeleton hands, and candy corn around the edges. The contrast of the bright toppings against a black backdrop makes every face pop.
- Individual serving boards
Serve each guest their own wooden board, complete with a small ramekin of extra pizza sauce or ranch for dipping. This personalized touch delights kids and adults alike, giving each person their own canvas to devour.
- Mini cauldrons and bread bowls
Place a handful of mini pizzas inside small plastic cauldrons or hollowed-out bread bowls. The effect feels playful and interactive, as guests reach in and fish out their favorite creepy creations.
- Halloween charcuterie mash-up
Mix your mini pizzas with an assortment of spooky charcuterie items like ghost-shaped cheese slices, olive-stuffed peppers, and mozzarella sticks labeled as “bone sticks.” The combination keeps flavor profiles varied and taps into the current charcuterie-trend frenzy.
HOW TO STORE HALLOWEEN MINI PIZZAS
Keeping these cheesy delights fresh and tasty for later snacking or parties is straightforward if you follow a few key principles. Proper storage ensures that your mini pizzas maintain their crisp edges and flavorful toppings without growing soggy or stale.
To store leftover mini pizzas, allow them to cool completely on a wire rack before packaging. This prevents condensation from making the crusts soggy. Once cooled, choose one of the following methods:
- Airtight container in the refrigerator
Layer the mini pizzas between sheets of parchment or wax paper in a sealed container. They’ll stay fresh for up to 3 days, with the paper preventing any cheese-to-cheese sticking.
- Freezer-safe bag for longer storage
Freeze the cooled mini pizzas in a heavy-duty plastic bag or resealable freezer pouch. Press out excess air before sealing, then store for up to 2 months. Thaw in the refrigerator before reheating.
- Reheating for optimal texture
To re-crisp the crust, place the pizzas directly on a baking sheet in a 350°F (175°C) oven for about 5–7 minutes. Alternatively, use a toaster oven for a quick 3–5 minute refresh.
- Avoid microwave storage
While microwaving is tempting, it can turn your crusts chewy and toppings rubbery. Stick to oven-based reheating or a hot skillet to retain that fresh-from-the-oven appeal.
CONCLUSION
These Halloween Mini Pizzas have everything you need: a beginner-friendly difficulty level, 15 minutes of hands-on prep, a quick 12-minute bake time, and just a 5-minute rest before diving in. They’re perfect for an appetizer table, a relaxed dinner with a spooky twist, or an activity that lets kids get creative with their own ghastly designs. With about 250 calories per mini pizza and endless topping variations—think smoky gouda, spiced pepper jack, or ghost-shaped mushrooms—you can customize each bite to suit your taste buds and party vibe. As a festive crowd-pleaser, they’ll be the first to vanish from the Halloween spread, leaving behind only happy faces and a craving for more.
Feel free to print this article and save it for your next haunted gathering, or bookmark it in your favorite recipe binder to revisit every October. You can also find an FAQ section below that covers common questions like how to switch up crust options, creative ghost cutter hacks, and tips for hosting a mini-pizza decorating station. If you give this recipe a try, please leave your comments, questions, or any feedback about your experience. Whether you need help perfecting that devilish grin on your pizza or you came up with your own spooky topping combo, I’d love to hear from you. Happy haunting and happy baking!
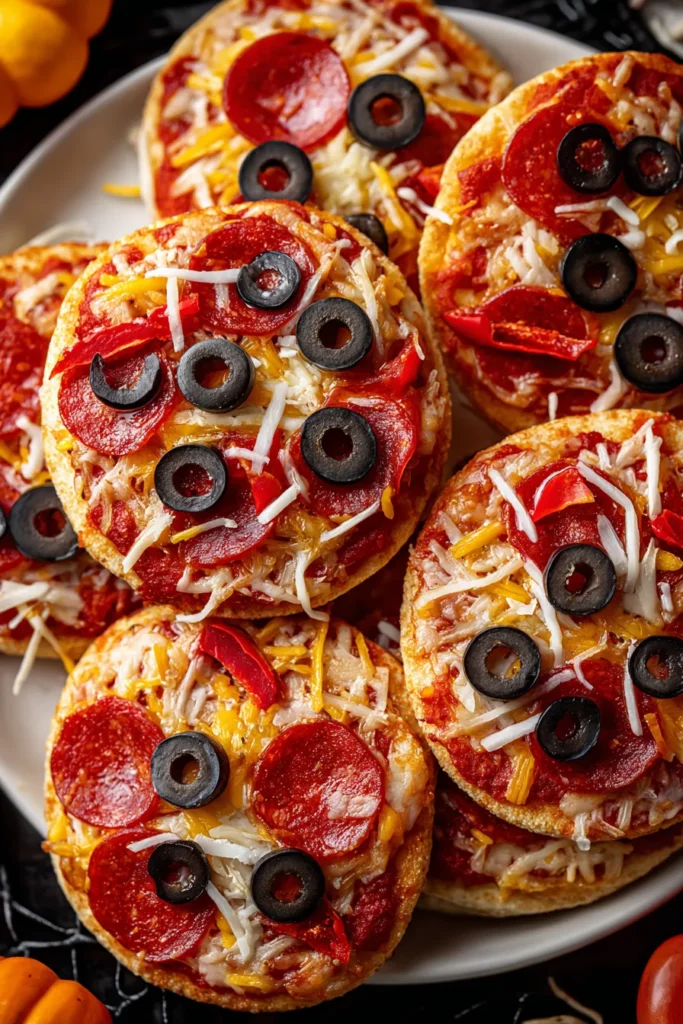

Halloween Mini Pizzas
Description
These Halloween Mini Pizzas are not just delicious; they're a creative way to celebrate the spooky season. Bursting with melted cheese and fun toppings, each bite is a delightful surprise!
Ingredients
Instructions
-
Preheat your oven to 375°F (190°C).
-
Arrange mini pizza crusts or English muffin halves on a baking sheet.
-
Lightly brush the tops of the crusts with olive oil.
-
Spread a tablespoon of pizza sauce over each mini crust.
-
Sprinkle a generous amount of mozzarella cheese evenly on top of the sauce.
-
Create a fun Halloween theme by arranging pepperoni, black olives, and bell pepper strips to form faces, using olives as eyes and bell pepper strips as mouths or scars.
-
For variety, add some shredded cheddar cheese to mimic hair or additional features.
-
Place the baking sheet in the preheated oven and bake for 10-12 minutes or until the cheese is melted and bubbly.
-
Remove from oven and let cool for a few minutes before serving.
Note
- Use ghost-shaped cookie cutters to cut pepperoni or bell peppers for more festive shapes.
- Try using food-safe skeleton hand or spider decorations for an extra spooky presentation.
- Great for parties, and kids love decorating their own mini pizzas.
- Experiment with different cheeses for unique flavors like a smoky gouda or spiced pepper jack.
- These can be made in advance and reheated, making them perfect for holiday gatherings.

