

Every bite of these Apple Pie Bars feels like a warm embrace from the cozy corners of a country kitchen. Flaky, buttery crust cradles tender apple slices that whisper with sweet spice, offering a perfect balance of texture and flavor. Golden edges give way to a melt-in-your-mouth center, where hints of cinnamon and vanilla mingle with bright notes of fresh lemon. Crisp sugars sparkle on top, inviting you to break through the surface and discover the juicy apple layer beneath.
Beyond taste, these bars tap into nostalgic memories—freshly washed apples piled in the kitchen basket, childhood weekends spent baking with loved ones, laughter echoing between rolling pins and mixing bowls. They’re slices of comfort that bring back simpler times, yet they’re effortless enough for busy weeknight dessert plans. Perfect for brunch spreads, after-school treats, and potluck gatherings, these bars slice into neat rectangles that can feed a crowd. In under two hours from start to finish—including chilling and baking—you have a dessert that rivals a classic pie but cuts prep time with a shortcut crust. Warning: these bars are dangerously shareable, so you might want to stash a few away for yourself!
One crisp autumn afternoon, I pulled these bars from the oven just as the sun dipped behind the trees, and my kitchen was filled with comforting spice. My kids couldn’t wait to sneak a piece before dinner, and their delighted smiles reminded me why I love sharing homemade treats. You don’t have to wait for fall, though—these bars shine any time you crave that warm, spiced apple flavor. The process is delightfully straightforward: you whisk together flour and salt, cut in cold butter until you have coarse crumbs, and bring it together with a splash of ice water. While that dough chills, you mix bright apple slices with lemon juice, vanilla extract, cinnamon, and sugar, giving them a sweet, tangy bite. Rolling out the layers, layering in the fruit, brushing on a glossy egg wash, and dancing through the kitchen in anticipation becomes part of the fun. Serving them warm with a scoop of vanilla ice cream elevates every mouthful into a magical moment you'll want to repeat again and again.
KEY INGREDIENTS IN APPLE PIE BARS
Before pulling out your bowls and pans, let’s explore the lineup of ingredients that lend these bars their irresistible flavor and texture. From the foundation of the crust to the spiced filling, each item plays a specific role in creating a balanced, delicious bite.
- all-purpose flour
Provides structure and helps the crust achieve that tender, flaky texture we all love. It’s the backbone of both the bottom and top layers.
- salt
Enhances and balances sweetness, rounding out flavors and making every ingredient shine. Even a small amount is crucial.
- unsalted butter
When cold and cubed, it creates steam pockets that turn into flaky layers in the crust. Unsalted varieties let you control the savory-sweet balance.
- ice water
Gently brings the dough together without melting the butter, keeping the crust crisp and flaky.
- granulated sugar
Sweetens the apple filling and helps draw out the natural juices, ensuring every bite has that perfect caramel-like quality.
- ground cinnamon
Infuses the filling with warm spice notes, complementing the apples and adding depth to each mouthful.
- apples
The star of the show—use crisp varieties like Granny Smith or Honeycrisp for the best texture. They hold their shape and deliver that classic tart-sweet balance.
- lemon juice
Brightens the apple flavor and prevents browning, adding a subtle tang that lifts the sweetness.
- vanilla extract
Rounds out the spice blend with floral, sweet notes, deepening the overall flavor profile.
- egg
Used as an egg wash to give the top crust a golden sheen and help any topping sugars adhere.
- turbinado sugar
Optional sprinkling for added crunch and a beautiful sparkly finish once baked.
HOW TO MAKE APPLE PIE BARS
With all our components at the ready, it’s time to walk through each step to transform pantry staples into golden bars brimming with juicy apples and warm spices. Follow these detailed directions and you’ll have dessert bliss in under two hours.
1. Preheat your oven to 375°F (190°C). Grease a 9×13 inch baking pan or line it with parchment paper to ensure easy removal and clean-up.
2. In a large mixing bowl, combine the flour and salt. Add in the chilled, cubed butter and use a pastry cutter or your fingers to blend until the mixture resembles coarse crumbs.
3. Gradually add ice water, one tablespoon at a time, mixing until the dough just begins to come together. Be careful not to overwork the dough. Divide into two portions, wrap each in plastic wrap, and refrigerate for 30 minutes.
4. In another bowl, mix together the granulated sugar and ground cinnamon. Set aside to build flavor for the filling.
5. In a separate large bowl, toss the apple slices with lemon juice and vanilla extract. Add half of the sugar–cinnamon mixture and toss until each slice is well-coated.
6. On a lightly floured surface, roll out one portion of dough to fit the bottom of the prepared pan. Press it evenly into the pan to form a smooth base layer.
7. Spread the apple mixture over the dough in an even layer, making sure it reaches all corners without overflowing.
8. Roll out the second dough portion and place it on top of the apples, covering them completely. Seal the edges by pressing the top and bottom crust layers together.
9. Brush the top crust with the beaten egg to create a glossy finish, then sprinkle turbinado sugar evenly for extra texture and sparkle.
10. Bake for 45–50 minutes, or until the crust is golden brown and the apple filling is bubbling and tender.
11. Remove from the oven and allow to cool completely before slicing into bars. This resting time helps the filling set and makes for cleaner cuts.
SERVING SUGGESTIONS FOR APPLE PIE BARS
Now that your Apple Pie Bars are baked to golden perfection, let’s talk about how to present and serve these sweet treats in style. Whether you’re gathering with friends, treating your family, or simply indulging a solo craving, these serving ideas will elevate every bite and showcase the bars at their best. From temperature contrasts to complementary toppings, each suggestion adds its own special flair without overshadowing the star ingredient—the spiced apple filling.
- Warm with Ice Cream
Serve bars warm straight from the oven and top with a generous scoop of vanilla ice cream. The heat from the bars gently melts the ice cream, creating a luscious sauce that seeps into every crumb.
- Drizzle with Caramel Sauce
For an extra layer of sweetness, drizzle homemade or store-bought caramel sauce over each bar. A light zigzag pattern adds visual appeal and decadent flavor.
- Dust with Powdered Sugar and Cinnamon
For a simple, elegant finish, sift a light layer of powdered sugar mixed with a pinch of cinnamon over the cooled bars. It adds a delicate sweetness and a pretty snowy effect.
- Pack in Lunchboxes
These bars are sturdy and portable, making them perfect for lunchboxes or picnic baskets. Wrap individual portions in parchment paper to keep them fresh and mess-free.
HOW TO STORE APPLE PIE BARS
Proper storage ensures your Apple Pie Bars stay fresh, flavorful, and perfectly textured—even after they’re tucked away. Whether you plan to enjoy them over the next few days or freeze some for future snacking, these tips will help maintain that flaky crust and juicy filling. Always let the bars cool completely before storing to avoid steam buildup, which can make the crust soggy.
- Room Temperature in an Airtight Container
Store cooled bars in a single layer inside an airtight container at room temperature for up to 3 days. This keeps the crust crisp and the filling tender.
- Refrigerator for Extended Freshness
If you’d like to extend their shelf life, place bars in a sealed container and refrigerate for up to 5 days. Bring to room temperature or gently reheat before serving to restore that just-baked warmth.
- Freezer for Long-Term Storage
For longer preservation, individually wrap cooled bars in plastic wrap, then place them in a freezer-safe zip-top bag. Freeze for up to 2 months. Thaw at room temperature or microwave briefly to enjoy that fresh-baked taste.
- Reheating Tips
To refresh stored bars, reheat in a preheated oven at 300°F (150°C) for 10–12 minutes or in a toaster oven until the crust is crisp and the filling is warm. This restores their original texture and aroma.
CONCLUSION
These Apple Pie Bars deliver all the warmth and nostalgia of a classic pie but with streamlined prep and easy sharing in mind. The buttery, flaky crust pairs flawlessly with sweet-spiced apples, brightened by lemon juice and vanilla. Whether you’re a beginner baker or a seasoned pro looking for a simple dessert hack, this recipe fits the bill: minimal equipment, straightforward techniques, and flexible timing. You’ll spend about 30 minutes on prep, let the dough rest for another 30, and then bake for 45–50 minutes—under two hours to ultimate cozy comfort. The result is a dessert perfect for potlucks, lunchboxes, festive gatherings, or a quiet evening treat with a cup of coffee. Don’t forget, you can customize with a pinch of nutmeg or swap apple varieties to suit your taste.
Feel free to print this article and save it to your recipe collection for whenever a sweet snack or after-dinner treat calls your name. You’ll also find a FAQ below to answer common questions and troubleshooting tips. If you give these bars a try, I’d love to hear how they turned out! Leave a comment with your adaptations, questions, or feedback—whether you tried Granny Smith apples or decided to drizzle on extra caramel, your thoughts help this recipe grow and improve. Happy baking, and may your kitchen be filled with warmth and delicious memories!
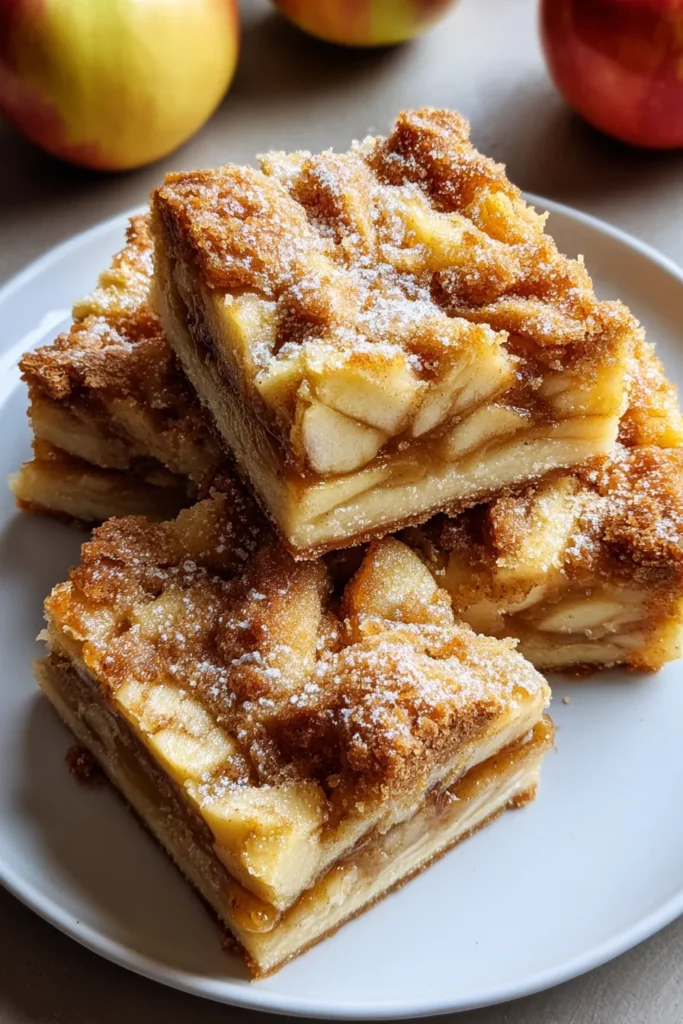

Apple Pie Bars
Description
These delicious apple pie bars feature tender apples spiced with cinnamon, all wrapped in a buttery crust. They're perfect for sharing or enjoying solo!
Ingredients
Instructions
-
Preheat your oven to 375°F (190°C). Grease a 9x13 inch baking pan or line it with parchment paper.
-
In a large mixing bowl, combine the flour and salt. Add in the butter cubes and use a pastry cutter or your fingers to blend until the mixture resembles coarse crumbs.
-
Gradually add ice water, one tablespoon at a time, mixing until the dough begins to come together. Do not overwork the dough. Divide it into two portions, wrap in plastic wrap, and refrigerate for 30 minutes.
-
In another bowl, mix together the granulated sugar and cinnamon. Set aside.
-
In a separate large bowl, toss the apple slices with lemon juice and vanilla extract. Add half of the sugar-cinnamon mixture to the apples and toss well to coat.
-
Roll out one portion of the dough on a lightly floured surface to fit the bottom of the prepared baking pan. Press it evenly into the pan.
-
Spread the apple mixture over the dough in an even layer.
-
Roll out the second portion of the dough and place it on top of the apples, covering them completely. Seal the edges with the bottom dough layer.
-
Brush the top of the crust with the beaten egg and sprinkle turbinado sugar for added texture, if desired.
-
Bake in the preheated oven for 45-50 minutes, or until the crust is golden brown and the apples are tender.
-
Remove from the oven and allow to cool before cutting into bars.
Note
- Apple varieties like Granny Smith or Honeycrisp work well for baking.
- For an extra touch of flavor, consider adding a pinch of nutmeg.
- Serve warm with vanilla ice cream or a dollop of whipped cream.
- These bars can be stored in an airtight container at room temperature for up to 3 days.

