

Golden, twisted strips of dough slathered in garlicky butter and stuffed with molten mozzarella and Parmesan—nothing beats the sheer comfort of Warm Garlic Herb Cheesy Breadsticks fresh out of the oven. These fluffy, golden-brown beauties marry simple pantry staples like refrigerated pizza dough and melted butter with the vibrant flavors of Italian seasoning and minced garlic. Each bite offers a perfect contrast: a lightly crisp exterior gives way to a soft, stretchy center that’s positively oozing cheese. From the moment you lift one to your mouth, you’ll feel that delightful pull of warm cheese stretching between your fingers, inviting you to take one more irresistible bite. Whether you’re feeding a crowd or enjoying a cozy movie night for two, these breadsticks are the ultimate easy appetizer, a homemade indulgence that tastes like you spent hours mastering it.
Beyond being a crowd-pleasing Party Food staple, this recipe is tailor-made for beginner cooks looking to level up their Easy Appetizer game. With just 20 minutes of prep time, 15 minutes of baking, and a brief 20-minute rest for dough relaxation, you’ll have crispy-on-the-outside, soft-on-the-inside sticks that boast 504 calories of pure joy per serving. They’re perfect alongside a steaming bowl of pasta, paired with marinara sauce for dipping, or simply enjoyed straight off the tray with a sprinkle of fresh parsley. Dive into this Pizza Dough Recipe session, and let’s celebrate the unbeatable combination of Homemade Breadsticks, raw garlic’s kick, and the subtle hug of Italian herbs. These Garlic Herb Breadsticks are the kind of recipe you’ll bookmark, print out, and pass along to friends as your go-to for effortless, cheesy perfection.
KEY INGREDIENTS IN WARM GARLIC HERB CHEESY BREADSTICKS
Before we get our hands floury and the oven heating, let’s lay out the flavor-packed cast of characters that turn simple dough into cheesy, garlicky heaven. Each ingredient has a role in building layers of taste and texture, ensuring every breadstick is tender, buttery, and irresistibly savory.
- Refrigerated pizza dough
A super-convenient base that eliminates the need for yeast proofing. It creates a soft, chewy foundation that crisps up beautifully, giving structure to all the cheesy goodness.
- Unsalted butter
When melted, it acts as the vehicle for garlic and herbs, coating the dough with rich, golden flavor without overpowering the delicate notes of the cheese.
- Garlic
Fresh minced cloves deliver that signature pungent kick and aromatic depth. Garlic is the heart of these breadsticks, infusing every bite with robust, savory warmth.
- Italian seasoning
A fragrant blend of herbs like oregano, basil, and thyme. This seasoning mix adds a Mediterranean zing that complements the buttery garlic and gooey cheese.
- Garlic powder
An extra punch of concentrated garlic taste. It layers in a subtle, roasted nuance that enhances the fresh cloves.
- Salt
A small but vital pinch that balances sweetness in the dough and amplifies all other flavors, ensuring the herbs and cheese shine.
- Mozzarella cheese
The star cheese for meltability and stretchiness. Its mild, milky profile allows the herb and garlic flavors to take center stage.
- Parmesan cheese
A sharp, salty accent that adds complexity and a slightly granular texture. Parmesan creates pockets of savory brightness.
- Fresh parsley
Bright green flecks scattered on top bring a pop of color and a hint of freshness that cuts through the richness.
- Marinara sauce (optional)
A tangy tomato-based dip that pairs perfectly with these cheesy strips. It adds acidity and creates an interactive, fun element for sharing.
HOW TO MAKE WARM GARLIC HERB CHEESY BREADSTICKS
Ready to roll, brush, twist, and bake? Follow this step-by-step guide for perfectly golden, melty breadsticks every time.
1. Preheat your oven to 400°F (200°C). Line a baking sheet with parchment paper or lightly grease it to prevent sticking and encourage even browning.
2. Roll out the pizza dough on the prepared sheet into a neat rectangle about 10 by 15 inches. Use a lightly floured surface or your fingertips to gently stretch, ensuring an even thickness for uniform baking.
3. In a small bowl, whisk together the melted butter, minced garlic, Italian seasoning, garlic powder, and salt. Stir until every droplet of butter is infused with the fragrant herb blend.
4. Generously brush the entire surface of the dough with the seasoned butter, covering every edge for maximum flavor in each bite.
5. Sprinkle the mozzarella and Parmesan cheeses evenly over one half of the dough, leaving a small two-inch border around the edges to allow for sealing.
6. Fold the uncheesed half of dough over the cheese-covered side, meeting the edges. Press down gently along the seam with your fingertips to create a tight seal that traps all the melty cheese inside.
7. Using a sharp knife or pizza cutter, slice the sealed dough into 1-inch strips. If you like a playful look, twist each strip a few times before placing it back on the sheet, spacing them an inch apart.
8. Bake for 10–15 minutes, watching closely until the breadsticks are golden brown and the cheese is fully melted and bubbly.
9. Remove the tray from the oven and lightly dust the hot breadsticks with fresh parsley, adding a bright, herbal finish.
10. Serve immediately while still warm, pairing with marinara sauce on the side for dipping if you’d like that extra burst of tomato tang.
SERVING SUGGESTIONS FOR WARM GARLIC HERB CHEESY BREADSTICKS
When it comes to presenting these cheesy breadsticks, a little thought goes a long way in transforming a simple appetizer into a memorable experience for friends and family. Whether you’re hosting an informal game night, a cozy movie marathon, or just craving a snack that doubles as a dinner-sidekick, the right accompaniments and presentation can elevate this humble dough treat into a star attraction on your table. From rustic boards and vibrant dipping bowls to curated pairings that balance richness with bright freshness, these serving ideas will ensure your homemade breadsticks shine in both flavor and style. They’re perfect for showcasing your creativity, turning snack time into a feast of textures, colors, and communal enjoyment.
- Serve on a wooden board with a small bowl of marinara in the center. The natural grain of the board adds rustic charm, and guests can easily tear off strips, dunk, and snack at their own pace.
- Create a dipping station featuring garlic aioli, spicy sriracha mayo, and classic marinara. Label each bowl with handwritten tags to guide taste-testing, turning dipping into a fun flavor exploration.
- Pair with a crisp green salad dressed lightly in lemon vinaigrette. The bright, acidic crunch of the greens offers a refreshing counterpoint to the chewy, buttery breadsticks.
- Present alongside a steaming bowl of tomato basil soup for a comforting combo. Ladle the soup into small crocks and let each breadstick double as a cozy spoon for sipping.
HOW TO STORE WARM GARLIC HERB CHEESY BREADSTICKS
After the initial excitement (and deliciousness) of devouring warm breadsticks, you might find yourself with leftovers that deserve another moment in the spotlight rather than a hasty toss into the trash. Proper storage ensures you can enjoy that fluffy-cheesy goodness over the next few days without sacrificing texture or flavor. The trick lies in choosing the right container, wrapping technique, and reheating method to preserve the delicate balance between crisp edges and soft, stretchy cheese. Whether you plan a quick snack the next day, want to share in packed lunches, or are stocking up your freezer for emergency comfort food, these simple storage strategies will keep your garlic herb cheesy breadsticks tasting like they just came out of the oven.
- Room-temperature rest: If you’ll be eating within two hours, leave the breadsticks on the counter, lightly covered with a clean tea towel. This prevents wicking moisture while preserving their warm, just-baked crispness.
- Refrigeration: Cool completely, then place breadsticks in an airtight container or zip-top bag. Use parchment paper between layers to prevent sticking. Store for up to 3 days; reheat gently to revive texture.
- Freezing: Flash-freeze on a baking sheet for one hour, then transfer to a sealed freezer bag or container. Label with the date, and freeze for up to 2 months. Thaw overnight in the fridge before reheating.
- Reheating: Warm in a preheated oven at 350°F for 5–7 minutes or until heated through and slightly crisp. For a quicker fix, microwave briefly (30–45 seconds), then pop into a hot oven or toaster oven to refresh the exterior.
CONCLUSION
From refrigerated pizza dough to bubbling, golden-brown cheese pulls, these Warm Garlic Herb Cheesy Breadsticks pack maximum flavor with minimal fuss—perfectly suited to busy weeknights, casual get-togethers, or whenever that irresistible craving for something warm, garlicky, and utterly cheesy hits. We’ve explored every step, from rolling out the dough and whipping up an herb-infused butter blend to the artful twist that makes each stick a handheld delight. Whether you’re a novice home cook or a seasoned bread enthusiast, this recipe’s beginner-friendly approach and customizable notes on spice levels or cheese variations invite you to make it your own. Don’t forget that with 20 minutes of prep, 15 minutes of baking, and a brief 20-minute rest, you’ll be savoring these sticks in under an hour—an unbeatable time frame for an appetizer that feels gourmet. Feel free to print this guide and save it in your recipe binder for spontaneous snack attacks or the next party invitation.
We’ve also covered serving ideas—think wooden boards, dipping stations, paired salads, and soup companions—and smart storage hacks to keep leftovers tasting fresh. Below, you’ll find a helpful FAQ to troubleshoot common questions, from dough thickness to reheating methods. If you try this recipe, I’d love to hear how your breadsticks turned out! Leave a comment, share your favorite cheese twist, or ask any questions you have about technique, timing, or flavor variations. Your feedback, stories, and tips make our cooking community stronger—and who knows, your experience might inspire the next batch of cheesy, garlicky magic in someone else’s kitchen. Happy baking!
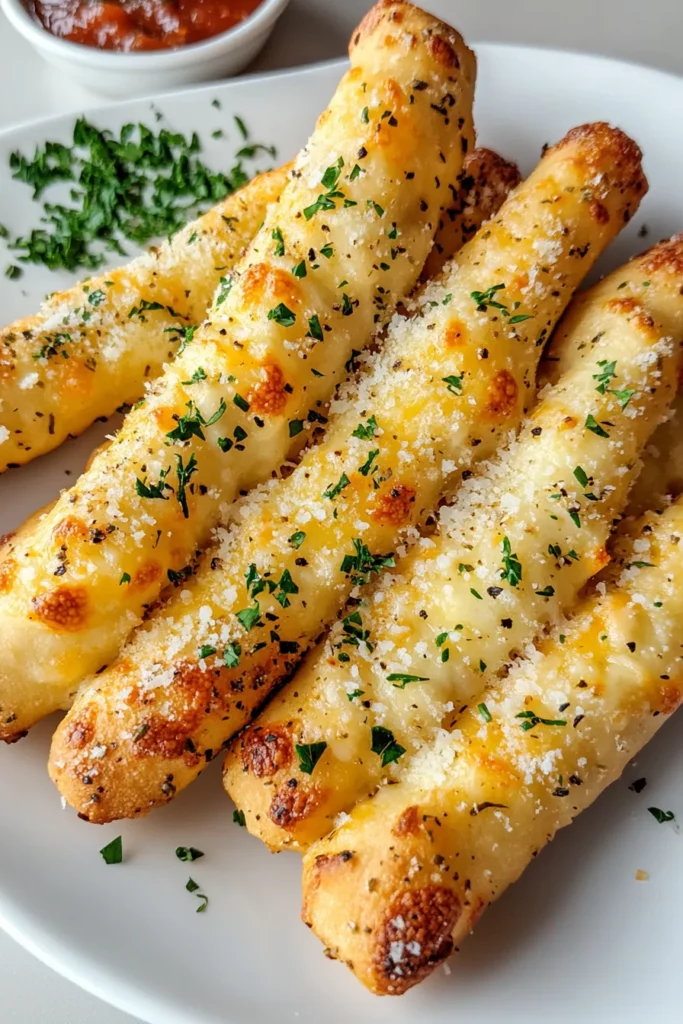

Warm Garlic Herb Cheesy Breadsticks
Description
Golden, twisted breadsticks bursting with melted mozzarella & Parmesan, infused with aromatic garlic & herbs. Soft, cheesy, and utterly addictive a crowd-pleaser!
Ingredients
Instructions
-
Preheat your oven to 400°F (200°C). Line a baking sheet with parchment paper or lightly grease it.
-
Roll out the pizza dough into a rectangle approximately 10x15 inches on the prepared baking sheet.
-
In a small bowl, combine the melted butter, minced garlic, Italian seasoning, garlic powder, and salt. Mix well to ensure the seasonings are evenly distributed.
-
Brush the butter and herb mixture generously over the entire surface of the rolled-out pizza dough.
-
Spread the mozzarella cheese and Parmesan cheese evenly over half of the dough, leaving a small border around the edges.
-
Fold the dough in half over the cheese so the edges meet. Press gently to seal the edges.
-
Using a sharp knife or pizza cutter, slice the dough into 1-inch strips. Twist each strip slightly, if desired, and arrange them on the baking sheet, leaving some space between each strip.
-
Bake in the preheated oven for 10-15 minutes until the breadsticks are golden and the cheese is melted and bubbly.
-
Remove from the oven and sprinkle with fresh parsley.
-
Serve warm with marinara sauce on the side for dipping, if desired.
Note
- For a spicier version, sprinkle some crushed red pepper flakes on top with the fresh parsley.
- You can experiment with different cheeses, like cheddar or a cheese blend, to personalize your breadsticks.
- If you prefer a softer texture, bake for a shorter time; for a crispier texture, extend the baking time slightly.
- These breadsticks make a perfect party snack or accompaniment to pasta dishes.

