

Soft and chewy, slightly sweet, with a satisfyingly crisp crust that crackles under your knife—this honey oat sourdough bread is one of those comforting kitchen triumphs that makes you feel like a bona fide artisan baker, even on your very first bake. Working with a fed and bubbly sourdough starter gives this loaf a gentle tang that perfectly balances the natural sweetness of honey, while hearty oats lend texture and a warm, nutty character. In each bite, you’ll taste the depth of fermentation, subtle honeyed notes, and a tender, springy crumb that’s begging to be slathered with butter, jam, or your favorite spread.
I still remember the first time I pulled a golden boule from the oven, its surface dusted with oats and bathed in that irresistible honey glow. As steam rose and the kitchen filled with the scent of toasty grains, I felt a burst of pride so big I wanted to share it with anyone who would listen. This bread recipe strikes the perfect balance between hands-on technique and a forgiving process—it rewards your patience and attention, yet fits neatly into a relaxed weekend routine. With just a few simple ingredients and some thoughtful resting times, you’ll create a loaf that’s ideal for breakfast toast, lunchtime sandwiches, or a cozy evening snack alongside soup. Whether you’re a sourdough devotee or a curious newcomer, this recipe offers plenty of room to experiment and make it your own.
KEY INGREDIENTS IN SOFT AND CHEWY HONEY OAT SOURDOUGH BREAD
Every ingredient in this honey oat sourdough loaf plays its part in delivering that signature combination of softness, chew, and flavor depth. From the lively starter to the nourishing oats, each element works in harmony to give you a bread that’s as wholesome as it is delicious.
- Active sourdough starter
A lively blend of wild yeast and bacteria, this starter provides natural leavening, fermentation flavor, and structure. A well-fed, bubbly starter ensures a good rise and that subtle tang that defines sourdough.
- Warm water
Gently warms the dough and activates both your starter and the gluten in the flour. Keeping water around 110°F (43°C) helps the fermentation process along without shocking the starter culture.
- Honey
Adds a touch of sweetness that contrasts the sour notes from fermentation. Honey also serves as a food source for your starter, boosting yeast activity and contributing to a soft crumb.
- Whole wheat flour
Delivers a nutty aroma, extra fiber, and a richer texture. Whole wheat adds complexity to the flavor profile, making the bread more wholesome while still retaining tenderness when balanced with all-purpose flour.
- All-purpose flour
Provides the necessary gluten framework to trap gases produced during fermentation. It keeps the dough extensible enough for great oven spring and a light, chewy interior.
- Rolled oats
Introduced into the dough for texture and a gentle chew, oats also contribute a toasty, earthy flavor that echoes in each bite.
- Salt
Enhances overall flavor, tightens the gluten network, and regulates yeast activity so the dough doesn’t rise too quickly and collapse.
- Olive oil
Enriches the dough, resulting in a softer crumb and a slightly tender crust. It also makes handling the dough smoother during kneading.
- Additional rolled oats for topping
Sprinkled on the loaf before baking, these oats yield an attractive, rustic finish and a crunchy contrast to the soft crumb beneath.
HOW TO MAKE SOFT AND CHEWY HONEY OAT SOURDOUGH BREAD
Ready to turn these quality ingredients into a gorgeous loaf? This method involves gentle folding, a key autolyse phase, long fermentation for flavor, and a hot Dutch oven bake to achieve that perfect crust and airy crumb.
1. In a large mixing bowl, combine the active sourdough starter, warm water, and honey. Stir gently with a spatula until the honey has fully dissolved, ensuring an even sweetness and a happy starter ready to spring into action.
2. Add in the whole wheat flour, all-purpose flour, and rolled oats. Mix with your hands or a sturdy spatula until all the flour is hydrated and you have a rough, shaggy dough—this initial rough mix makes it easier to develop gluten later.
3. Let the dough rest for about 30 minutes. This period, called autolyse, allows the flour to absorb water fully, jumpstarting gluten formation and making the dough easier to handle.
4. After the autolyse, sprinkle the salt evenly over the dough and drizzle the olive oil on top. Mix thoroughly so the salt and oil are fully incorporated, ensuring even flavor distribution and a smoother dough texture.
5. Turn the dough out onto a lightly floured surface and knead for about 10 minutes, or until it becomes smooth and elastic. If the dough feels excessively sticky, add just enough flour to keep it manageable without over-drying.
6. Place the kneaded dough into a lightly greased bowl, cover with a damp cloth, and let it rise at room temperature for 4 to 6 hours, or until doubled in size. This longer bulk fermentation builds flavor and structure.
7. Once risen, gently deflate the dough to release excess gas, then transfer it to a floured surface. Shape it into a round loaf (boule) or a batard, focusing on surface tension to help it hold shape during the final proof.
8. Place the shaped loaf into a proofing basket or a bowl lined with a floured kitchen towel. Cover it and proof for 1 to 2 hours, until noticeably puffy and nearly doubled.
9. About 30 minutes before baking, preheat your oven to 450°F (230°C). If you have a Dutch oven, place it inside to heat up—this will create steam for a superior crust.
10. Carefully remove the hot Dutch oven. Using parchment paper can simplify the transfer. Place the dough inside and sprinkle additional oats on top for a beautiful, artisanal finish.
11. Cover with the lid and bake for 30 minutes. Then take off the lid and continue baking for another 15 to 20 minutes, until the crust turns a deep golden brown and sounds hollow when tapped.
12. Remove the bread from the Dutch oven and let it cool on a wire rack for at least 1 hour before slicing. This cooling time ensures the crumb sets perfectly and your slices won’t turn gummy.
SERVING SUGGESTIONS FOR SOFT AND CHEWY HONEY OAT SOURDOUGH BREAD
With its crisp crust and pillowy interior, this honey oat sourdough shines in countless ways, from simple breakfasts to elegant snack plates. Whether you’re enjoying it hot from the oven or toasted the next morning, the bread’s gentle sweetness and nutty undertones make it an ideal foundation for both sweet and savory toppings. Gathering friends or family around the table? Offer a variety of spreads and sides so everyone can customize their slice. In colder months, pair thick slices with a warm bowl of soup or stew, letting the bread soak up all those cozy flavors. Come spring and summer, it transforms into a delightful base for lighter toppings—think creamy ricotta, fresh herbs, and a drizzle of olive oil.
- Classic Butter and Jam: Spread a generous layer of soft butter over a warm slice, then top with your favorite fruit jam for a timeless breakfast treat.
- Toasted Avocado Smash: Lightly toast the bread, mash ripe avocado with a squeeze of lemon, and sprinkle with sea salt and chili flakes for a vibrant, nutritious snack.
- French Toast Upgrade: Dip slices into a rich egg-milk batter with cinnamon and vanilla, then cook until golden. Serve with fresh berries and a drizzle of maple syrup.
- Gourmet Sandwich: Layer thinly sliced turkey or ham, crisp lettuce, juicy tomato, and a smear of honey mustard between two slices for an elevated lunchtime favorite.
HOW TO STORE SOFT AND CHEWY HONEY OAT SOURDOUGH BREAD
Keeping your honey oat sourdough at its best requires a little know-how, but it’s surprisingly simple to maintain that tender crumb and crisp crust over several days. First, let the loaf cool completely—trapping residual heat can cause condensation and sogginess. Once cooled, choose your storage approach based on how quickly you’ll enjoy the bread. For same-day munching, an unsealed paper bag or bread box lets the crust stay crisp while preventing it from drying out too fast. If you plan to keep it around for a few days, an airtight container or a tight kitchen towel wrap at room temperature will hold on to moisture without making the crust rubbery.
- Room-Temperature Bread Box: Store in a bread box or a paper bag to balance airflow and humidity, preserving the crust’s crunch and the crumb’s softness for up to 2 days.
- Airtight Container: After fully cooling, place the loaf in an airtight container or a resealable bag. Remove as much air as possible to keep the crumb soft for 3–4 days.
- Freezer Slices: Slice the bread and wrap individual slices in plastic wrap or foil. Store in a freezer bag for easy, single-serve portions that thaw quickly in a toaster or at room temperature.
- Refrigeration (Short-Term): Although the fridge can speed up staling, tightly wrapping the loaf in plastic wrap and storing it on a middle shelf can keep it usable for 5 days when your kitchen is very warm.
CONCLUSION
Bringing together the tang of a well-fed sourdough starter, the golden sweetness of honey, and the nutty chew of oats, this Soft and Chewy Honey Oat Sourdough Bread is more than just a loaf—it’s a weekend adventure and a testament to the joy of homemade baking. From mixing that first shaggy dough to the satisfying “thwack” you hear when you tap the cooled crust, you’ll find every step rewarding. Whether you’re starting your day with warm, buttered slices or crafting an open-faced sandwich for lunch, the intricate flavors and textures create endless possibilities in your kitchen. Feel free to print out this article and tuck it into your recipe binder, so it’s always within reach whenever you’re ready for the comforting scent of freshly baked bread.
Feel free to leave a comment below if you give this recipe a try or have any questions about the process. Your feedback helps me refine these recipes and inspires others to take on their own sourdough journey. I can’t wait to hear how your loaf turns out—and remember, there’s always a helpful FAQ below to guide you through any baking hiccups you might encounter! Happy baking, and may your kitchen always smell of warm, honey-sweet oats and tangy sourdough.
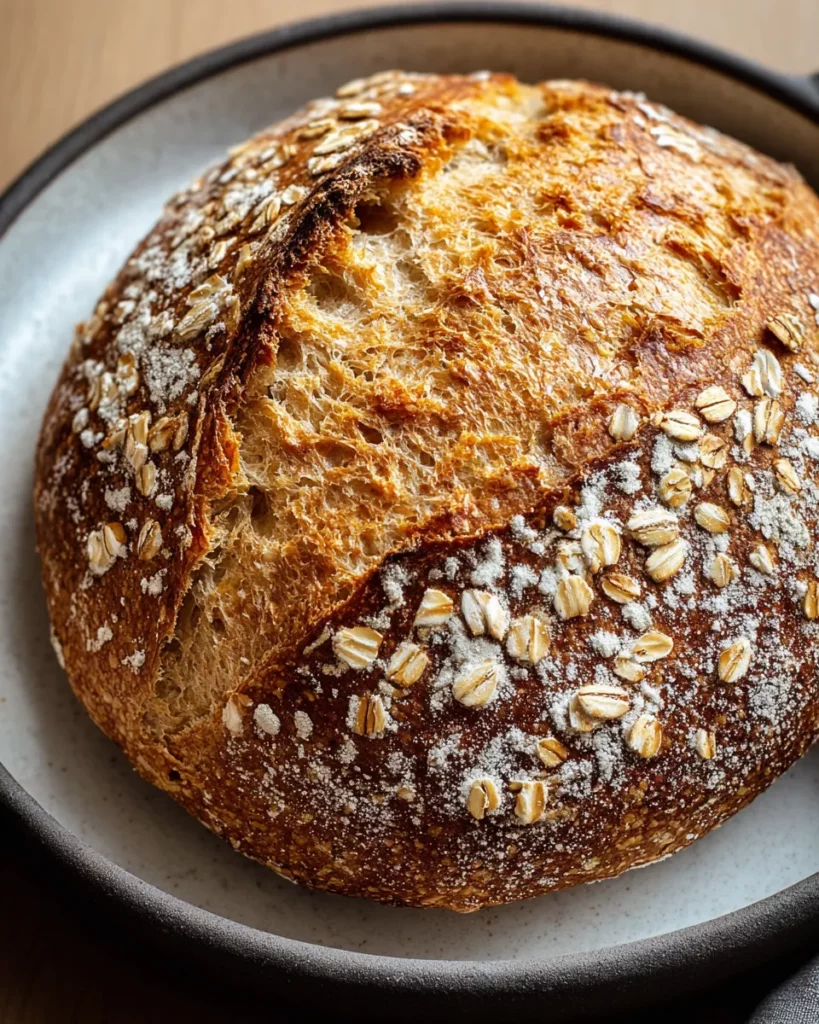

Soft and Chewy Honey Oat Sourdough Bread
Description
Soft and chewy with a hint of sweetness, this honey oat sourdough bread features a crispy crust and fluffy interior, making it perfect for any meal or snack.
Ingredients
Instructions
-
In a large mixing bowl, combine the active sourdough starter, warm water, and honey. Stir gently until the honey is dissolved.
-
Add the whole wheat flour, all-purpose flour, and rolled oats into the mixing bowl. Mix with a spatula or your hands until all the flour is hydrated and a shaggy dough forms.
-
Let the dough rest for about 30 minutes. This step, called autolyse, allows the flour to absorb the water and develop gluten.
-
After resting, sprinkle the salt over the dough, then drizzle the olive oil on top. Mix well to incorporate the salt and oil into the dough.
-
Turn the dough out onto a clean surface and knead for about 10 minutes, or until the dough is smooth and elastic. If the dough is too sticky, you can add a small amount of flour as needed.
-
Place the dough in a lightly greased bowl and cover it with a damp cloth. Allow it to rise at room temperature for about 4 to 6 hours, or until it has doubled in size.
-
After the rise, gently deflate the dough and turn it out onto a floured surface. Shape it into a round loaf or a batard, depending on your preference.
-
Place the shaped dough in a proofing basket or a bowl lined with a floured kitchen towel. Cover it with a cloth and let it rise for another 1 to 2 hours, or until puffy and nearly doubled in size.
-
Preheat your oven to 450°F (230°C) about 30 minutes before baking. If you have a Dutch oven, place it in the oven while it preheats.
-
If using a Dutch oven, carefully remove it from the oven. Place the dough into the hot Dutch oven (you can use parchment paper to help transfer it), then sprinkle additional oats on top for garnish.
-
Cover the Dutch oven with its lid and bake for 30 minutes. Then, remove the lid and bake for an additional 15 to 20 minutes, or until the crust is a deep golden brown.
-
Once done, carefully remove the bread from the Dutch oven and let it cool on a wire rack for at least 1 hour before slicing.
Note
- This bread is best enjoyed fresh but can be stored in an airtight container to maintain its softness.
- The sourdough starter should ideally be active and bubbly; otherwise, the bread might not rise well.
- If you prefer a sweeter bread, you can add a bit more honey to the recipe.
- Experiment with adding seeds or nuts for extra texture and flavor.

