

If you love soft, chewy cookies with a delightful twist of surprise, you’re in for a treat with Secret Kisses Cookies. These little bundles of joy start with a classic cookie dough that yields a tender crumb, but the real magic happens when you press a Hershey’s Kiss right into the warm center. As you bite into that lightly golden edge, the cookie gives way to a melt-in-your-mouth center, revealing a sweet chocolate heart tucked away like a hidden gem. Whether you’re celebrating a special occasion or simply craving a little homemade comfort, these cookies deliver that perfect balance of buttery sweetness and rich chocolate in every single bite.
Every batch of Secret Kisses Cookies feels like a celebration in your kitchen. From the moment you cream the sugars and butter together, you can’t help but smile as that fluffy dough takes shape. Stirring in the chocolate chips adds pockets of melty goodness throughout, but it’s the final step—nestling a Hershey’s Kiss into the hot cookie—that feels like a secret handshake among bakers. The result is a plate of golden rounds crowned with a gleaming chocolate top, each one waiting to surprise someone special. Whether you share them with family, gift them to friends, or simply savor them on your own with a cold glass of milk, these cookies are guaranteed to bring smiles all around.
KEY INGREDIENTS IN SECRET KISSES COOKIES
Before we dive into the step-by-step baking process, let’s get acquainted with the stars of the show. Each ingredient plays an essential role in creating that perfect cookie texture and flavor:
- Unsalted butter
Unsalted butter provides a rich, creamy backbone for the dough. By starting with softened butter, you ensure a smooth, uniform mixture when creaming with sugars, which contributes to the tender, melt-in-your-mouth texture.
- Granulated sugar
This classic white sugar adds sweetness and helps with spreading. It also contributes to the light, crisp edges that contrast beautifully with a soft center.
- Brown sugar
Packed with molasses flavor, brown sugar brings a deeper caramel note and extra moisture. It helps keep the cookies chewy and adds complexity to every bite.
- Eggs
Eggs are the binding agent that hold everything together. They add structure and richness while helping the dough rise just enough to stay soft and tender.
- Vanilla extract
A splash of vanilla infuses the dough with warm, aromatic flavor, enhancing the sweetness of the sugars and complementing the chocolate perfectly.
- All-purpose flour
The foundation of any cookie, all-purpose flour provides structure. It needs to be measured and sifted properly to avoid dense cookies and ensure an even rise.
- Baking soda
Acting as a leavening agent, baking soda creates tiny air pockets in the dough, giving the cookies a light, tender crumb without spreading too thin.
- Salt
Just a touch of salt balances the sweetness and brings out the flavors of butter and chocolate, ensuring each bite is perfectly seasoned.
- Semi-sweet chocolate chips
These chips offer bursts of melty chocolate throughout the dough, adding richness and texture in every chew.
- Hershey’s Kisses
The grand finale of the recipe, unwrapped Hershey’s Kisses are pressed into the hot cookies, hiding a small chocolate treasure in every center.
HOW TO MAKE SECRET KISSES COOKIES
Get ready to transform these simple pantry staples into irresistible treats. The process is straightforward, and each step builds toward that perfect balance of chewy cookie and melty chocolate surprise.
1. Preheat your oven to 350°F (175°C) and line a baking sheet with parchment paper. This ensures an even bake and makes cleanup a breeze.
2. In a large mixing bowl, cream together the softened butter, granulated sugar, and brown sugar until the mixture is light and fluffy—about 3 minutes with an electric mixer. This step incorporates air for a tender texture.
3. Add the eggs, one at a time, beating well after each addition. Stir in the vanilla extract until fully combined, ensuring the dough is smooth and glossy.
4. In a separate bowl, sift together the all-purpose flour, baking soda, and salt. This aerates the flour and removes any lumps, so your cookies bake up evenly.
5. Gradually add the flour mixture to the wet ingredients, mixing just until combined. Overmixing can lead to tough cookies, so stop once you see that all the flour streaks are gone.
6. Fold in the semi-sweet chocolate chips, making sure they’re evenly distributed throughout the dough for delicious pockets of melty chocolate.
7. Using a cookie scoop or tablespoon, drop rounded balls of dough onto the prepared baking sheet, leaving about 2 inches of space between them to allow for spreading.
8. Bake in the preheated oven for 10–12 minutes, or until the edges are lightly golden and the centers are set but still soft. Keep an eye on these in the final minutes to avoid over-baking.
9. Remove the cookies from the oven and immediately press a Hershey’s Kiss into the center of each warm cookie, creating that hidden chocolate heart.
10. Allow the cookies to cool on the baking sheet for 5 minutes before transferring them to a wire rack to cool completely. Enjoy fresh or store in an airtight container for up to a week.
SERVING SUGGESTIONS FOR SECRET KISSES COOKIES
When it comes to presenting these delightful treats, there are so many fun and creative ways to serve Secret Kisses Cookies. Whether you’re hosting a gathering, packing lunchboxes, or simply enjoying a quiet afternoon snack, these ideas will help you showcase their irresistible charm:
- Serve them warm on a decorative platter alongside a pitcher of cold milk. The contrast between the cozy, gooey centers and the refreshing sip of milk makes every bite feel like a mini celebration.
- Pair with a coffee or hot chocolate bar for a dessert spread. Arrange the cookies on tiered stands beside flavored syrups, whipped cream, and marshmallows—your guests can customize their own cozy beverage to enjoy with a cookie on the side.
- Package as homemade gifts in small cellophane bags tied with festive ribbon. These make heartfelt presents for teachers, neighbors, or co-workers, and the peek of a shiny Kiss adds an element of surprise.
- Elevate dessert night by crumbling cooled cookies over a bowl of vanilla ice cream. The combination of chewy cookie pieces, melty chocolate, and creamy ice cream creates an indulgent, textural delight.
HOW TO STORE SECRET KISSES COOKIES
Keeping your Secret Kisses Cookies fresh ensures you can savor that hidden chocolate surprise any time you like. Follow these storage tips to maintain their soft, chewy texture and delicious flavor:
Storing these cookies properly will help them stay fresh for days, so you can enjoy that perfect soft texture and gooey chocolate center whenever the craving strikes. Whether you’re prepping ahead for a party or simply want to bake once and snack throughout the week, these methods will keep your cookies tasting just-baked.
- Room-temperature airtight container
Place completely cooled cookies in a single layer or separated by parchment sheets. Seal the container tightly and store at room temperature for up to 5 days. This preserves the chewy texture without drying them out.
- Refrigeration for extended freshness
If you live in a warm climate, refrigerate your cookies to prevent the chocolate from softening too much. Use an airtight container with parchment paper between layers and chill for up to 7 days.
- Freezer storage for long-term keeping
Arrange cooled cookies in a single layer on a baking sheet and freeze until firm (about 1 hour). Transfer them to a freezer-safe bag or container with parchment separators. Freeze for up to 3 months, then thaw at room temperature before serving.
- Cookie dough freezing
Scoop the cookie dough into balls and freeze on a tray until solid. Once firm, store the dough balls in a sealed bag for up to 3 months. Bake from frozen, adding 1–2 minutes to the baking time for fresh-baked goodness on demand.
CONCLUSION
From the very first bite of a Secret Kisses Cookie, you’re treated to a symphony of textures and flavors that come together in the most delightful way. We began by exploring how a simple blend of ingredients like softened butter, granulated and brown sugars, eggs, and vanilla extract forms a lush, tender dough. Then, we learned the importance of sifting flour, baking soda, and salt to create a light crumb, followed by folding in semi-sweet chocolate chips for pockets of melty richness. The grand finale—pressing a Hershey’s Kiss into each warm cookie—transforms an everyday treat into an enchanting experience, revealing a hidden chocolate heart in every single bite.
We also covered creative serving suggestions, from warming them on a platter with cold milk to packaging them as charming homemade gifts, and tips for storing these treasures to maintain that perfect chewy texture. With a total preparation time of just 15 minutes, a brief 12-minute bake, and a short 5-minute resting period, you can whip up a batch of 24 cookies that clock in at around 150 calories each—and you’ll have them ready to enjoy or share in no time. Don’t forget you can print this article and save it for later, so the next time you’re craving a little chocolatey surprise, you’ll have everything you need at your fingertips. Below, you’ll find a helpful FAQ section to address any further questions you might have about ingredients, substitutions, or troubleshooting.
Baking these Secret Kisses Cookies is as much about the experience as it is about the final product. I hope this guide has inspired you to roll up your sleeves, preheat your oven, and create some sweet memories in your kitchen. If you ever have comments, questions, or need a little troubleshooting help, please drop a note in the comments below. Whether it’s your first batch or your hundredth, I’d love to hear how your Secret Kisses Cookies turn out, what creative variations you try, and any tips you pick up along the way. Happy baking!
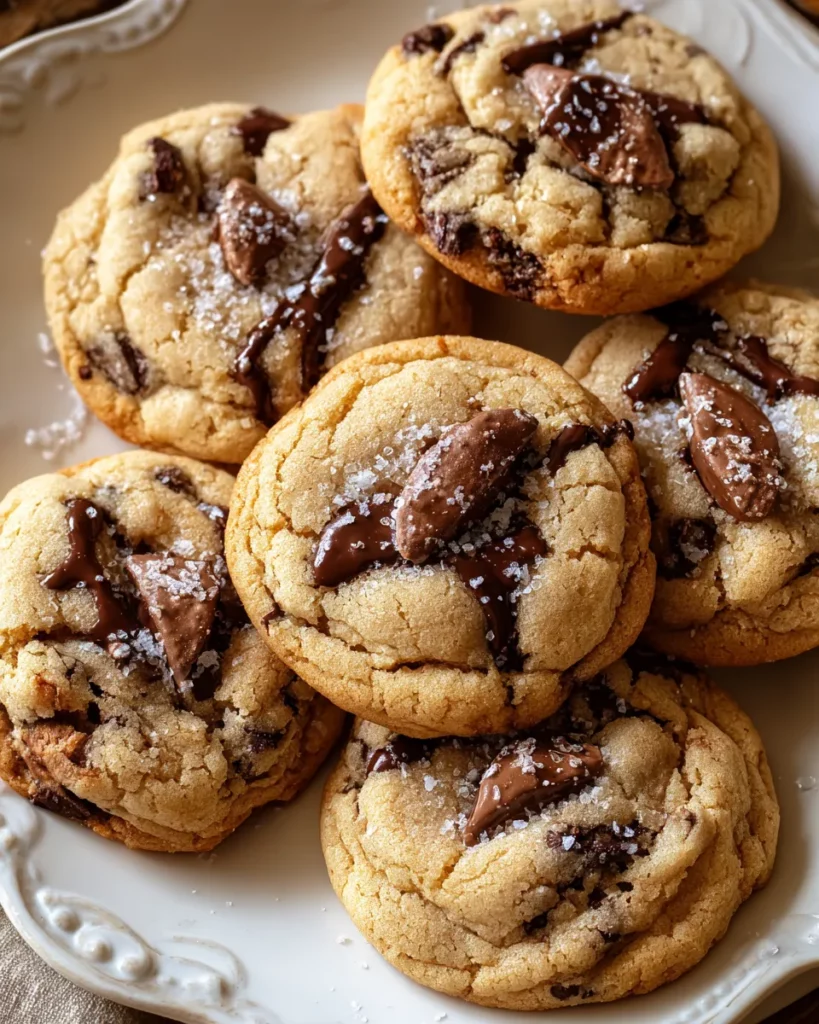

Secret Kisses Cookies
Description
These soft and chewy cookies hide a sweet surprise of melty Hershey's Kisses in the center. Perfect for sharing or savoring on your own, they're a treat that everyone will love!
Ingredients
Instructions
-
Preheat your oven to 350°F (175°C) and line a baking sheet with parchment paper.
-
In a large mixing bowl, cream together the softened butter, granulated sugar, and brown sugar until the mixture is light and fluffy. This should take about 3 minutes with an electric mixer.
-
Add the eggs, one at a time, beating well after each addition. Stir in the vanilla extract until fully combined.
-
In a separate bowl, sift together the all-purpose flour, baking soda, and salt. Gradually add the flour mixture to the wet ingredients, mixing just until combined.
-
Fold in the semi-sweet chocolate chips until evenly distributed throughout the dough.
-
Using a cookie scoop or tablespoon, drop rounded balls of dough onto the prepared baking sheet, leaving about 2 inches of space between them.
-
Bake in the preheated oven for 10-12 minutes, or until the edges are lightly golden and the centers are set but still soft.
-
Remove the cookies from the oven and immediately press a Hershey's Kiss into the center of each cookie.
-
Allow the cookies to cool on the baking sheet for 5 minutes before transferring them to a wire rack to cool completely.
-
Enjoy your Secret Kisses Cookies fresh or store them in an airtight container for up to a week.
Note
- These cookies can be customized with different types of chocolate or flavored Kisses.
- For a festive touch, try using seasonal Kisses (like peppermint or coconut) based on the time of year.
- The cookie dough can be frozen for up to 3 months; just thaw before baking.
- Adding chopped nuts or dried fruit can enhance the flavor and texture of the cookies.

