

There’s something utterly irresistible about a dessert that masterfully balances sweetness with a whisper of sea salt, creating a flavor experience that lingers long after the last bite. This Salted Caramel Dessert brings together a luxuriously smooth, amber-hued caramel sauce and a pillowy vanilla cake base, offering a delightful contrast of textures in every forkful. From the moment you drizzle that glossy caramel over the soft batter to the satisfying crackle of golden edges emerging from the oven, you’ll know you’re in for a treat that transcends ordinary sweets. It’s the kind of dessert that invites you to slow down, breathe in the warmth of nostalgia, and relish each layer of gooey decadence alongside a tender crumb.
When the first slice is cut and that ribbon of caramel oozes out, it’s impossible not to smile. Whether you’re hosting a cozy gathering on a crisp evening or simply craving a luxurious pick-me-up after a long day, this recipe promises to be your new go-to indulgence. Drawing on simple pantry staples—granulated sugar, butter, cream, flour, and a few leavening agents—this dessert feels elegantly complex without demanding hours of effort. Every step, from melting sugar to whipping up the batter, brings you closer to a homemade wonder that’s bound to become a cherished favorite. So grab your spatula and let’s dive into a world where sweet meets salty and comfort meets celebration.
KEY INGREDIENTS IN SALTED CARAMEL DESSERT
Before we dive into the step-by-step instructions, let’s take a moment to appreciate the star players that make this Salted Caramel Dessert so memorable. Each ingredient has a specific role, whether it’s building structure, adding richness, or infusing that signature salty-sweet character.
- Granulated Sugar
The heart of your caramel, granulated sugar dissolves and browns to create that deep, buttery amber sauce. Its transformation under heat is what gives the dessert its complex, slightly toasty sweetness.
- Unsalted Butter
Used in two forms—melted into the caramel and creamed into the batter—unsalted butter provides richness and a tender crumb. Opting for unsalted ensures you control the salt levels precisely.
- Heavy Cream
Poured slowly into the melted sugar-butter mixture, heavy cream adds creaminess and a lush texture to the caramel, preventing it from hardening too quickly once cooled.
- Vanilla Extract
A splash in both the caramel and the cake base, vanilla extract rounds out flavors with its warm, floral notes, elevating the sweetness without overpowering.
- Sea Salt
Just a teaspoon of sea salt intensifies the caramel’s sweetness and brings a delightful contrast. Flaky sea salt on top adds a satisfying crunch in every bite.
- All-Purpose Flour
The structural backbone of the cake, all-purpose flour provides enough gluten formation for a soft yet sturdy base that holds the gooey caramel.
- Cornstarch
Working alongside flour, cornstarch lightens the cake’s texture, creating a tender and almost melt-in-your-mouth crumb that pairs beautifully with the dense caramel layer.
- Baking Powder
A gentle leavener, baking powder helps the cake rise evenly, ensuring that the base is fluffy rather than flat or overly dense.
- Baking Soda
Though used in a small amount, baking soda aids browning and balances acidity, contributing to that perfect golden hue and subtle tang.
- Powdered Sugar
Creamed with softened butter, powdered sugar aerates the batter, giving the cake its light, tender lift and a whisper of sweetness in each bite.
- Egg
Acting as both binder and tenderizer, the egg provides structure, moisture, and richness, helping the dessert hold together while maintaining a soft, pleasant bite.
HOW TO MAKE SALTED CARAMEL DESSERT
Let’s walk through the process of crafting this indulgent treat, step by step. From melting sugar until it glows amber to pouring that glossy caramel over a soft vanilla base, each moment brings you closer to dessert bliss.
1. In a medium saucepan set over medium heat, add the granulated sugar. Use a wooden spoon or heatproof spatula to stir constantly, ensuring even melting. Watch patiently as the sugar transforms into a smooth, amber-colored liquid—this is the foundation of your caramel’s rich flavor.
2. When no granules remain, carefully add the unsalted butter pieces. Continue to stir until the butter has fully melted and melded into the sugar, creating a velvety mixture.
3. Slowly drizzle in the heavy cream while stirring vigorously. The mixture will bubble up—this is normal. Allow it to boil gently for 1 minute, which thins and perfects the caramel.
4. Remove the pan from heat and immediately stir in the vanilla extract and sea salt. Set this salted caramel aside to cool and thicken while you prepare the cake base.
5. Preheat your oven to 350°F (175°C). Grease an 8×8-inch baking pan to prevent sticking.
6. In a mixing bowl, whisk together the all-purpose flour, cornstarch, baking powder, and baking soda. Setting these dry ingredients aside ensures an even rise in your cake.
7. In a separate bowl, cream together the softened unsalted butter and powdered sugar with an electric mixer. Beat until the mixture is light and fluffy, signaling proper aeration.
8. Add the egg and additional vanilla extract to the creamed butter-sugar blend. Beat until everything is fully combined and the batter looks smooth and glossy.
9. Gradually fold the dry ingredients into the wet mixture, stirring with a spatula just until combined. Overmixing can lead to a tough cake.
10. Spread the batter evenly into your prepared pan, smoothing the top with an offset spatula.
11. Pour the cooled salted caramel over the batter, using a spatula to spread it into an even layer.
12. Bake for 20–25 minutes, or until a toothpick inserted into the center comes out clean. The edges should be lightly golden, and the caramel will still be delectably gooey.
13. Let the dessert cool completely in the pan before slicing. This rest allows the caramel to set just enough for clean, satisfying slices.
SERVING SUGGESTIONS FOR SALTED CARAMEL DESSERT
This Salted Caramel Dessert shines brightest when paired thoughtfully to highlight its rich layers. Whether you’re hosting a dinner party or indulging in a solo treat, these serving ideas will make each portion feel like a special moment.
- Serve each slice warm with a generous scoop of vanilla ice cream. The contrast between hot dessert and cold ice cream creates a delightful temperature play on the palate.
- Drizzle extra homemade caramel sauce over the top and finish with a sprinkle of flaky sea salt. This double-dose of caramel intensifies flavor and adds a pleasing crunch.
- Accompany your dessert with a side of fresh berries—think raspberries or blackberries—to cut through the sweetness with a hint of tang and introduce a burst of vibrant color.
- Plate individual squares on elegant dessert dishes, garnishing with a mint sprig or edible flower. The pop of green or a delicate bloom elevates the presentation and makes each serving Instagram-worthy.
HOW TO STORE SALTED CARAMEL DESSERT
Once this decadent treat has cooled, you’ll want to keep it at its very best. Proper storage helps maintain texture, freshness, and that irresistible gooeyness. Here’s how to preserve your dessert for days to come without sacrificing flavor.
- Store at room temperature in an airtight container for up to three days. Ensure the lid is sealed tightly to prevent the caramel from drying out and the cake from absorbing ambient odors.
- For longer storage, place individual slices on a sheet of parchment paper, stack them neatly in a freezer-safe container, and freeze for up to one month. When you’re ready to enjoy, thaw at room temperature for an hour.
- If refrigerating, wrap the pan tightly with plastic wrap or transfer squares into a sealed container. The cooler temperature will firm up the caramel layer—simply allow the dessert to come back to room temperature or warm briefly before serving.
- Reheat single portions in the microwave for 10–15 seconds or in a preheated 300°F (150°C) oven for 5–7 minutes. This gentle warmth brings back that fresh-from-the-oven softness without overcooking.
CONCLUSION
We’ve journeyed from melting sugar until it glows golden to slicing into that luscious, layered bliss of salted caramel and tender vanilla cake. This Salted Caramel Dessert combines simple pantry staples—granulated sugar, butter, cream, flour, and a few leaveners—into a show-stopping treat that feels both approachable and indulgent. Whether you’re a seasoned baker or an adventurous home cook, you’ll find joy in each step: stirring that bubbling caramel, whipping batter to a fluffy peak, and finally unveiling slices that glisten with caramel promise. Don’t forget, you can print this article and save it for later so you’re always just a few steps away from caramel-filled heaven, and keep an eye out for our FAQ section below for common tips and troubleshooting advice.
We hope this article inspires you to whip up a pan of this indulgent dessert for your next gathering or cozy night in. If you give this recipe a try, please leave your comments, questions, or feedback—your kitchen wins (and learning curves) make the journey sweeter for everyone. Happy baking and may your caramel always turn out perfectly gooey!
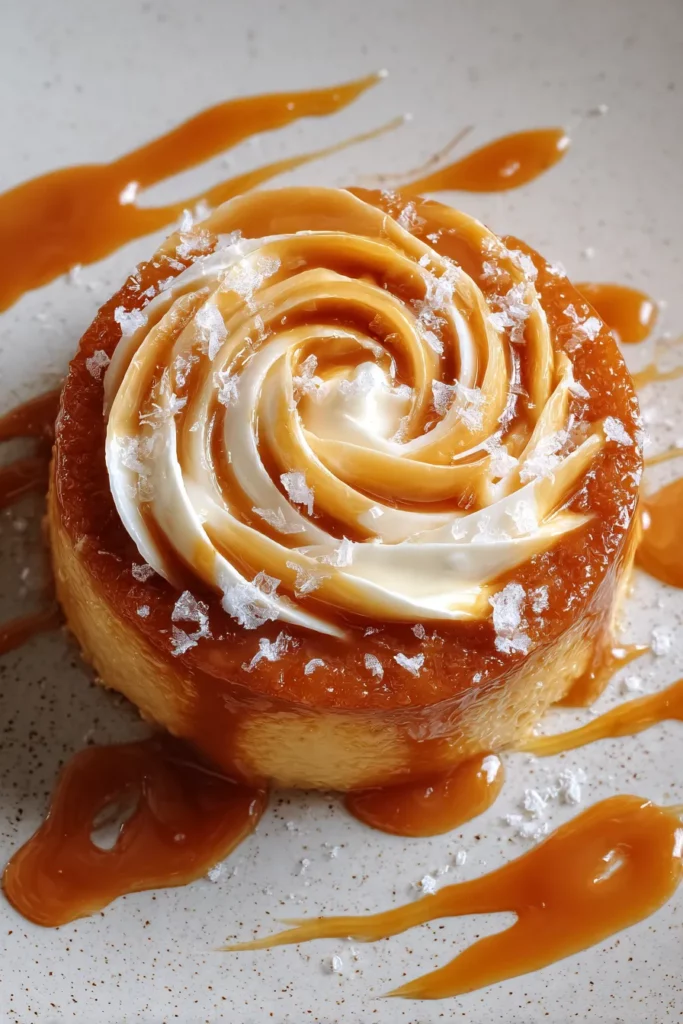

Salted Caramel Dessert
Description
This decadent treat features a perfectly gooey salted caramel layered on a soft vanilla cake base, creating a delightful contrast of flavors and textures.
Ingredients
Instructions
-
Begin by making the salted caramel. In a medium saucepan over medium heat, melt 1 cup of granulated sugar, stirring constantly until it turns into an amber color.
-
Once the sugar is completely melted, add 6 tablespoons of butter. Stir until the butter is melted and combined.
-
Slowly pour in 1/2 cup of heavy cream while continuously stirring. Allow the mixture to boil for 1 minute.
-
Remove from heat and stir in 1 teaspoon of vanilla extract and 1 teaspoon of sea salt. Set aside to cool.
-
For the dessert base, preheat your oven to 350°F (175°C).
-
In a bowl, mix 1/2 cup of all-purpose flour, 1/4 cup of cornstarch, 1/4 teaspoon of baking powder, and 1/8 teaspoon of baking soda. Set aside.
-
In a mixing bowl, cream together 1/4 cup of softened unsalted butter and 1/2 cup of powdered sugar until light and fluffy.
-
Beat in 1 large egg and 1 teaspoon of vanilla extract until well combined.
-
Gradually add the dry ingredients to the wet mixture, stirring until just combined.
-
Spread the batter evenly into a greased 8x8-inch baking pan.
-
Pour the cooled salted caramel over the batter, spreading evenly with a spatula.
-
Bake for 20-25 minutes or until a toothpick inserted into the center comes out clean.
-
Allow the dessert to cool in the pan before slicing and serving.
Note
- For a more intense flavor, try using flaky sea salt instead of regular sea salt.
- Serve with a scoop of vanilla ice cream for extra indulgence.
- This dessert can be stored in an airtight container at room temperature for up to 3 days.
- For an added twist, sprinkle crushed nuts on top of the caramel before baking.

