

There’s something utterly swoon-worthy about the way a buttery shortbread crust meets a river of sweet, golden caramel—especially when a sprinkle of sea salt cuts through the sweetness with the perfect amount of sophistication. These Salted Caramel Butter Bars are exactly that kind of dessert magic: a tender, crumbly base topped with a velvet-smooth ribbon of dulce de leche, all crowned by the rustic charm of a streusel-like crumble. As you slice into these bars, you’ll reveal gooey pockets of caramel peeking through, promising a bite that’s both nostalgic and utterly irresistible. Whether you’re craving a mid-afternoon treat or planning a show-stopping dessert for your next gathering, these bars deliver a symphony of textures and flavors that feels downright celebratory.
I still remember the first time I baked these bars for my family—my kitchen smelled like a cozy patisserie, and every corner of the house seemed to hum with anticipation. The recipe is delightfully beginner-friendly (difficulty level: Beginner), yet the payoff feels gourmet. You’ll spend about 30 minutes prepping, 55 minutes baking, then let the bars rest for 15 minutes before slicing into 24 generous squares, each packing around 400 calories of pure joy. It’s the kind of recipe that transforms simple pantry staples—unsalted butter, flour, sugars—into something downright decadent. So grab your favorite spatula and turn on your oven to 325°F; these Salted Caramel Butter Bars are about to become your new go-to dessert obsession.
KEY INGREDIENTS IN SALTED CARAMEL BUTTER BARS
Before we dive into the step-by-step, let’s take a moment to appreciate the simple lineup that makes these bars so extraordinary. Each component plays its part, from creating a delicate, tender base to crafting that luscious caramel layer and achieving the finale—a delicate sprinkle of sea salt that elevates every bite.
- Unsalted butter
This is the heart and soul of our buttery crust. At room temperature, it creams effortlessly with sugar, creating an airy texture and rich mouthfeel that defines a perfect shortbread base.
- Granulated sugar
Adds structure and a gentle sweetness. When creamed with butter, it helps incorporate air for a lighter, more tender crumb.
- Powdered sugar
Contributes to a melt-in-your-mouth feel and subtle sweetness. It also helps the dough come together smoothly, ensuring your bars have that delicate, crumbly texture.
- Vanilla extract
A little goes a long way in lifting all of the other flavors. Its warm, aromatic notes add depth and complexity to this deceptively simple dessert.
- All-purpose flour
The building block of our crust and crumble topping. Its moderate protein content provides just the right amount of structure without sacrificing tenderness.
- Dulce de leche or caramel sauce
The star of the show—the silky, sticky layer that turns these bars into pure decadence. It separates the two buttery layers and provides that irresistible caramel pull.
- Sea salt
Sprinkled on top to balance the sweetness, it adds a tantalizing salty crunch and brings out the nuanced flavors of butter and caramel.
HOW TO MAKE SALTED CARAMEL BUTTER BARS
Here’s where the real fun begins! Follow these detailed steps to build perfect layers of buttery crust, luscious caramel, and crumbly topping. Don’t rush—each phase is key to achieving that heavenly texture and flavor balance.
1. Preheat your oven to 325°F (163°C). Grease a 9×13-inch baking dish or line it with parchment paper to ensure your bars lift out in one graceful piece.
2. In a large mixing bowl, cream together the butter, granulated sugar, and powdered sugar on medium speed until the mixture is light, fluffy, and pale—about 2–3 minutes. This step incorporates air for a tender crust.
3. Pour in the vanilla extract and mix until it’s fully combined, infusing the base with those signature sweet-honeyed notes.
4. Slowly add the all-purpose flour, one cup at a time, beating on low speed until each addition is just incorporated. You want a soft, slightly crumbly dough that holds together when pressed.
5. Reserve half of the dough. Press the remaining dough evenly into the bottom of your prepared pan, using your fingers or a flat-bottomed glass to create a smooth, compact layer.
6. Bake this bottom crust for 20 minutes, or until it turns golden brown around the edges. Remove the pan from the oven and let it cool for 15 minutes so the caramel won’t slip through later.
7. Once cooled, spread the dulce de leche evenly over the crust, reaching right to the edges. This ensures each bite is bursting with caramel.
8. Crumble the reserved dough over the top, scattering it loosely to allow little caramel pockets to peek through, creating that rustic, tempting appearance.
9. Sprinkle the surface with sea salt, adjusting the amount to suit your personal sweet-and-salty preference.
10. Return the pan to the oven and bake for another 25–30 minutes, until the top is a light golden brown and the caramel is set but still gooey.
11. Allow the bars to cool completely in the pan before slicing into squares. This resting time lets the layers firm up for clean cuts and perfect servings.
SERVING SUGGESTIONS FOR SALTED CARAMEL BUTTER BARS
Once these beauties are baked and cooled, the world is your oyster—well, dessert oyster! Here are a few of my favorite ways to serve Salted Caramel Butter Bars, each one designed to highlight their buttery richness and caramel charm in a unique setting.
- Coffee Bar Delight
Place a few bars on a tiered tray alongside a steaming carafe of hot coffee or espresso. The robust, slightly bitter coffee notes play off the caramel’s sweetness, making each bite taste like a mini coffeehouse treat.
- Ice Cream Sundae Upgrade
Cut bars into bite-sized squares and scatter them over generous scoops of vanilla bean ice cream. Drizzle with extra caramel sauce and a sprinkle of flaky sea salt for an over-the-top dessert experience.
- Dessert Platter Centerpiece
Arrange your caramel bars on a wooden board or mirrored platter, interspersed with fresh berries and mint sprigs. The vibrant colors and variety of textures will impress at any gathering.
- Gift-Wrapped Goodness
Stack a few bars, wrap them in parchment paper, and tie with baker’s twine for an artisanal homemade gift. Include a small tag with “Handle with care—deliciousness inside!” for extra charm.
HOW TO STORE SALTED CARAMEL BUTTER BARS
Maintaining that fresh-baked, just-out-of-the-oven taste involves storing your bars thoughtfully. These tips will help you keep the layers of buttery crumble and soft caramel tasting their best for days to come.
Storing at room temperature (if you plan to enjoy within 2–3 days) in an airtight container or a tightly wrapped baking dish will keep the crust tender and the caramel pliable. Just remember to keep them away from direct sunlight or heat sources.
If you’d like to extend their lifespan to up to one week, place the bars in the refrigerator. Line your container with wax paper between layers to prevent sticking. Chilling firms up the caramel, giving the bars a chewier bite.
For longer-term storage, you can freeze the bars. Wrap individual squares in plastic wrap, then tuck them into a freezer-safe bag. They’ll stay fresh for up to three months. Thaw at room temperature or give them a quick zap in the microwave for a warm, melty treat.
If you’re traveling with them or gifting, pack them snugly in a portable tin with parchment paper between layers to protect the delicate crumble and caramel swirls.
CONCLUSION
What a delicious journey we’ve had, from the first stir of butter and sugar to that final drizzle of caramel and sprinkle of sea salt. These Salted Caramel Butter Bars combine the tender crumb of a shortbread crust with the melt-in-your-mouth sweetness of dulce de leche, all elevated by a whisper of saltiness that makes you savor every single bite. They’re ideal for dessert tables, coffee breaks, or simply a weekend afternoon in the kitchen. With a total time of about 100 minutes (including prep, baking, and cooling), you’ll feel like a seasoned baker even if this is your first foray into layered bars. Remember, this is a Beginner-level recipe that yields 24 squares, so there’s plenty to share—or not!
Feel free to print this article and save it for later, folding it into your favorite recipe binder for easy access. You’ll find a handy FAQ section below to troubleshoot any baking questions and offer extra tips. If you give these bars a whirl, I’d love to hear how they turned out—drop a comment, ask a question, or share your own twist on this caramel sensation. Happy baking, and may your kitchen always smell like buttery bliss!
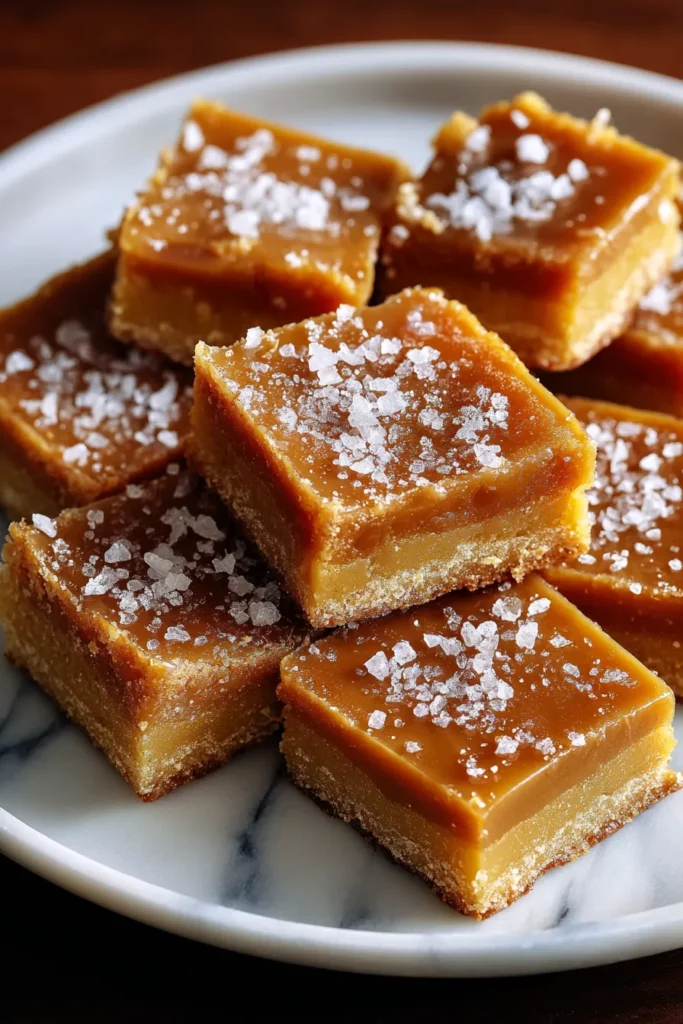

Salted Caramel Butter Bars
Description
These Salted Caramel Butter Bars offer an exquisite mix of soft, crumbly crust and luscious caramel, sprinkled with sea salt for an added punch of flavor.
Ingredients
Instructions
-
Preheat your oven to 325°F (163°C). Grease a 9x13 inch baking dish or line it with parchment paper for easier removal.
-
In a large mixing bowl, cream together the butter, granulated sugar, and powdered sugar until light and fluffy. This should take about 2-3 minutes.
-
Add the vanilla extract to the creamed mixture and stir until well combined.
-
Gradually add the flour, one cup at a time, mixing on low speed until fully incorporated. The dough should be soft and slightly crumbly.
-
Press half of the dough into the prepared baking dish, ensuring you spread it evenly across the bottom to form an even layer.
-
Bake the bottom crust for 20 minutes, or until it turns golden brown. Remove from the oven and allow it to cool for 15 minutes.
-
After the bottom layer has cooled, spread the dulce de leche evenly over the crust. Make sure to reach the edges for full coverage.
-
Crumble the remaining dough over the top of the caramel layer, spreading it roughly to allow spots of caramel to peek through.
-
Sprinkle the sea salt evenly over the top layer of dough.
-
Place the baking dish back into the oven and bake for an additional 25-30 minutes, or until the top is light golden brown.
-
Allow the bars to cool completely in the pan before slicing into squares.
Note
- These bars can be stored in an airtight container at room temperature for up to 4 days.
- For a richer flavor, consider browning the butter before creaming it with the sugars.
- You can substitute homemade caramel sauce for a personal touch.
- Adjust the amount of sea salt to your preference for a sweeter or more savory profile.
- These bars are perfect for sharing and make a fantastic treat for gatherings and holidays.

