

When crisp apples meet a buttery, flaky crust, something magical happens. Rustic Apple Pie brings together the perfect balance of sweet and tart in every tender bite. By blending Granny Smith’s bright tang with Honeycrisp’s natural sweetness, this pie sings with layers of flavor that feel like autumn wrapped in pastry. As you slice through that golden crust, you’ll find fruit bathed in warm spices—cinnamon, nutmeg, and a hint of lemon juice—that have mingled gently, creating a filling so comforting it feels like a cozy blanket on a cool evening. Every forkful offers a delightful contrast of textures: the slight crunch of the apples, the delicate crumble of the crust, and the buttery dots of melted butter that add richness and depth.
One of the best parts of this Rustic Apple Pie is how approachable it feels. Whether you’re a beginner baker or a seasoned pro looking for a nostalgic treat, the simple steps make it easy to whip up a dessert that feels like it came from a grandma’s kitchen. Using refrigerated pie crusts saves time without sacrificing that homemade feel, and by tossing your apples in sugar, flour, and spices, you give them the support they need to stay tender but not mushy. As the pie bakes, the kitchen fills with inviting warmth, and when it emerges, golden and bubbling, it practically begs to be shared. This is more than a dessert—it’s a way to gather around the table, spark conversation, and create memories that linger long after the last crumb is gone.
KEY INGREDIENTS IN RUSTIC APPLE PIE
Before you begin, let’s take a closer look at the heart and soul of this Rustic Apple Pie. Each component plays a vital role in delivering that classic taste and texture you love.
- Apples
A mix of Granny Smith and Honeycrisp brings both tartness and natural sweetness. The firm texture holds up during baking, ensuring each slice has perfectly tender fruit without turning to mush.
- Granulated Sugar
Sweetens the filling and helps draw out the apple juices. It balances the tart notes of the fruit and caramelizes slightly as the pie bakes, adding depth to every bite.
- Ground Cinnamon
Adds warmth and a familiar spice that complements the apples. Cinnamon infuses the filling with an earthy aroma and a hint of sweetness.
- Ground Nutmeg
Offers a subtle, nutty flavor that enhances the complexity of the filling. Just a pinch goes a long way in balancing the sweet and tart elements.
- Lemon Juice
Brightens the filling and prevents the apples from browning. The acidity also lifts the overall flavor, keeping the pie from tasting overly sweet.
- All-Purpose Flour
Coats the apple slices to thicken the juices released during baking. This simple pantry staple helps the filling set perfectly without becoming runny.
- Unsalted Butter
Small pieces of butter dot the top of the apple mixture, melting into rich pockets of creaminess. It deepens the flavor and keeps the filling luxuriously moist.
- Refrigerated Pie Crusts
Two ready-made crusts make preparation quick and fuss-free. They roll out smoothly and bake into a flaky, golden shell that rivals homemade pastry.
- Egg
A beaten egg used for an egg wash gives the crust a glossy, golden finish. It also helps any sugar you sprinkle adhere to the surface.
- Extra Flour
For dusting your work surface and rolling pin. Prevents the dough from sticking and ensures an even, smooth crust.
HOW TO MAKE RUSTIC APPLE PIE
Baking this Rustic Apple Pie is a joyful journey of simple steps that come together in perfect harmony. From preheating the oven to letting the pie rest, each stage lays the foundation for that quintessential flaky crust and spiced apple filling.
1. Preheat your oven to 425°F (220°C). This high heat jump-starts the cooking process, giving the crust a head start on becoming golden and crisp.
2. In a large mixing bowl, combine the sliced apples, granulated sugar, ground cinnamon, ground nutmeg, lemon juice, and flour. Use a wooden spoon or spatula to toss everything until the apples are evenly coated. The flour will help thicken the juices, while the sugar and spices begin to infuse the fruit.
3. Roll out one pie crust onto a floured surface and carefully fit it into a 9-inch pie plate. Gently press the crust into the plate, leaving the excess dough draped over the edges.
4. Pour the apple mixture into the pie crust, making sure to distribute it evenly. Dot the filling with small pieces of butter, spacing them throughout to ensure every slice has a touch of richness.
5. Roll out the second pie crust and place it over the apple filling. You can leave it whole for a classic look—just cut a few slits in the top—or weave it into a beautiful lattice design.
6. If using a whole top crust, cut several slits to allow steam to escape. Crimp the edges of the top and bottom crust together by pinching or using a fork to seal the pie completely.
7. Brush the top crust with the beaten egg to create a golden sheen. If you like extra sparkle, sprinkle a bit of sugar on top before baking.
8. Place the pie on a baking sheet to catch any drips, then bake in the preheated oven for 15 minutes. The initial blast of heat helps set the crust quickly.
9. After 15 minutes, reduce the temperature to 350°F (175°C) and continue baking for an additional 30–35 minutes, or until the crust is a rich golden brown and the filling is bubbling up through the vents.
10. Once baked, remove the pie from the oven and let it cool for at least 2 hours. This rest time allows the juices to firm up, ensuring clean, perfect slices every time.
SERVING SUGGESTIONS FOR RUSTIC APPLE PIE
After waiting patiently for your pie to cool and set, it’s time to think about presentation and those finishing touches that elevate every slice. With a Rustic Apple Pie this rich and inviting, simple pairings and creative garnishes can make a world of difference. Whether you’re hosting a festive gathering or enjoying a quiet night in, these ideas will help you serve your pie with flair and flavor.
- A scoop of vanilla ice cream
Place a generous scoop of cold vanilla bean ice cream atop each warm slice. The contrast of hot pie and melting ice cream creates a creamy, dreamy combination that’s utterly irresistible.
- A dollop of whipped cream
Whip heavy cream with a touch of sugar and vanilla until soft peaks form. Serve a fluffy swirl alongside your pie for a light, airy complement to the dense filling.
- Drizzle of caramel sauce
Warm homemade or store-bought caramel in the microwave for a few seconds, then drizzle over each slice. The sweet, buttery sauce adds a luxurious touch.
- Sprinkle of toasted nuts
Lightly toast chopped pecans or walnuts in a dry pan until fragrant. Scatter them over the finished pie for an extra crunch and nutty accent.
HOW TO STORE RUSTIC APPLE PIE
Knowing how to store your Rustic Apple Pie ensures every leftover slice tastes as delightful as the first. Proper storage methods help maintain the integrity of the crust, keep the filling moist, and prevent sogginess. Here are a few tried-and-true techniques to keep your pie fresh, whether you plan to enjoy it over the next day or freeze it for a special occasion.
- Room temperature
If you’ll eat the pie within 1–2 days, cover it loosely with aluminum foil or a pie box to protect it from dust and drying out. Keep it in a cool, dry spot away from direct sunlight.
- Refrigeration
To extend the pie’s life up to 4–5 days, transfer any leftover slices to an airtight container or wrap them snugly in plastic wrap. Refrigeration slows bacterial growth and helps preserve both flavor and texture.
- Freezing
For longer storage (up to 2–3 months), cut the pie into individual slices. Wrap each slice tightly in plastic wrap followed by aluminum foil to prevent freezer burn. Thaw overnight in the refrigerator before reheating.
- Reheating
To bring back that fresh-baked feeling, heat pie slices in a 350°F (175°C) oven for 10–15 minutes. This method revives the crisp crust and warms the filling without making it soggy.
CONCLUSION
This Rustic Apple Pie journey has taken you from crisp, tangy apples to a golden, flaky crust, then on through tempting serving ideas and foolproof storage tips. You’ve learned how to balance flavors, master simple pastry techniques, and transform a few everyday ingredients into a dessert that feels both comforting and celebratory. With just under an hour of active work and a couple of hours of resting time, you can create a pie that delights eight people and leaves them asking for seconds. Feel free to print this article or save it to your favorite recipe collection so that every fall (or any time your craving strikes) you have a trusted guide right at your fingertips. Below, you’ll also find a handy FAQ section to troubleshoot any baking question you might have as you embark on perfecting this classic treat.
Whether you’re looking for a heartwarming dessert to share with family or a festive showstopper for your next potluck, Rustic Apple Pie delivers on taste, texture, and nostalgia. I hope you’ll try this recipe, customize it with your own twists, and make it a tradition in your home. If you have any comments, questions, or feedback—about ingredients, techniques, or creative variations—I’d love to hear from you. Happy baking, and may your kitchen always be filled with warmth and delicious aromas!
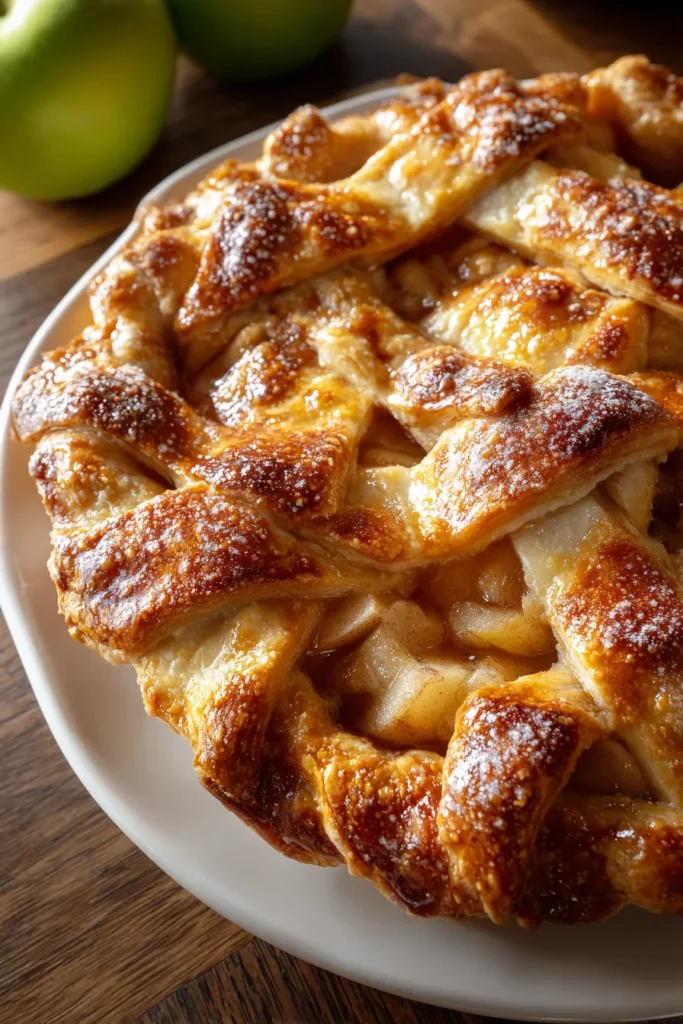

Rustic Apple Pie
Description
This Rustic Apple Pie is bursting with sweet, spiced apple goodness, wrapped in a flaky, golden crust. Comforting and nostalgic, it's perfect for any occasion.
Ingredients
Instructions
-
Preheat your oven to 425°F (220°C).
-
In a large mixing bowl, combine the sliced apples, granulated sugar, ground cinnamon, ground nutmeg, lemon juice, and flour. Toss the mixture until the apples are evenly coated. Set aside to let the flavors meld.
-
Roll out one pie crust onto a floured surface and fit it into a 9-inch pie plate. Gently press the crust into the plate, allowing the excess to hang over the edges.
-
Pour the apple mixture into the pie crust, making sure to distribute it evenly. Dot the filling with small pieces of unsalted butter for added richness.
-
Roll out the second pie crust and place it over the apple filling. You can either leave it whole and cut slits for steam vents or create a lattice design with strips of dough.
-
If using a whole top crust, cut several slits in the top to allow steam to escape. Crimp the edges of the top and bottom crusts together to seal the pie.
-
Brush the top crust with the beaten egg to give it a golden finish while baking. Sprinkle a little extra sugar over the top if desired.
-
Place the pie on a baking sheet to catch any drips, then bake in the preheated oven for 15 minutes.
-
After 15 minutes, reduce the oven temperature to 350°F (175°C) and continue baking for an additional 30-35 minutes, or until the crust is golden brown and the apple filling is bubbly.
-
Once baked, remove the pie from the oven and let it cool for at least 2 hours before serving to allow the juices to set.
Note
- For added flavor, consider including a pinch of ground cloves or allspice in the apple filling.
- This pie is great served warm with a scoop of vanilla ice cream or a dollop of whipped cream.
- You can use a mixture of different apples for a more complex flavor profile.
- If the crust edges begin to brown too quickly, you can cover them with strips of aluminum foil.

