

Soft, buttery oat crumble meets a bright, tangy braid of fresh raspberries in these irresistible bars. Each bite delivers a gentle crunch from the oats and a tender, golden crust that gives way to a juicy raspberry center, creating a symphony of textures that feels both comforting and exciting. With just the right balance of sweetness from brown and granulated sugars, and a zing of lemon juice to wake up your taste buds, these Raspberry Crumble Bars are the perfect handheld treat for any time of day.
If you’re new to baking or just looking for an easy dessert to brighten your week, this recipe is a dream come true. In about 15 minutes of prep, 40 minutes in the oven, and a 30-minute resting period, you’ll have bars you can slice and serve to friends, family, or simply savor yourself. Designed as a beginner-friendly dessert, each bar clocks in at roughly 190 kcal, making them an ideal pick-me-up with your afternoon coffee or a crowd-pleaser at potlucks and picnics.
I still remember the first time I whisked together the crumble mixture—the aroma of brown sugar and butter dancing in my little kitchen, while juicy raspberries bubbled just enough to peek through the golden topping. It felt like magic to press that buttery dough into the pan, dollop a mountain of berries, and sprinkle on more crumbs. Baking those bars turned into a weekend ritual: warm squares for brunch, cool slices for lazy movie nights, and always smiles all around. Trust me, once you taste that sweet-tart filling nestled in a buttery crust, these bars will become a regular in your recipe rotation.
KEY INGREDIENTS IN RASPBERRY CRUMBLE BARS
Before we roll up our sleeves and bake, let’s talk about the pantry heroes that make these bars so magical:
- All-purpose flour
Provides the sturdy foundation for both the crust and the topping, ensuring your bars hold together beautifully without being too dense.
- Rolled oats
Adds chewiness and a rustic texture, giving each bite a satisfying oat-forward crunch.
- Packed brown sugar
Brings a deep, caramel-like sweetness and a touch of moisture, enhancing the buttery flavor in the crumble.
- Baking powder
Gives the crust a subtle lift and gentle rise, keeping it light instead of rock-hard.
- Salt
Balances the sweetness and sharpness of the raspberries, while also enhancing the overall flavor profile.
- Unsalted butter
When worked into the dry ingredients cold, it creates those signature flaky pockets and golden edges in both crust and topping.
- Egg
Acts as a binder to hold the crust together, giving it structure and a tender crumb.
- Vanilla extract
Infuses the dough with a warm, aromatic backdrop that complements the fruit’s tartness.
- Fresh raspberries
Offer a bright, juicy burst and natural tartness; can be swapped with thawed, drained frozen berries for convenience.
- Granulated sugar
Sweeter and finer, it helps draw out the raspberries’ juices and thickens the filling.
- Cornstarch
Works as a thickening agent so that the raspberry juices don’t turn your bars into a soggy mess.
- Lemon juice
Just a splash brightens the berry mixture, balancing sweetness with a zesty kick.
HOW TO MAKE RASPBERRY CRUMBLE BARS
Ready to bake? Follow these steps for perfect layers of crust, filling, and crumble:
1. Preheat your oven to 350°F (175°C). Grease and line an 8×8-inch square baking pan with parchment paper, leaving an overhang on two sides for easy removal.
2. In a medium bowl, combine the all-purpose flour, rolled oats, brown sugar, baking powder, and salt. Stir until every ingredient is evenly incorporated.
3. Add the cold, cubed butter to the flour mixture. Using a pastry cutter or clean fingers, work the butter in until the mix resembles coarse crumbs with pea-sized bits of butter throughout.
4. Crack in the egg and pour in the vanilla extract. Mix until the dough just comes together. Reserve 1 cup of this mixture for the topping, and set it aside.
5. Transfer the remaining dough to the prepared pan. Use the back of a spoon or your fingertips to press it evenly into the bottom, forming the crust layer.
6. In a separate bowl, combine the raspberries, granulated sugar, cornstarch, and lemon juice. Gently toss until the berries are coated and the sugar begins to draw out their juices.
7. Spread the raspberry filling evenly over the pressed crust, making sure to cover every corner.
8. Sprinkle the reserved crumble mixture over the raspberry layer, patching any gaps so the filling is fully covered.
9. Bake for 35–40 minutes, or until the topping turns golden brown and the filling is bubbling at the edges.
10. Let the bars cool in the pan for about 10 minutes, then use the parchment overhang to lift them onto a wire rack. Allow them to reach room temperature before slicing into squares or bars.
SERVING SUGGESTIONS FOR RASPBERRY CRUMBLE BARS
These bars are a versatile treat that shines in many settings—from casual brunches to elegant tea parties. Have fun elevating each serving with these delicious ideas:
- Serve warm bars with a generous dollop of whipped cream, letting the cream melt into the still-tender crumbs for a dreamy, dessert-café vibe.
- Chill the bars completely and top each square with a scoop of cold vanilla ice cream, creating a contrast between crisp crumble and creamy cold.
- Lightly dust the cooled bars with powdered sugar for a pretty presentation and just a hint of extra sweetness.
- Pair bars with afternoon tea or strong coffee, setting out a selection of herbal and black teas to complement the fruit’s zest and the buttery crust’s richness.
HOW TO STORE RASPBERRY CRUMBLE BARS
With their satisfying texture and bold flavor, these bars are just as delightful the next day. Here are some tips to keep them fresh:
- Room Temperature Storage
Place cooled bars in an airtight container layered with parchment paper. Store at room temperature for up to 2 days, keeping the crumble crisp.
- Refrigerator
For longer freshness, stack bars in a sealed container and chill in the refrigerator for up to 5 days. Let them come to room temperature or warm slightly before serving.
- Freezer
Individually wrap each bar in plastic wrap and store in a freezer-safe bag. Freeze for up to 3 months. Thaw at room temperature or gently reheat in a low oven to restore crispness.
- Reheating
Warm a single bar in the microwave for 10–15 seconds, or pop a few in a 300°F oven for 5–7 minutes to bring back that freshly-baked texture.
CONCLUSION
Raspberry Crumble Bars bring together the best of both worlds: a buttery oat crumble that’s golden and crisp, paired with a vibrant, tangy berry filling that bursts with fruity goodness. From mixing the simple dough to pressing it into the pan, pouring over the ruby filling, and sprinkling on more crumbs, you’ll love how straightforward and rewarding this recipe is. With beginner-friendly steps and easily swapped ingredients—like using frozen berries in a pinch—this dessert is perfect for anyone looking to add a homemade touch to their baking repertoire. Feel free to bookmark, print, or save this article for later reference so you can whip up a batch whenever that craving strikes.
Whether you’re serving these at a family gathering, treating yourself after a long day, or gifting a pan to a friend, these bars always bring smiles. Don’t forget, you can find an FAQ below to address common questions if you need more guidance or troubleshooting tips. If you give these Raspberry Crumble Bars a try, I’d love to hear how they turned out! Drop a comment, share your tweaks, or ask any questions—happy baking!
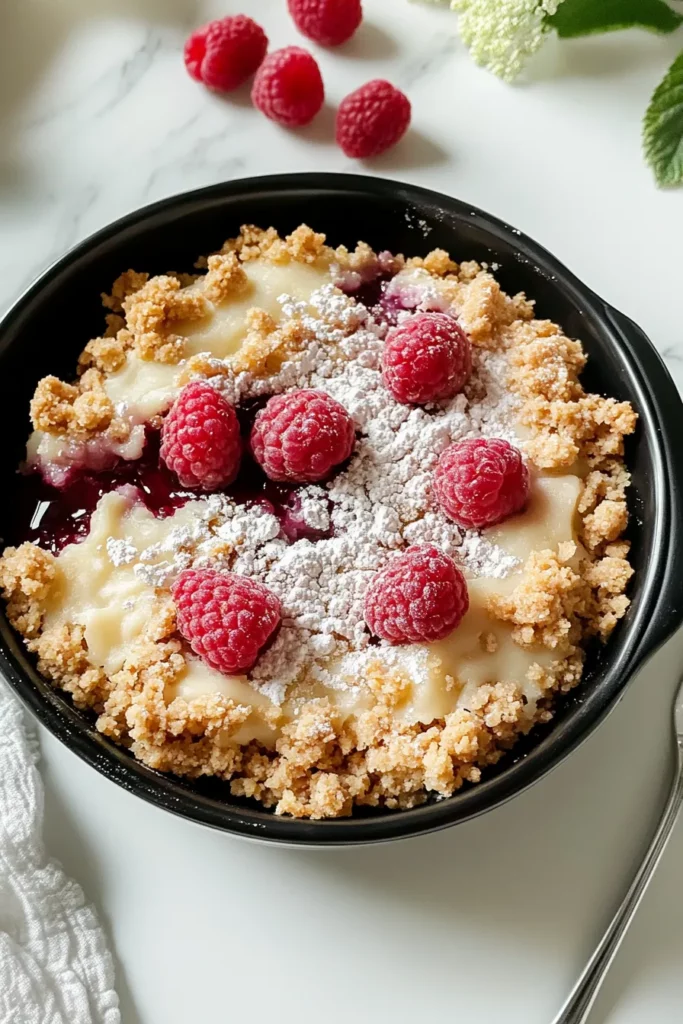

Raspberry Crumble Bars
Description
Enjoy sweet-tart raspberries nestled between a golden oat crust and crunchy crumble topping, bursting with buttery richness and bright fruit flavors in every chewy, irresistible bite.
Ingredients
Instructions
-
Preheat your oven to 350°F (175°C). Grease and line an 8x8-inch square baking pan with parchment paper, leaving an overhang for easy removal later.
-
In a medium-sized bowl, combine the all-purpose flour, rolled oats, brown sugar, baking powder, and salt. Stir until everything is evenly mixed.
-
Add the cold cubed butter to the flour mixture and, using a pastry cutter or your fingers, work the butter into the dry ingredients until the mixture resembles coarse crumbs.
-
Add the egg and vanilla extract to the mixture. Stir it together until the dough begins to form. Set aside 1 cup of this mixture to be used for the crumble topping later.
-
Press the remaining dough into the bottom of the prepared baking pan to form the crust layer. Use the back of a spoon or your fingers to press it down evenly.
-
In a separate bowl, combine the raspberries, granulated sugar, cornstarch, and lemon juice. Stir gently to coat the raspberries in the sugar mixture.
-
Spread the raspberry filling evenly over the crust layer in the pan.
-
Sprinkle the reserved crumble mixture over the raspberry filling, covering it completely.
-
Bake in the preheated oven for 35-40 minutes, or until the top is golden brown and the raspberry filling is bubbling.
-
Allow the bars to cool in the pan for about 10 minutes before transferring to a wire rack to cool completely. Once cool, cut into squares or bars and serve.
Note
- For extra flavor, try adding a pinch of cinnamon or nutmeg to the crumble topping.
- If you don't have fresh raspberries, frozen ones work just as well. Be sure to thaw and drain them before using.
- These bars can be stored in an airtight container for up to 5 days.
- For a slightly different twist, try using other berries such as blueberries, blackberries, or strawberries.
- Serve with a dollop of whipped cream or vanilla ice cream for an indulgent dessert!

