

If you’ve ever craved a sandwich that feels like a fiesta in every forkful, this Rainbow Grilled Cheese is here to make your cheesy dreams come true. Every bite boasts a kaleidoscope of melty cheddar, mozzarella, and vibrantly colored cheese that effortlessly bridges the gap between comfort food and playful creativity. There’s something undeniably joyful about slicing into a perfectly grilled sandwich and revealing those stripes of red, yellow, green, blue, and purple. It’s like unwrapping a present you get to eat—and who wouldn’t want a gift like that for lunch or a cozy dinner?
I can’t help but smile when I remember the first time I whipped these up for my niece’s birthday brunch. She squealed as the rainbow peeked out, and even my pickiest eater gobbled hers down. The bread crisped to golden perfection, the butter added that irresistible richness, and the blend of cheeses—some sharp, some mild, some subtly veggie-infused—melted together in gooey harmony. Whether you’re feeding tiny taste testers or simply want to brighten your own meal, this sandwich brings home the magic of color and gooey goodness in one handheld delight. Plus, it comes together in under half an hour, with just a few pantry staples and some fun food coloring (or natural veggie juices) to dial up the wow factor. Let’s turn your usual grilled cheese into a dazzling rainbow and make lunch feel like a celebration!
KEY INGREDIENTS IN RAINBOW GRILLED CHEESE
Before we dive into the fun part—grilling those colorful layers—let’s talk about the building blocks that make this sandwich spectacular. Each ingredient plays its part, from the foundation to the final flourish of purple cabbage or natural coloring.
- White bread
Soft but sturdy enough to get that golden crust, white bread is our canvas. It soaks up the butter beautifully and crisps up just right without overpowering the cheese.
- Unsalted butter
This adds richness and helps achieve a satisfyingly crunchy exterior. You can whisk in a pinch of garlic powder or sea salt for an extra flavor boost.
- Cheddar cheese slices
Classic sharpness that melts smoothly and provides a solid base for our red layer—perfect for depth of flavor.
- Mozzarella cheese slices
Known for its gooey stretchiness, mozzarella ensures every bite has that dreamy melt we all love in a grilled cheese.
- Red cheddar cheese
Grated and tinted with red coloring or beet juice, this layer gives that vivid pop of color plus a sharp, nutty taste.
- Yellow cheddar cheese
Brazenly sunny and slightly milder, yellow cheese adds a familiar cheddar punch without overwhelming heat.
- Green spinach cheese
Whether naturally green from spinach juice or tinted with food coloring, this cheese brings a subtle veggie note and vibrant hue.
- Blue cheese
Use a mild, creamy blue cheese or blue-tinted cheese blend for a smooth, tangy addition that melts into the rainbow.
- Purple cabbage
Finely shredded to lend a natural purple shade, it provides a gentle crunch and an unexpected veggie twist.
- Food coloring or vegetable juices
Red, yellow, green, blue, and purple—these dyes (or juices like beetroot and spinach juice) transform ordinary cheese into a playful palette.
HOW TO MAKE RAINBOW GRILLED CHEESE
Ready to transform these ingredients into a colorful masterpiece? Follow these steps for perfectly layered, gooey goodness:
1. Start by preparing your bread slices. Spread butter on one side of each slice, making sure to cover the entire surface evenly. This ensures a crispy, golden texture when grilled.
2. Lay out your cheese slices. For the rainbow effect, separate the cheese into five groups: red, yellow, green, blue, and purple. The red group is traditional cheddar, yellow is a mild cheddar or similar cheese, green can be spinach-based cheese, blue cheese (mild and soft) or a blue-tinted option, and purple comes from shredded cabbage.
3. Apply food coloring or natural vegetable juice to the grated cheese. Color each portion as follows:
- Red: Tint grated cheddar with a few drops of red food coloring or beet juice.
- Yellow: Use regular yellow cheddar or add a hint of yellow food coloring.
- Green: Drizzle spinach juice or green food coloring over the green cheese.
- Blue: Mix blue food coloring into mild blue cheese.
- Purple: Use finely shredded purple cabbage for a natural purple tone.
4. Now it’s time to assemble the sandwich. Place one slice of bread butter-side-down on a clean surface.
5. Add a layer of each colored cheese, starting with red at the bottom, followed by yellow, green, blue, and purple. Layer evenly to ensure each bite is a rainbow.
6. Once the cheese is perfectly stacked, cover with the second slice of bread, butter-side-up.
7. Heat a skillet or non-stick pan over medium heat. Once it’s hot, gently add the sandwich to the pan.
8. Grill the sandwich for 3–4 minutes on each side, or until the bread is golden brown and crispy. Press down lightly with a spatula to encourage even melting and a uniform crust.
9. When it’s done, transfer the sandwich to a cutting board, slice it in half, and let the vibrant rainbow inside steal the show!
SERVING SUGGESTIONS FOR RAINBOW GRILLED CHEESE
To make your rainbow creation even more memorable, consider these fun serving ideas. Each suggestion can turn a simple sandwich into a shareworthy treat perfect for gatherings, kids’ parties, or an Instagram-ready lunch plate.
- Serve with a steaming bowl of tomato basil soup for the ultimate cozy combo. The tangy soup balances the rich cheese, and you can even swirl a little cream for extra visual flair.
- Pair with fresh fruit skewers to add a juicy, refreshing counterpoint. Think melon balls, strawberry slices, and pineapple chunks threaded onto colorful sticks.
- Cut the grilled cheese into bite-sized triangles or fun shapes using cookie cutters. Arrange them on a platter for a playful appetizer at your next party.
- Add a side of herbed pickles or spicy pickled veggies for a zesty crunch that contrasts beautifully with the melty, buttery sandwich.
HOW TO STORE RAINBOW GRILLED CHEESE
Leftovers of this cheesy masterpiece can still be delightful if stored properly. To preserve freshness, color vibrancy, and that signature crispiness, follow these tried-and-true methods:
- Airtight container in the refrigerator
Place cooled sandwiches in a single layer or separated by parchment paper. Store for up to two days to maintain freshness without sogginess.
- Reheat in a toaster oven or skillet
Rather than microwaving, pop the sandwich back into a preheated skillet or toaster oven to recapture that golden crust and melty interior.
- Freezing for longer storage
Wrap each sandwich tightly in plastic wrap and place inside a freezer-safe bag. Freeze for up to one month. Thaw overnight in the fridge before reheating.
- Separate cheese layers in advance
If you want to prep ahead, assemble and color the grated cheeses in zip-top bags. Store in the fridge for up to two days, then simply layer and grill when ready.
CONCLUSION
Rainbow Grilled Cheese is more than just a sandwich—it’s an invitation to play with your food, brighten your plate, and share a little extra joy at mealtime. From the first golden-crisp bite to the vivid spectrum of cheese that stretches across each slice, this recipe embodies the fun and comfort we crave. Whether you’re packing lunches for little ones, hosting a colorful brunch, or simply treating yourself after a long day, this sandwich turns the ordinary into something truly magical. Feel free to print this article and save it for later so next time you need a quick burst of color and flavor, you’ll have everything at your fingertips.
Don’t forget, there’s an FAQ below if you’re curious about substitutions, allergies, or troubleshooting your cheese layers. I’d love to hear how your rainbow grilled cheese turns out—drop a comment, share your tips, or ask any questions if you hit a snag. Your feedback, stories, and creative twists are what make cooking fun and community-driven. Happy grilling, and may your sandwiches always be as bright and delicious as a rainbow!
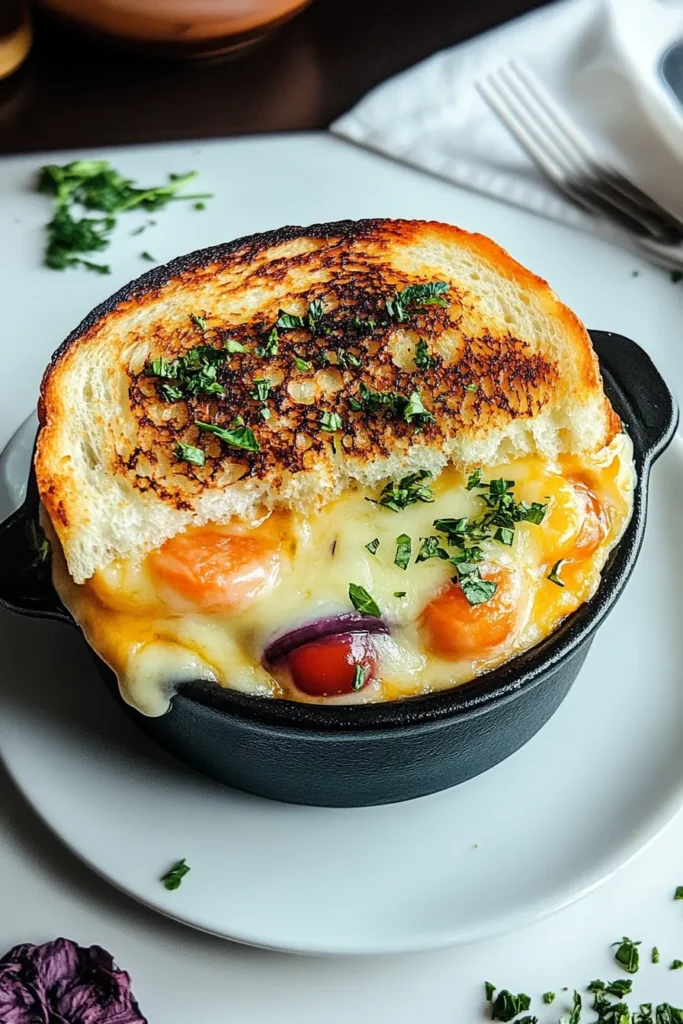

Rainbow Grilled Cheese
Description
Every bite features gooey cheddar and mozzarella layered with vibrant red, yellow, green, blue, and purple hues for a crunchy, cheesy rainbow experience.
Ingredients
Instructions
-
Start by preparing your bread slices. Spread butter on one side of each slice of bread. Make sure to cover the entire surface evenly for a crispy golden texture.
-
Lay out your cheese slices. For the rainbow effect, separate the cheese into five groups (red, yellow, green, blue, purple). The red group is cheddar cheese, yellow is the classic cheddar or a mild cheese, green can be spinach-based cheese, blue cheese (mild, soft) or a blue-tinted option, and purple can be achieved by using purple cabbage.
-
Apply food coloring or natural vegetable juice to the grated cheese. You can divide the cheese colors as follows:
-
- Red: Color the grated cheddar with a few drops of red food coloring or beet juice.
-
- Yellow: Use regular yellow cheddar or color it slightly with yellow food coloring.
-
- Green: Use spinach juice or green food coloring on the green cheese.
-
- Blue: Use blue food coloring or a mild blue cheese.
-
- Purple: Shred purple cabbage to create a natural purple hue.
-
Now it's time to assemble the sandwich. Place one slice of bread butter-side-down on a clean surface.
-
Add a layer of each colored cheese. Start with red at the bottom, followed by yellow, green, blue, and purple, layering them evenly.
-
Once the cheese is layered, cover the sandwich with the second slice of bread, butter-side-up.
-
Heat a skillet or non-stick pan over medium heat. Once hot, add the sandwich to the skillet.
-
Grill the sandwich for 3-4 minutes on each side, or until golden brown and crispy. Press down lightly with a spatula to ensure the cheese melts well and the bread crisps evenly.
-
Once done, remove the sandwich from the skillet, cut it in half, and reveal the beautiful rainbow effect inside.
Note
- To add extra flavor, you can mix some garlic powder or a pinch of salt to your butter before spreading it on the bread.
- For a smoother melt, use a combination of cheeses like mozzarella and cheddar.
- Use natural vegetable juices for coloring instead of artificial food coloring for a more wholesome touch.
- This recipe is great for kids and makes for an eye-catching dish for parties or gatherings.
- Experiment with different cheese flavors to create a unique taste for your rainbow grilled cheese!

