

Crisp layers of buttery pastry give way to a creamy, spiced filling that feels like a warm hug on a chilly morning. From the moment you unwrap that thawed puff pastry sheet, there’s an exciting promise of golden layers and pillowy air pockets waiting to be discovered. As the oven springs to life, the kitchen fills with whispers of cinnamon and nutmeg, teasing your senses with what’s to come. Bite after bite, the slight tang of cream cheese dances with the sweetness of pumpkin puree, while vanilla extract adds a smooth finish that lingers on the tongue. It’s a simple symphony of flavors—each ingredient playing its part in perfect harmony to create a treat that’s both sophisticated and comforting.
These danishes are more than just a seasonal indulgence—they’re an invitation to pause and savor the little moments. Whether you’re hosting a cozy brunch or crafting a special weekend breakfast for loved ones, these pastries bring people together around the table. The tender folds of pastry cradle the luscious filling, creating a fun pocket that’s as delightful to assemble as it is to devour. Every step, from rolling out the dough to that final dusting of powdered sugar, feels like a mini celebration of fall’s best flavors. And trust me, knowing that only a handful of pantry staples stand between you and this warm, flaky magic makes the whole process feel utterly achievable—even for beginners.
KEY INGREDIENTS IN PUMPKIN CREAM CHEESE DANISH
Before you dive into these delightful danishes, let’s get acquainted with the star players. Each ingredient brings its own magic, transforming a few simple staples into a show-stopping fall treat.
- Puff pastry
This ready-to-bake sheet provides the signature flakiness, rising with buttery layers that create a golden, tender shell. Its light texture is the perfect canvas for our creamy filling.
- Cream cheese
Silky and tangy, cream cheese adds richness and body to the filling. When softened, it blends effortlessly with pumpkin puree, creating that dreamy, velvety center.
- Pumpkin puree
This smooth, naturally sweet puree brings autumnal warmth and a subtle earthiness. It’s the heart of the filling, infusing each bite with a hint of festive comfort.
- Granulated sugar
A touch of sugar balances the tang of cream cheese and brightens the pumpkin, ensuring each mouthful has the right level of sweetness.
- Vanilla extract
Just a splash of vanilla deepens the flavor profile, lending a fragrant, mellow note that complements the pumpkin and spices.
- Ground cinnamon
Warm and aromatic, cinnamon adds depth and a cozy spice kick, making every bite feel like a seasonal embrace.
- Ground nutmeg
A pinch of nutmeg enhances the overall spiciness with its woody, slightly sweet undertones, rounding out the flavor blend.
- Egg
Beaten into an egg wash, this ingredient brings a glossy finish and helps the pastries turn a perfect golden-brown hue.
- Powdered sugar
A light dusting of this optional finishing touch adds a delicate sweetness and an elegant look, making each danish feel extra special.
HOW TO MAKE PUMPKIN CREAM CHEESE DANISH
Now that our ingredients are lined up, let’s transform them into flaky, pumpkin-filled pockets of perfection. Follow these detailed steps and you’ll soon be enjoying golden treats straight from your oven.
1. Preheat the oven to 400°F (200°C). Line a baking sheet with parchment paper to prevent sticking and make cleanup a breeze.
2. Roll out the puff pastry on a lightly floured surface, ensuring even thickness. Using a sharp knife or pizza cutter, cut the sheet into eight equal rectangles for uniform baking.
3. In a mixing bowl, combine the softened cream cheese, pumpkin puree, granulated sugar, vanilla extract, ground cinnamon, and ground nutmeg. Use a spatula to mix until the filling is smooth and well incorporated, with no lumps.
4. Spoon a generous tablespoon of the pumpkin cream cheese mixture into the center of each puff pastry rectangle, keeping the edges clean for easy folding.
5. Fold the corners of each rectangle toward the center, overlapping them slightly to create a sealed pocket. Gently press the edges to secure the filling.
6. Arrange the filled pastries on the prepared baking sheet, leaving at least an inch of space between each danish to allow for expansion.
7. Brush the top of each pastry with the beaten egg, creating an egg wash that will give the danishes a gorgeous, glossy finish.
8. Bake for 15–20 minutes or until the pastries are golden brown and puffed. Keep an eye on them as ovens can vary.
9. Remove the tray from the oven and let the danishes cool slightly on a wire rack, allowing the filling to set without becoming soggy.
10. If desired, finish with a dusting of powdered sugar for an elegant, bakery-style presentation before serving.
SERVING SUGGESTIONS FOR PUMPKIN CREAM CHEESE DANISH
Once these little pockets of joy emerge from the oven, it’s time to think about the best ways to enjoy them. Whether you’re sharing them with friends or savoring a quiet morning treat, serving can elevate the experience even further. The warm, flaky layers pair beautifully with a variety of accompaniments and presentation styles, making these danishes as versatile as they are delicious. From casual gatherings to elegant brunch spreads, these suggestions will help you make the most of every bite and leave a lasting impression on anyone lucky enough to indulge.
- Serve the danishes warm straight from the oven on a rustic wooden board, with a light dusting of powdered sugar and a scattering of fresh cranberries or pomegranate seeds for a pop of color.
- Pair each pastry with a spiced latte (think cinnamon, nutmeg, and a hint of clove) to mirror the filling’s flavors, creating a cozy café vibe at home.
- Offer a side of whipped cream or homemade cinnamon whipped topping, sprinkled with extra ground cinnamon, so guests can add an extra dollop for richness.
- Create a seasonal brunch platter by arranging the danishes alongside fresh fruit slices, candied pecans, and small jars of maple syrup or honey for drizzling.
HOW TO STORE PUMPKIN CREAM CHEESE DANISH
Keeping these danishes fresh and flaky is all about the right technique. Stored properly, they can maintain their delightful texture and flavor for days—even if you can’t resist nibbling on one (or two!) right away. Whether you’re planning ahead for a weekend brunch or want to savor leftovers, these storage tips will help you preserve the perfect bite without sacrificing that signature flakiness or creamy center.
- Store at room temperature in an airtight container, separating layers with parchment paper to prevent sticking. They’ll stay fresh for up to two days, ideal for quick morning treats.
- For longer life, place cooled pastries in the refrigerator inside a sealed container. This helps the filling stay firm and the pastry crisp, lasting up to four days. Let them come to room temperature before serving.
- To enjoy later, freeze individual danishes on a baking sheet until solid, then transfer to a freezer-safe bag or container. Freeze for up to one month. Reheat from frozen in a 350°F oven for 10–12 minutes until warmed through.
- When ready to eat, always reheat in the oven rather than the microwave to restore the flaky layers. A quick 5–7 minute warm-up at 350°F will revive that fresh-out-of-the-oven crispness.
CONCLUSION
What began as a humble sheet of puff pastry has blossomed into an irresistible treat that captures the essence of fall in every bite. From the first step of preheating your oven to the final flourish of a powdered sugar dusting, this Pumpkin Cream Cheese Danish recipe marries simplicity with flavor, making it a perfect project for bakers of all skill levels. The creamy, lightly spiced filling contrasts beautifully with the golden, flaky layers, while the optional tweaks—like adding ground cloves or chopped nuts—invite endless experimentation. You can easily print and save this article for your recipe collection, revisiting it whenever that craving for a warm, comforting pastry strikes.
Feel free to scroll down to the FAQ section for answers to common questions, tips on troubleshooting, and more ways to customize these danishes for your taste. If you try this recipe, I’d love to hear how it turns out! Drop a comment below with your thoughts, variations you’ve explored, or any questions you have about the process. Whether you’re seeking guidance on folding techniques or curious about alternative toppings, I’m here to help you bake the most delicious danishes your kitchen has ever seen. Happy baking!
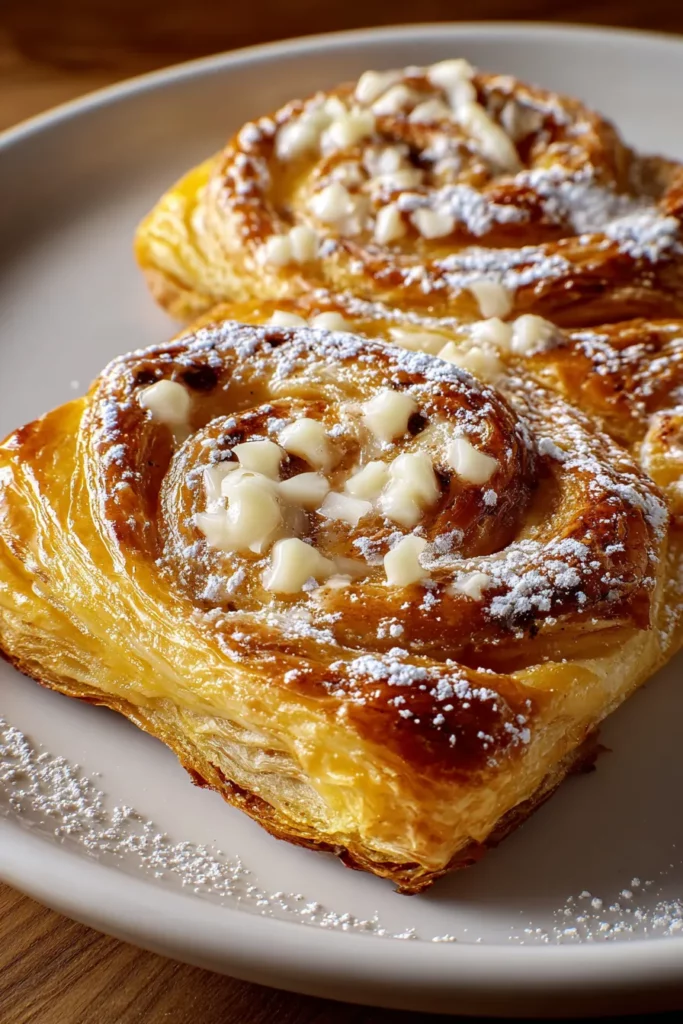

Pumpkin Cream Cheese Danish
Description
These Pumpkin Cream Cheese Danishes are a delightful fusion of flaky pastry and a spiced cream cheese filling, making them a perfect treat for any occasion.
Ingredients
Instructions
-
Preheat the oven to 400°F (200°C). Line a baking sheet with parchment paper.
-
Roll out the thawed puff pastry sheet on a lightly floured surface. Cut into 8 equal rectangles.
-
In a mixing bowl, combine the softened cream cheese, pumpkin puree, granulated sugar, vanilla extract, ground cinnamon, and ground nutmeg. Mix until smooth and well incorporated.
-
Place a generous tablespoon of the pumpkin cream cheese mixture in the center of each puff pastry rectangle.
-
Fold the corners of each rectangle towards the center, overlapping slightly, to create a pocket.
-
Arrange the filled pastries on the prepared baking sheet, leaving some space between them.
-
Brush the top of each pastry with the beaten egg to add shine.
-
Bake in the preheated oven for 15-20 minutes or until the pastries are golden brown and puffy.
-
Remove from the oven and let them cool slightly on a wire rack.
-
Dust with powdered sugar before serving, if desired.
Note
- For a richer flavor, you can add a pinch of ground cloves to the filling.
- Experiment with different shaped cuts and folds for the pastry to vary presentation.
- These pastries are best enjoyed fresh but can be stored in an airtight container at room temperature for up to 2 days.
- Adding chopped nuts or raisins to the filling can add extra texture and taste.

