

There’s something magical about creamy cheesecake folded into autumn’s favorite flavor. These Pumpkin Cheesecake Truffles capture that irresistible combination in every bite. Soft, pillowy centers infused with real pumpkin puree and warm pumpkin pie spice are wrapped in a smooth white chocolate shell. I still remember the first time I popped one into my mouth: the slight tang of cream cheese met the sweet whisper of white chocolate and the earthy sweetness of pumpkin, playing a symphony of cozy fall notes on my taste buds. As a busy home cook who loves to experiment, I couldn’t believe how effortless these little bites were to make. With just a handful of pantry staples, you can whip up a batch that looks as stunning on a dessert table as they taste dreamy on the tongue.
Friends often ask me how such sophisticated flavors can come from a beginner-friendly recipe, and the secret is in smart shortcuts like melting white chocolate chips in short bursts and using canned pumpkin puree for consistent texture. The resting time in refrigeration gives the mixture a chance to set perfectly, so rolling and coating become a breeze. Whether you’re planning a holiday party, baking gifts for neighbors, or simply craving something sweet to pair with your afternoon latte, these truffles check every box. They store beautifully, travel well, and even hold up to curious little hands—just be prepared for requests to make them again and again!
KEY INGREDIENTS IN PUMPKIN CHEESECAKE TRUFFLES
Before diving into the method, let’s get acquainted with the simple yet mighty ingredients that transform into these dreamy truffles. Each component plays a starring role, building layers of flavor and texture. Gather these essentials and get ready to turn your kitchen into an autumn wonderland.
- White chocolate chips
These lend a creamy, sweet foundation that melts down into a velvety base. Their high cocoa butter content ensures the truffle centers hold together with a smooth consistency.
- Canned pumpkin puree
Packed with autumnal goodness, the pumpkin puree contributes a buttery texture and gentle sweetness. It also brings that classic fall color and a hint of earthy flavor.
- Graham cracker crumbs
Offering subtle crunch and toasty notes, these crumbs help bind the mixture and add a nostalgic nod to pumpkin pie crust in every nibble.
- Cream cheese
Softened cream cheese gives a tangy richness and luscious body to the truffle, balancing out the sweet white chocolate and spiced pumpkin.
- White chocolate (for coating)
Melted into a glossy shell, this extra layer of white chocolate creates a delightful snap when you bite in, sealing in all the creamy goodness.
- Pumpkin pie spice
A warm bouquet of cinnamon, nutmeg, ginger, and cloves infuses the truffles with that unmistakable holiday essence, making them feel festive and comforting.
- Vanilla extract
Just a touch of vanilla rounds out the flavors, enhancing sweetness and tying all the components together in harmonious bliss.
- Salt
A small pinch lifts the sweetness, sharpens the spices, and ensures each flavor note pops on your palate.
- Additional graham cracker crumbs or finely chopped nuts (optional)
Rolling the truffles in these adds texture and visual interest, giving you the freedom to customize with crunchy perfection.
HOW TO MAKE PUMPKIN CHEESECAKE TRUFFLES
Turning these ingredients into luscious truffles is straightforward and almost meditative. In just a few stages—melting, mixing, chilling, shaping, and coating—you’ll create bite-sized delights that are as much fun to make as they are to devour.
1. In a medium microwave-safe bowl, melt the white chocolate chips in 20-second intervals, stirring between each until the mixture is completely smooth. This gradual approach prevents burning and keeps the chocolate silky.
2. Add the pumpkin puree, cream cheese, graham cracker crumbs, pumpkin pie spice, vanilla extract, and a pinch of salt to the melted white chocolate. Use a sturdy spatula to stir until everything is thoroughly combined and you have a homogeneous mixture with no streaks.
3. Cover the bowl with plastic wrap or a tight-fitting lid, then refrigerate for about 2 hours or until the mixture is firm enough to scoop and roll into balls without sticking.
4. Line a baking sheet with parchment paper to prevent sticking and make cleanup a breeze. Use a small cookie scoop or a teaspoon to portion the pumpkin mixture into 1-inch balls, placing each neatly onto the prepared sheet.
5. Transfer the baking sheet to the freezer for about 30 minutes to allow the truffle balls to harden, which makes them easier to coat later on.
6. In another microwave-safe bowl, melt the additional white chocolate for coating, again using 20-second intervals and stirring until the chocolate is fluid and glossy.
7. Working quickly, dip each chilled truffle ball into the melted white chocolate, ensuring it is fully coated. Gentle taps on the side of the bowl will remove any excess coating.
8. While the coating is still wet, sprinkle the truffles with additional graham cracker crumbs or chopped nuts for a decorative and textural finish, if desired.
9. Place the coated truffles back into the refrigerator and chill until the outer shell is set, about 30 minutes to 1 hour.
10. Once the coating is firm, transfer the truffles to an airtight container and keep them refrigerated until you’re ready to serve.
SERVING SUGGESTIONS FOR PUMPKIN CHEESECAKE TRUFFLES
When it’s time to showcase your truffles, presentation can make them feel extra special. Whether you’re hosting family, gifting to neighbors, or enjoying a cozy night in, these ideas will elevate your bite-sized masterpieces.
- Festive Dessert Platter
Arrange the truffles on a large serving tray alongside small pumpkins, autumn leaves, or sprigs of rosemary for a seasonal touch. Place them in neat rows or concentric circles so each truffle shines.
- Individual Wrapping
Wrap each truffle in a tiny square of parchment paper or place them in decorative cupcake liners. Tie a small ribbon around each for charming edible favors at bridal showers or Thanksgiving dinners.
- Coffee & Tea Pairing
Serve the truffles on a small plate beside steaming cups of pumpkin spice latte or chai tea. The creamy sweetness balances the warm spices of your beverage for a perfect afternoon pick-me-up.
- Ice Cream Garnish
Crumble a few truffles over vanilla, caramel, or cinnamon ice cream. The combination of cold ice cream and creamy truffle fragments creates a playful texture contrast that guests will adore.
HOW TO STORE PUMPKIN CHEESECAKE TRUFFLES
Proper storage keeps your Pumpkin Cheesecake Truffles tasting freshly made and maintains their perfect texture. Because these treats rely on dairy and chocolate, refrigeration is key. With a few simple steps, you’ll preserve flavor and prevent any melty mishaps.
- Refrigerator Storage
Place the truffles in a single layer in an airtight container. If stacking, separate layers with parchment or wax paper to avoid sticking. They’ll stay fresh for up to one week.
- Freezer Stash
For longer storage, freeze the truffles in a freezer-safe container with parchment between layers. Thaw overnight in the refrigerator before serving to keep their structure intact. They’re good for up to one month in the freezer.
- Individual Portions
If you plan to grab a truffle at a moment’s notice, wrap each one in plastic wrap and store in the fridge. This method helps the coating stay crack-free and makes portion control effortless.
- Travel-Ready Packaging
When transporting truffles, pack them in a chilled cooler bag with ice packs. This ensures they remain firm and arrive at your destination looking polished and ready to enjoy.
CONCLUSION
After spending time crafting these Pumpkin Cheesecake Truffles, you’ll appreciate how a handful of pantry staples can come together in such an elegant, festive way. From the creamy white chocolate base to the cozy pumpkin-spice heart, every element shines with autumn warmth. The beginner-friendly steps—which include melting, mixing, chilling, shaping, and coating—make this dessert approachable even if you’re just beginning your baking journey. With a total preparation time of about 20 minutes and a resting interval of 3 hours, these truffles are perfect for planning ahead. Whether you’re aiming to impress at a holiday gathering or simply craving a special fall treat, you’ll find these bite-sized delights are as delightful to serve as they are to savor. Don’t forget that each truffle is roughly 120 calories, making them easy to portion and perfect for sharing—though trust me, you might find yourself sneaking an extra one or two!
Feel free to print this article or save it to your favorite recipe binder so you can return to it whenever the mood for something sweet and seasonal strikes. You can also scroll down to the FAQ below for answers to common questions about making, coating, and storing your truffles—whether you want guidance on flavor variations or tips on achieving that flawless white chocolate shell. As always, I’d love to hear how your batch turns out! Drop a comment if you tried the recipe, share any tweaks you made, or ask questions if you need a helping hand. Your feedback and stories bring this recipe to life and inspire fellow home cooks to embrace the joy of making their own homemade truffle treats. Happy baking, and here’s to many more cozy moments with delicious bites in hand!
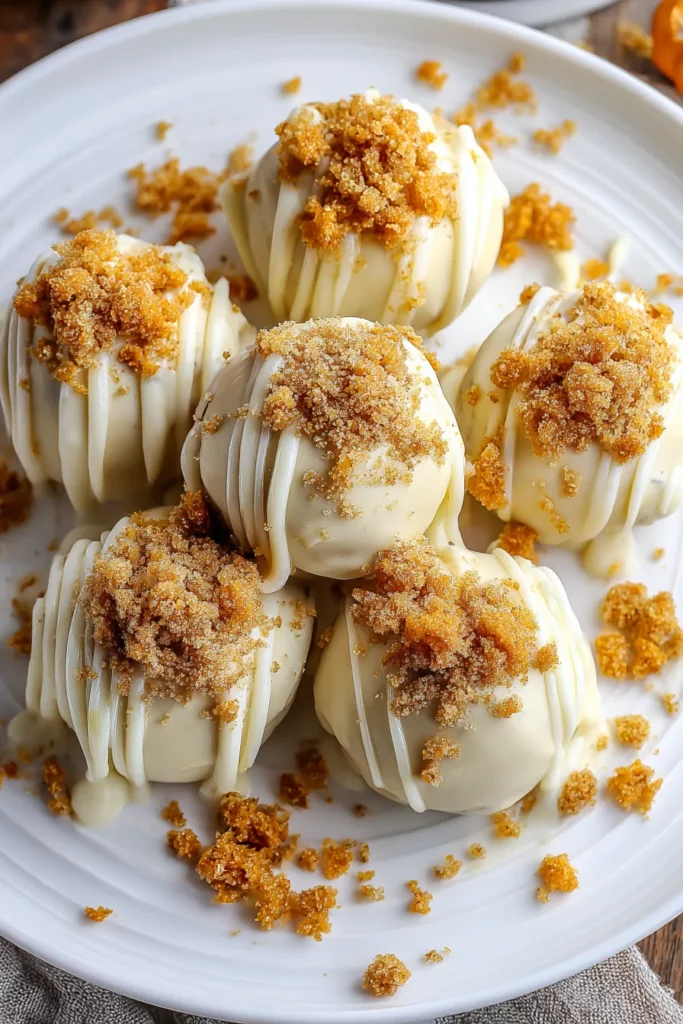

Pumpkin Cheesecake Truffles
Description
These velvety pumpkin cheesecake truffles bring together rich cream cheese, warm spices, and a white chocolate coating, creating a sweet treat that celebrates autumn flavors in every bite.
Ingredients
Instructions
-
In a medium microwave-safe bowl, melt the white chocolate chips in 20-second intervals, stirring in between until completely smooth.
-
Add the pumpkin puree, cream cheese, graham cracker crumbs, pumpkin pie spice, vanilla extract, and a pinch of salt to the melted white chocolate. Stir until thoroughly combined and smooth.
-
Cover the mixture and refrigerate for about 2 hours or until it is firm enough to scoop and roll into balls.
-
Line a baking sheet with parchment paper. Scoop the pumpkin mixture into 1-inch balls and place them onto the prepared baking sheet.
-
Place the truffle balls in the freezer for about 30 minutes to harden.
-
Melt the additional white chocolate for coating in a microwave-safe bowl, using 20-second intervals as before, until smooth.
-
Dip each truffle ball into the melted white chocolate, ensuring it is fully coated, and return it to the parchment-lined baking sheet.
-
While the coating is still wet, you can sprinkle additional graham cracker crumbs or chopped nuts on top for an extra decorative touch, if desired.
-
Refrigerate the truffles until the coating is set, about 30 minutes to 1 hour.
-
Once set, transfer the truffles to an airtight container and refrigerate until ready to serve.
Note
- These truffles can be stored in the refrigerator for up to one week, making them a great make-ahead dessert.
- Feel free to experiment with dark or milk chocolate for the coating for a different flavor twist.
- To add a festive touch, you can drizzle the coated truffles with a contrasting color of chocolate before the coating sets.

