

When the summer sun nudges you toward something cool and vibrant, this homemade pineapple ice cream is exactly what your freezer has been waiting for. Cool off with a creamy, tropical twist on a classic summer dessert! With each spoonful, you’ll taste the juicy burst of fresh pineapple perfectly rounded by creamy vanilla and a whisper of salt. It’s a simple recipe catering to both the beginner cook and the seasoned dessert enthusiast, offering a lovely balance of sweet acidity and dreamy texture. The best part? You’ll be whisking together milk, cream, sugar, and that golden pineapple magic in under 30 minutes, then letting Mother Nature do the rest during a few hours of chilling.
I still remember the first time I churned this batch in my little ice cream maker, the hum of the machine turning tropical nectar into silky perfection. My kitchen filled with vibrant gold hues as I peeked over the rim, spoon in hand, eager for that first taste. This pineapple ice cream bursts with the vibrant sweetness of fresh pineapple, creamy vanilla, and a hint of salt, creating a luscious treat that’s perfect for warm days or anytime you crave a sunny escape. Whether you’re hosting a backyard barbecue or simply treating yourself after a long day, this dessert is bound to transport your taste buds to an island breeze—no passport required.
KEY INGREDIENTS IN PINEAPPLE ICE CREAM
Every unforgettable dish starts with ingredients that play off each other. In this section, you’ll find the essentials that give our pineapple ice cream its luscious texture, bright flavor, and creamy finish. Gather these pantry and fridge staples, then get ready to blend, churn, and taste your way to paradise.
- Fresh pineapple chunks: The heart of this recipe, pineapple brings that signature tropical sweetness and mild acidity. Fresh fruit delivers bright, juicy flavor that canned or frozen can’t quite match.
- Heavy cream: This is what makes your ice cream rich and indulgent. Heavy cream creates a smooth, velvety mouthfeel that coats each taste bud with creamy goodness.
- Whole milk: Providing body and balance, whole milk lightens the richness of the heavy cream while maintaining a silky texture.
- Granulated sugar: More than just sweetness, sugar helps lower the freezing point of the mixture for a scoopable consistency straight from the freezer.
- Pure vanilla extract: A small splash of vanilla deepens the flavor profile, adding warm, aromatic notes that complement the bright pineapple.
- Salt: Just a pinch brings out the natural sweetness of the fruit and rounds out the creaminess, keeping every flavor note in perfect harmony.
HOW TO MAKE PINEAPPLE ICE CREAM
Transforming these ingredients into a dreamy, tropical ice cream is easier than you might think. In a few simple steps—peeling, blending, heating, chilling, and churning—you’ll have a homemade dessert that tastes like a sunshine-filled vacation.
1. Begin by peeling the ripe pineapple. Use a sharp knife to remove the top, bottom, and outer skin, then chop the flesh into bite-sized pieces. Measure 2 cups of chunks; keeping them uniform ensures each scoop feels velvety, without oversized fruit bits.
2. In a blender, puree the pineapple chunks until they form a smooth, golden base. If you love texture, reserve a few small pieces and gently fold them in later to create delightful bursts of fruit.
3. In a medium saucepan, combine the pureed pineapple, heavy cream, whole milk, granulated sugar, pure vanilla extract, and a pinch of salt. Stir everything together until it looks beautifully blended.
4. Place the saucepan over medium heat, stirring frequently to prevent scorching. Within about 5–7 minutes, the sugar will fully dissolve—just don’t let the mixture come to a boil, or you’ll risk altering the creamy texture.
5. Once the sugar has dissolved, carefully remove the saucepan from the heat. Set it aside to cool to room temperature, allowing those flavors to mingle and mellow.
6. Cover the cooled mixture and refrigerate for at least 4 hours, or ideally overnight, until it’s thoroughly chilled. This step is crucial for achieving a smooth churn.
7. Transfer the cold base into your ice cream maker and churn according to the manufacturer’s instructions—typically around 20–25 minutes. Watch as your mixture thickens into a soft-serve dream.
8. Spoon the churned ice cream into a lidded container, smoothing the top. Freeze for at least 2 hours, or until it firms up into scoopable perfection.
9. Serve scoops of your homemade pineapple ice cream and let every bite transport you to tropical skies. Enjoy this vibrant, creamy treat with friends and family.
SERVING SUGGESTIONS FOR PINEAPPLE ICE CREAM
Elevating your pineapple ice cream from delightful to unforgettable is all about presentation and complementary flavors. In this section, we’ll explore ideas for garnishes, pairings, and plating that make each scoop shine like a work of art.
- Tropical fruit bowl: Top each scoop with fresh mango, kiwi, and papaya for a colorful medley. The contrasting textures and sweet-tart notes create an island-inspired dessert that tastes as good as it looks.
- Toasted coconut crunch: Sprinkle toasted coconut flakes over the ice cream for a bit of crunch and a deeper coconut aroma. Spread the flakes on a baking sheet, toast in a 350°F oven for 5 minutes, then cool before adding.
- Lime zest drizzle: Grate fresh lime zest over the top to enhance the pineapple’s acidity. A few shreds of citrus peel add a bright, tangy contrast that wakes up the palate.
- Rum-infused sauce: Warm a few tablespoons of rum with sugar and a squeeze of pineapple juice on the stove, then drizzle over your scoop for an adults-only twist. This boozy syrup brings sophistication and a hint of warmth.
HOW TO STORE PINEAPPLE ICE CREAM
Proper storage is key to preserving the creamy texture and vibrant flavors of your homemade treat. Whether you make a big batch for a party or just want a few servings throughout the week, these tips will ensure your pineapple ice cream tastes fresh and scoopable every time.
- Use an airtight container: Transfer the ice cream into a container with a snug-fitting lid as soon as churning is complete. This prevents unwanted air exposure, which can lead to ice crystals and freezer burn.
- Press plastic wrap: Before sealing the lid, lay a piece of plastic wrap directly on the surface of the ice cream. This extra barrier keeps moisture out and maintains that silky texture we all crave.
- Freeze at the right temperature: Set your freezer to 0°F (-18°C) or lower. A consistent, cold environment stops ice crystals from forming and preserves peak flavor.
- Label and date: Use a piece of tape or a freezer-safe marker to note the preparation date on the container. Homemade ice cream is best enjoyed within two weeks for optimal taste and texture.
CONCLUSION
Bringing this pineapple ice cream recipe to life is like hosting a permanent miniature luau right in your kitchen. From the first whip of the blender through the gentle hum of the ice cream maker, you’ve crafted something truly special: a dessert that marries the tropical sweetness of fresh pineapple with the luxurious creaminess of vanilla-infused custard, all balanced by a pinch of salt. With simple, beginner-friendly steps—peeling, pureeing, heating, chilling, and churning—you’ve unlocked a treat perfect for summer days, casual gatherings, or just a cozy night in. Feel free to print this article or save it for later reference, ensuring you can revisit these tips and tricks whenever the mood for island-inspired indulgence strikes.
Below you’ll find a handy FAQ section to troubleshoot common questions and help you tweak the recipe to your liking. If you give this recipe a whirl, I’d love to hear how it turned out! Drop a comment, share your favorite garnish, or ask any questions if you need a little extra guidance. Your feedback means the world, and I’m always here to chat about all things homemade, tropical, and utterly delicious. Happy churning!
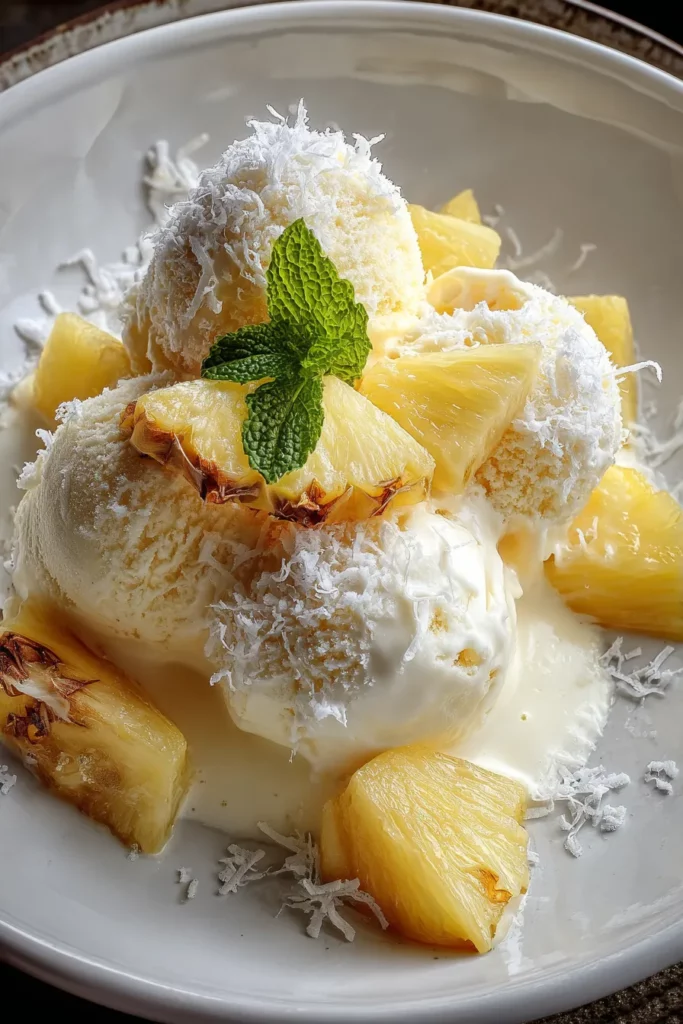

Pineapple Ice Cream
Description
This pineapple ice cream bursts with the vibrant sweetness of fresh pineapple, creamy vanilla, and a hint of salt, creating a luscious treat that’s perfect for warm days.
Ingredients
Instructions
-
Begin by peeling and chopping a fresh pineapple into small chunks. Measure 2 cups and ensure the pieces are bite-sized to avoid any large chunks in the ice cream.
-
In a blender, puree the pineapple chunks until smooth. Depending on your preference, you can leave a few small chunks for added texture.
-
In a medium saucepan, combine the pureed pineapple, heavy cream, milk, granulated sugar, vanilla extract, and a pinch of salt.
-
Heat the mixture over medium heat, stirring frequently, until the sugar fully dissolves. This process should take about 5-7 minutes. Do not allow the mixture to reach a boiling point.
-
Once the sugar has dissolved, remove the saucepan from the heat and let the mixture cool to room temperature.
-
Once cooled, cover the mixture and refrigerate for at least 4 hours or until it is completely chilled. For best results, chill overnight.
-
Pour the chilled mixture into an ice cream maker and churn according to the manufacturer’s instructions, typically around 20-25 minutes.
-
Transfer the churned ice cream to a lidded container and freeze for at least 2 hours, or until firm.
-
Serve scoops of your homemade pineapple ice cream and enjoy the tropical treat.
Note
- For a dairy-free version, replace the heavy cream and milk with coconut milk for an added tropical twist.
- Adding a dash of lemon juice can enhance the flavor of the pineapple.
- Garnish the ice cream with toasted coconut flakes or fresh pineapple slices for a delightful presentation.
- This recipe is perfect for summer barbecues or tropical-themed parties.

