

Nothing feels more satisfying on a scorching afternoon than biting into a creamy, icy treat that’s both indulgent and wholesome. These Peanut Butter and Banana Popsicles hit that sweet spot perfectly, delivering a delightful mash-up of naturally sweet ripe bananas, rich and nutty peanut butter, and the gentle tang of Greek yogurt. Each popsicle glides across your taste buds with velvety goodness, releasing bursts of golden banana and pockets of nutty flavor that feel like a nostalgic spin on your childhood favorite sandwich. Whether you’re lounging by the pool, entertaining little ones in the backyard, or simply craving a guilt-free dessert, this recipe turns everyday pantry staples into a protein-packed, freezer-friendly delight that freezes your stress away one bite at a time.
Growing up, my mom used to whip up simple banana-based treats on hot summer days: banana slices dipped in peanut butter, rolled in crushed cereal, and popped on skewers before a quick freeze. Those quick fixes inspired today’s popsicle version—only now we have the luxury of a blender to create ultra-smooth, creamy consistency that tastes downright gourmet. With just a handful of ingredients and a little time in the freezer, you’ll bring smiles to your friends and family. Plus, these popsicles are endlessly adaptable. Swap in almond butter, drizzle melted chocolate, or mix in fresh berries for a splash of color. You’ll find this recipe is more than just a popsicle—it’s a blueprint for endless summertime culinary creativity.
KEY INGREDIENTS IN PEANUT BUTTER AND BANANA POPSICLES
Every superstar recipe stands on the shoulders of its ingredients, and this one is no different. From ripe bananas lending natural sweetness to peanut butter providing creamy protein, each component has a crucial role in creating the perfect popsicle texture and flavor harmony.
- Ripe Bananas
These serve as the natural sweetener and creamy base. When well-ripened, bananas blend into a smooth consistency and unlock a deep, comforting flavor that’s richer than under-ripe fruit.
- Peanut Butter
Whether smooth or crunchy, peanut butter adds a nutty backbone, boosting protein content and creating luscious mouthfeel. The oils help bind the mixture, ensuring the popsicles aren’t icy.
- Honey or Maple Syrup
A touch of honey or maple syrup balances the tang from yogurt and intensifies sweetness without relying on refined sugar. You can tweak the amount to suit your taste.
- Greek Yogurt
Greek yogurt contributes tang, creaminess, and extra protein. It also prevents the popsicles from feeling too heavy or unnaturally frosty, lending a velvety texture.
- Vanilla Extract
A hint of vanilla rounds out flavors, adding warmth and depth. It ties the banana’s sweetness and peanut butter’s nuttiness into a harmonious whole.
- Salt
Just a pinch of salt (optional) enhances all the sweet and savory notes by balancing and amplifying flavor complexity.
- Mini Chocolate Chips or Chopped Nuts
These garnishes deliver delightful bursts of texture. The chocolate chips bring indulgence, while chopped nuts add an extra crunch.
HOW TO MAKE PEANUT BUTTER AND BANANA POPSICLES
Ready to transform these kitchen staples into frozen perfection? Follow these steps to assemble, freeze, and unveil your deliciously creamy popsicles.
1. Peel the Bananas and place them in a blender or food processor. Make sure they’re fully ripe to maximize natural sweetness and achieve a smooth consistency.
2. Add the Peanut Butter, Honey or Maple Syrup, Greek Yogurt, Vanilla Extract, and a Pinch of Salt (if using) into the blender with the bananas. Layering ingredients helps the blades catch everything evenly.
3. Blend Everything Until Smooth and Creamy. Use the pulse function first, then switch to a higher speed. Scrape down the sides to eliminate any lumps and ensure an ultra-velvety texture.
4. Pour the Mixture into Popsicle Molds. Fill each cavity almost to the top. If you crave extra texture, sprinkle in mini chocolate chips or chopped nuts before inserting the sticks.
5. Insert the Sticks into each mold and transfer the tray to the freezer. Make sure molds are level to avoid tilted sticks.
6. Freeze for at Least 4 Hours, or until completely solid. Patience is key for the perfect snap when you bite in.
7. Release the Popsicles from the Molds by running warm water over the outside of the molds for a few seconds. Gently pull out each popsicle by the stick.
SERVING SUGGESTIONS FOR PEANUT BUTTER AND BANANA POPSICLES
Serving these popsicles can be just as fun as making them. Whether you want a simple snack or an Instagram-worthy dessert, here are ideas to elevate the experience.
- Garnish with Crunch: After unmolding, sprinkle your popsicles with crushed nuts or toasted coconut flakes. Press gently to make them adhere to the surface and add a delicious contrast.
- Drizzle with Melted Chocolate: Warm up dark or milk chocolate, then swirl it over each popsicle for an extra decadent touch. Place them back in the freezer for 5–10 minutes to set the chocolate layer.
- Serve on a Platter: Arrange popsicles on a chilled tray lined with parchment paper. Surround them with fresh fruit slices like strawberries or kiwi for a vibrant, colorful presentation.
- Pair with a Dip: Whip up a quick dip by mixing Greek yogurt with a teaspoon of honey and a dash of cinnamon. Serve in small bowls so guests can dunk and enjoy two textures in one bite.
HOW TO STORE PEANUT BUTTER AND BANANA POPSICLES
Proper storage ensures your popsicles retain their creamy texture and vibrant flavor without freezer burn or ice crystals sneaking in. Follow these tips for long-lasting, delicious frozen treats.
When not enjoyed immediately, transfer any extra popsicles into a sealed, airtight container or a reusable freezer bag. Press out as much air as possible to slow down ice crystal formation and preserve the original consistency.
- Individual Wrapping: Wrap each popsicle in plastic wrap or parchment paper before placing them in a storage bag. This prevents them from sticking together and makes portioning effortless.
- Airtight Containers: Store popsicles in a rigid container with a tight‐fitting lid. Add a layer of parchment paper between pop layers to avoid clumping and ensure easy retrieval.
- Freezer Placement: Keep your popsicles in the coldest part of the freezer, away from the door where temperature fluctuations can cause partial melting and refreezing.
- Label and Date: Write the preparation date on the bag or container. While these treats stay delightful for up to 2 months, labeling helps you track freshness and rotate stock efficiently.
CONCLUSION
We’ve taken you on a delightful journey from peeling those first ripe bananas to savoring the final crunchy peek of chocolate chip or nut garnish. This Peanut Butter and Banana Popsicles recipe proves that just a handful of everyday ingredients can transform into an extraordinary guilt-free treat that your whole family will applaud. Whether you’re a kitchen novice or a seasoned pro, these popsicles are a fantastic way to cool off, boost protein, and indulge in comfort flavors that harken back to childhood summers. Feel free to experiment with nut—butters, sweeteners, or toppings, keeping the core combo of banana, peanut butter, and yogurt intact. And don’t forget to print this article and save it for your next hot-weather craving or weekend DIY dessert project.
I can’t wait to hear how your popsicles turn out! You’ll also find a FAQ section below to answer common questions and troubleshoot any popsicle pitfalls. If you give this recipe a spin, please leave a comment and let me know your favorite twist or topping. Questions, feedback, or curious experiments—share them all. Your insights help everyone craft the creamiest, most delicious frozen treats imaginable, one popsicle at a time.
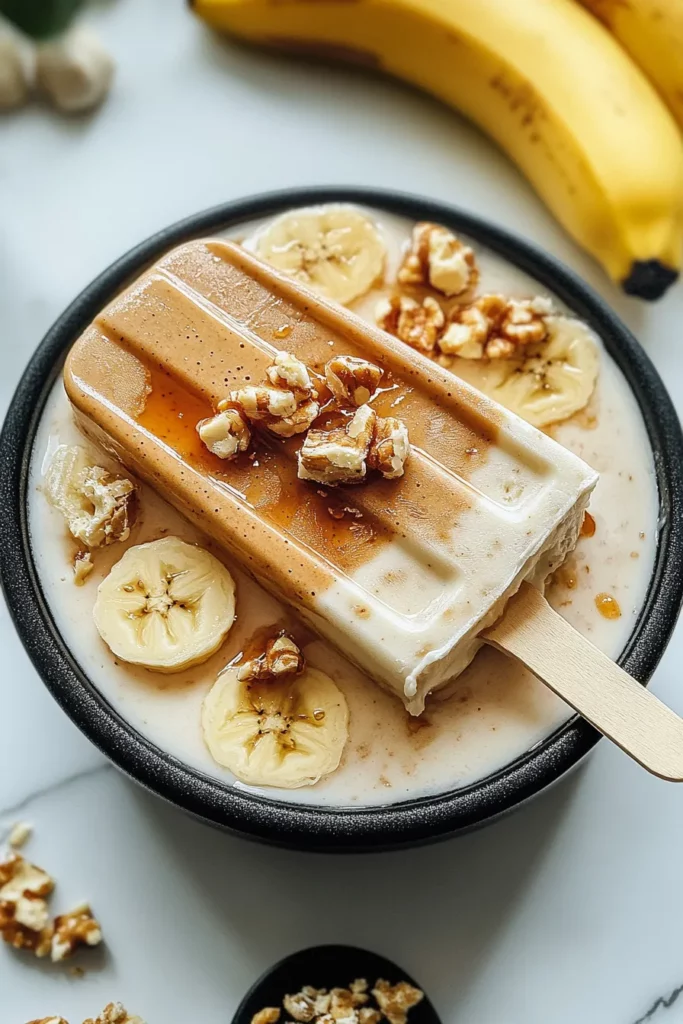

Peanut Butter and Banana Popsicles
Description
Experience the fusion of ripe bananas, rich peanut butter, Greek yogurt, and honey, frozen into a guilt-free treat bursting with natural sweetness and satisfying creaminess.
Ingredients
Instructions
-
Peel the bananas and place them in a blender or food processor.
-
Add the peanut butter, honey or maple syrup, Greek yogurt, vanilla extract, and a pinch of salt (if using) into the blender with the bananas.
-
Blend everything until smooth and creamy. Make sure there are no banana lumps left.
-
Once the mixture is smooth, pour it into popsicle molds. If you'd like, sprinkle in some mini chocolate chips or chopped nuts at this point for extra texture and flavor.
-
Insert the sticks into the molds and place the popsicles in the freezer.
-
Freeze for at least 4 hours, or until completely solid.
-
To release the popsicles from the molds, run warm water over the outside of the molds for a few seconds, then gently pull out the popsicles.
Note
- For a dairy-free version, use a plant-based yogurt and maple syrup instead of honey.
- You can swap out peanut butter for almond butter or any nut butter of your choice.
- Add a swirl of melted chocolate on top before freezing for a more indulgent treat.
- These popsicles are a great source of protein and make for a perfect summer snack or healthy dessert.

