

There’s something downright magical about pulling a tray of perfectly cooked chicken out of the oven and knowing you’ve nailed dinner without breaking a sweat. I remember the first time I tried my hand at oven-baked chicken breasts—I was convinced I’d end up with dry, flavorless slabs. But when that first slice gave way to a tender, juicy interior, I felt like I’d unlocked a culinary secret. This recipe is exactly that: your foolproof weeknight dinner hero, delivering reliably moist chicken every single time. It’s beginner-friendly, healthy, and so versatile that you’ll find yourself leaning on it whenever you need a stress-free meal that still tastes like you spent hours in the kitchen.
What’s even better? You only need a handful of pantry staples—olive oil, salt, pepper, garlic powder, onion powder, paprika, and just a hint of thyme—to transform ordinary chicken breasts into a savory, aromatic feast. With a total cooking time of under 30 minutes (plus a quick 5-minute rest), this method fits seamlessly into busy schedules. At around 250 calories per serving, it’s kind to waistlines without sacrificing taste. Whether you’re gathering around the table for a cozy family dinner or meal-prepping for the week ahead, this recipe will become your go-to for consistently delicious results. I seriously can’t wait for you to try it and discover that oven-baked chicken breasts can indeed be tender, juicy, and bursting with flavor.
KEY INGREDIENTS IN OVEN BAKED CHICKEN BREAST
To create a crowd-pleasing, juicy chicken breast, each ingredient plays its part—whether it’s locking in moisture, adding a punch of flavor, or finishing with a bright, fresh touch. Here’s what you’ll need and why each element matters:
- Boneless, skinless chicken breasts
These lean cuts serve as the perfect canvas for flavor. Their mild taste soaks up seasonings beautifully, while easy trimming means you can cook without worrying about bones or skin.
- Olive oil
This heart-healthy oil not only helps the spices adhere to the chicken but also creates a light, golden crust as it bakes. It seals in moisture for tender results.
- Salt
Simple but essential, salt enhances the natural taste of the chicken and helps retain juices during cooking, keeping every bite flavorful.
- Black pepper
Freshly ground pepper adds a subtle heat and aromatic depth that balances the richness of the olive oil and salt.
- Garlic powder
Offering a mellow garlic flavor without the risk of burning fresh cloves, garlic powder infuses the chicken with a savory undertone.
- Onion powder
This pantry staple contributes a sweet, slightly pungent note, rounding out the flavor profile alongside garlic powder.
- Paprika
With its vibrant hue and mild smokiness, paprika delivers both color and a gentle warmth that makes the chicken look—and taste—amazing.
- Dried thyme (optional)
A hint of earthy herbal aroma can elevate the spice mix. Thyme pairs beautifully with poultry, adding complexity without overpowering.
- Lemon slices and fresh parsley (optional)
Bright, citrusy lemon and verdant parsley provide a fresh, zesty finish. They lift the dish visually and flavor-wise, adding a touch of brightness to each plate.
HOW TO MAKE OVEN BAKED CHICKEN BREAST
Let’s walk through this simple yet transformative process. By following these detailed steps, you’ll ensure each chicken breast bakes up tender, moist, and perfectly seasoned.
1. Preheat your oven to 400°F (200°C). Ensuring the oven is hot before the chicken goes in helps to lock in juices and form a light crust.
2. Place the chicken breasts on a clean cutting board or flat surface. If they vary in thickness, gently pound them with a meat mallet to achieve an even thickness—this guarantees uniform cooking throughout.
3. Pat the chicken breasts dry with paper towels to remove excess moisture. Then, drizzle and rub them generously with olive oil, coating each piece thoroughly to help the seasonings stick.
4. In a small bowl, combine salt, black pepper, garlic powder, onion powder, paprika, and dried thyme (if using). Mix until well blended for an even sprinkle.
5. Sprinkle the seasoning mixture evenly over both sides of each chicken breast. Press the spices gently into the meat so they adhere and impart maximum flavor.
6. Line a baking sheet with parchment paper or lightly grease it with olive oil. This prevents sticking and makes cleanup a breeze.
7. Place the seasoned chicken breasts on the prepared baking sheet, making sure they’re spaced evenly apart for proper heat circulation.
8. Bake in the preheated oven for 18–25 minutes, or until the chicken’s internal temperature reaches 165°F (75°C) on a meat thermometer. Cooking time will vary depending on thickness, so keep an eye on the temp.
9. Remove the baking sheet from the oven and let the chicken rest for 5 minutes. Resting allows the juices to redistribute, ensuring each bite is tender and succulent.
10. Garnish with lemon slices and fresh parsley if desired, then serve warm. Enjoy the satisfying result of your effort: a perfectly baked chicken breast ready to impress.
SERVING SUGGESTIONS FOR OVEN BAKED CHICKEN BREAST
Bringing this juicy, flavorful chicken to the table opens up a world of delicious meal possibilities. Whether you’re aiming for a hearty dinner or a light lunch, here are some creative ways to serve your oven-baked chicken breast so it shines in every bite:
- Roasted Vegetable Platter
Arrange colorful roasted veggies—think carrots, Brussels sprouts, and bell peppers—around the chicken. The sweet caramelization of the vegetables complements the savory spices, creating a balanced, nutrient-packed plate.
- Fresh Green Salad
Slice the chicken and lay it atop a bed of crisp greens, cherry tomatoes, cucumber ribbons, and avocado. Drizzle with a tangy vinaigrette for a refreshing, protein-rich meal that’s perfect for warm days.
- Creamy Pasta Toss
Cube the chicken and mix into cooked penne or farfalle with a light cream sauce, peas, and spinach. The seasoning from the chicken infuses the pasta, making every forkful irresistibly savory.
- Grain Bowl Glory
Build a bowl with quinoa or brown rice, add chopped chicken, roasted sweet potatoes, black beans, and a dollop of Greek yogurt. Finish with a squeeze of lemon and fresh parsley for a wholesome, balanced bowl that powers your day.
HOW TO STORE OVEN BAKED CHICKEN BREAST
Keeping your oven-baked chicken breasts at peak freshness is all about proper cooling, packaging, and storage techniques. Whether you’re saving leftovers for tomorrow’s lunch or prepping meals for the week ahead, these methods will preserve moisture, flavor, and safety:
- Store in airtight containers in the refrigerator within two hours of cooking. Let the chicken cool slightly on the counter, then transfer to shallow containers to speed up chilling. Properly sealed, it will stay juicy for up to 4 days.
- Freeze individual portions in freezer-safe bags or vacuum-sealed pouches. Remove as much air as possible to prevent freezer burn. Label each bag with the date, and freeze for up to 3 months. Thaw overnight in the fridge before reheating.
- Reheat gently in the oven at 350°F (175°C) wrapped in foil to retain moisture. Bake for 10–15 minutes, or until heated through. This method revives the texture better than a microwave.
- For a quick microwave restart, slice the chicken and place it in a microwave-safe dish with a splash of water or chicken broth. Cover loosely and heat on medium power in 30-second intervals, flipping halfway to ensure even warmth.
CONCLUSION
What a journey we’ve taken from pantry staples to a beautifully plated, juicy chicken breast! You’ve learned how to use basic ingredients—like olive oil, salt, pepper, garlic powder, onion powder, paprika, and optional thyme—to craft a weeknight dinner that tastes like it came from your favorite bistro. We dove into the importance of even cooking by pounding the chicken, why patting it dry and coating it in oil matters, and how a simple seasoning blend can elevate every bite. We covered essential techniques, from preheating the oven to letting the chicken rest for maximum tenderness, and shared tips on garnishing with lemon and parsley for that final pop of freshness.
Feel free to print this article or save it in your digital recipe box—you’ll want to come back to this foolproof formula again and again. Below, you’ll find a handy FAQ section to answer any lingering questions you might have about substitutions, cooking times, or flavor tweaks. And if you ever find yourself wondering which side dish pairs best or looking to customize the spice mix, those FAQs have your back. This oven-baked chicken breast recipe is designed to be your culinary sidekick, ready to support all your healthy dinner and lunch adventures with minimal fuss and maximum flavor.
I’d love to hear how it turns out in your kitchen! Drop your comments, questions, or feedback below—especially if you have your own twist on the seasoning or a fun story about surprising your family with this dish. If you hit any snags or need guidance on mastering the perfect rest time or internal temperature, just let me know. Cooking is so much more fun when we share our successes (and laugh about our mishaps), so feel free to reach out and let’s keep the conversation going!
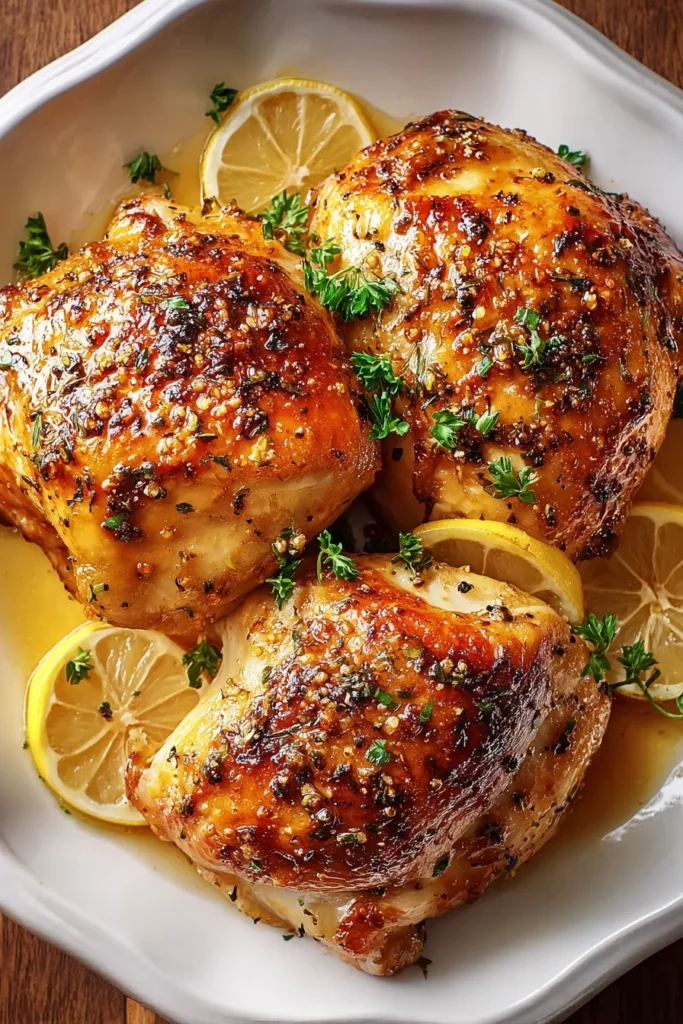

Oven Baked Chicken Breast
Description
Savor incredibly tender, moist chicken breasts bursting with a savory blend of classic spices. This easy oven method delivers delicious, healthy results every time.
Ingredients
Instructions
-
Preheat your oven to 400°F (200°C).
-
Place the chicken breasts on a clean cutting board or a flat surface. If they are uneven in thickness, gently pound them with a meat mallet to ensure even cooking.
-
Pat the chicken breasts dry with paper towels, then coat them generously with olive oil.
-
In a small bowl, combine salt, black pepper, garlic powder, onion powder, paprika, and dried thyme (if using).
-
Sprinkle the seasoning mixture evenly over both sides of each chicken breast, ensuring they are well-coated.
-
Line a baking sheet with parchment paper or lightly grease it with olive oil.
-
Place the seasoned chicken breasts on the prepared baking sheet, ensuring they are spaced evenly apart.
-
Bake in the preheated oven for 18-25 minutes, or until the internal temperature of the chicken reaches 165°F (75°C). The time may vary depending on the size of the chicken breasts.
-
Remove the baking sheet from the oven and let the chicken rest for 5 minutes before serving.
-
Garnish with lemon slices and fresh parsley if desired, then serve warm. Enjoy your perfectly baked chicken breast!
Note
- To keep the chicken juicy, avoid overcooking by using a meat thermometer.
- Letting the chicken rest post-baking helps redistribute juices for a more tender result.
- Feel free to adjust the seasoning according to your taste preferences.
- The olive oil helps to lock moisture, so don't skip this step.
- This dish pairs wonderfully with roasted vegetables or a fresh green salad.

