

Summer days call for the ultimate cool-down treat: luscious, creamy strawberry ice cream that practically slices happiness into every bite. With its vibrant pink hue and pockets of fresh fruit, this no-churn delight brings the essence of a sun-soaked afternoon right to your spoon. It transforms simple ingredients—ripe strawberries, velvety cream, and that magical sweetened condensed milk—into a dessert that feels special yet remains effortlessly simple. Whether you’re hosting an impromptu backyard gathering or simply craving a solo indulgence, this recipe delivers a burst of bright, juicy flavor without ever needing an ice cream maker.
There’s something truly satisfying about whipping up your own frozen treat in just half an hour of prep, then letting the freezer do the rest. In fact, I still remember the first time I surprised my neighbors with a big tub of this strawberry dream. They thought I’d purchased it from an artisan shop—only to discover it was homemade, beginner-friendly, and bursting with natural strawberry sweetness. Fresh, creamy, and bursting with strawberry flavor, this no-churn recipe is a perfect summer treat for everyone! With just a handful of pantry staples and a little patience during its six-hour chill, you’ll be scooping up smiles in no time.
KEY INGREDIENTS IN NO-CHURN STRAWBERRY ICE CREAM
Before we dive into the fun of folding and freezing, let’s chat about the core elements that make this ice cream so dreamy. Each component plays a starring role, delivering texture, flavor, and that irresistible creamy body we all love.
- Fresh Strawberries
Vibrant, ripe strawberries provide the natural sweetness, bright color, and those delightful pockets of strawberry goodness. Macerating them releases juicy flavor and infuses the mixture with authentic summer charm.
- Granulated Sugar
A touch of sugar helps draw out the juices during maceration, creating a lightly sweet syrup that amplifies the berry flavor. The remaining sugar balances the sweetness in the ice cream base.
- Heavy Whipping Cream
This is where the magic of creamy texture comes in. Whipping the cream to stiff peaks builds air into the mixture, resulting in light, scoopable ice cream that feels indulgent yet airy.
- Sweetened Condensed Milk
Acting as both a sweetener and a binding agent, sweetened condensed milk lends smoothness and stability without the need for an ice cream maker. It prevents ice crystals and keeps every scoop silky.
- Vanilla Extract
A splash of vanilla rounds out the strawberry notes with warm, aromatic undertones. It adds complexity and depth, making each bite more rounded and flavorful.
- Lemon Juice (optional)
Just a hint of acidity brightens the overall flavor profile, cutting through the sweetness and enhancing the natural fruit tang.
HOW TO MAKE NO-CHURN STRAWBERRY ICE CREAM
Gather your bowls and mixers, and let’s bring this simple yet sensational strawberry ice cream to life. The process is straightforward, and each step builds on the last to create a luscious, no-churn marvel.
1. In a medium bowl, combine the sliced strawberries and 1/4 cup of sugar. Toss until the strawberries are well-coated. Let them sit for 15–20 minutes to macerate and release their juices.
2. After the strawberries have macerated, mash them using a fork or a potato masher until you achieve a chunky texture, leaving some small strawberry pieces for added texture.
3. In a large mixing bowl, whip the heavy cream using a hand mixer or a stand mixer with a whisk attachment on medium-high speed until stiff peaks form.
4. Gently fold the sweetened condensed milk into the whipped cream using a spatula, maintaining the airy consistency.
5. Add the mashed strawberries (and their juices) into the whipped cream mixture. Fold gently until well combined.
6. Stir in the vanilla extract and lemon juice, if using, until thoroughly mixed.
7. Pour the ice cream mixture into a lidded, freezer-safe container or a loaf pan. Smooth the top with a spatula.
8. Cover with a lid or plastic wrap and freeze for at least 6 hours, preferably overnight, until the ice cream is firm and ready to scoop.
9. To serve, let the ice cream sit at room temperature for a few minutes to soften slightly for easier scooping.
SERVING SUGGESTIONS FOR NO-CHURN STRAWBERRY ICE CREAM
Bringing out the best in this homemade strawberry ice cream is all about contrast and presentation. Whether you’re serving it at a backyard barbecue or a cozy family dinner, a few thoughtful touches will elevate each spoonful into a memorable experience. Here are some fun ideas to make every serving feel like a mini celebration of summer’s finest fruit.
- Top each scoop with a handful of fresh berries and a sprig of mint for a pop of color and extra freshness. The garnish not only looks stunning but also complements the strawberry sweetness.
- Layer the ice cream in a tall glass with crumbled shortbread cookies or graham crackers to introduce a delightful crunch that contrasts the smooth, creamy texture.
- Serve scoops in crisp waffle cones, lightly toasted in the oven for a minute. The warm, crunchy cone pairs beautifully with the cold, creamy ice cream for a perfect textural balance.
- Drizzle with warm chocolate sauce or swirl in a ribbon of homemade berry coulis for an elegant twist. The added sauce brings complexity and transforms each portion into a gourmet treat.
HOW TO STORE NO-CHURN STRAWBERRY ICE CREAM
Proper storage is key to maintaining that dreamy, scoopable texture and bright strawberry flavor. While homemade ice cream doesn’t last as long as store-bought varieties, you can still keep it perfectly fresh for special treats throughout the next couple of weeks. Here’s how to ensure every serving tastes as good as the first scoop.
- Store the ice cream in a deep, freezer-safe container rather than a shallow bowl, minimizing exposure to air. Press a layer of plastic wrap directly onto the surface before sealing with the lid to prevent ice crystals from forming.
- Keep the container at the back of the freezer, where the temperature remains most stable. Avoid placing it near the door to reduce temperature fluctuations caused by opening and closing.
- Label the container with the date of preparation and aim to consume within two weeks for optimal freshness. While it remains safe to eat longer, flavor and texture can degrade over time.
- If you need to scoop a smaller portion, transfer the remaining ice cream back into its original container as quickly as possible and refreeze, minimizing the time it sits at room temperature.
CONCLUSION
This no-churn strawberry ice cream recipe brings together fresh strawberries, airy whipped cream, and sweetened condensed milk to create a dessert that’s as effortless as it is enchanting. From the first step of macerating berries to the final, blissful spoonful, every moment feels like a celebration of summer’s finest flavors. Beginner cooks will delight in its simplicity—no ice cream maker required—while more seasoned home chefs can experiment with mix-ins like chocolate chips or nuts. With just 30 minutes of hands-on prep and a six-hour chill, you’ll end up with a dessert that rivals anything from a gelato shop.
Feel free to print this article and save it for later; it’s the perfect addition to your recipe collection. You can also find a FAQ below to answer any lingering questions. If you give this recipe a try, I’d love to hear how it turns out—please leave your comments, questions, or feedback. Whether you’re craving an afternoon pick-me-up or planning your next summer gathering, this strawberry ice cream is here to bring smiles, one scoop at a time.
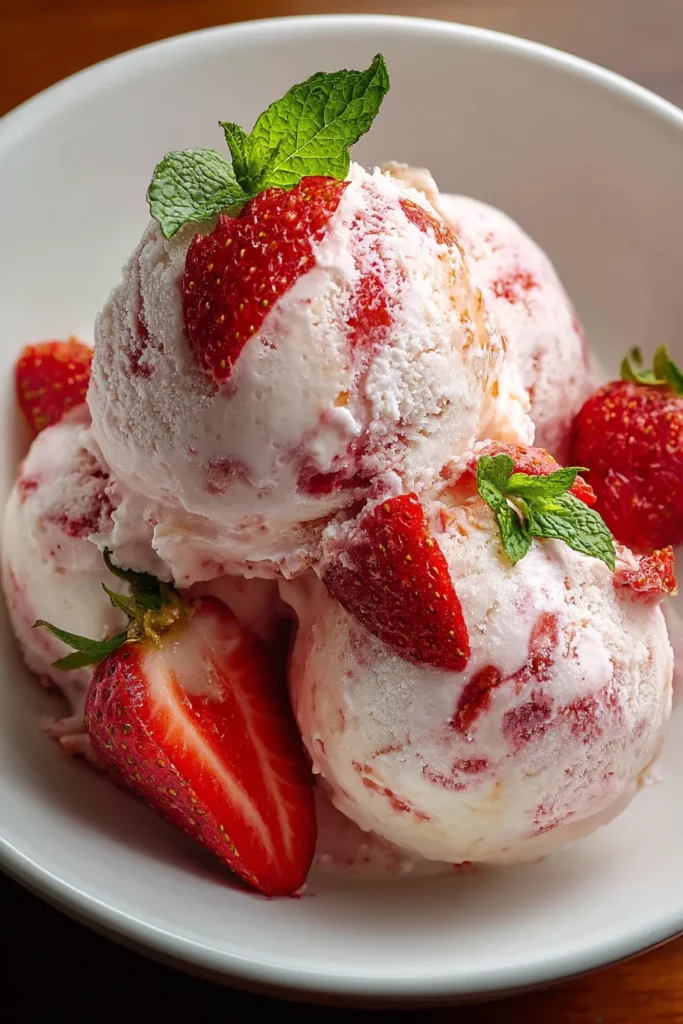

No-Churn Strawberry Ice Cream
Description
Enjoy a sweet and creamy homemade strawberry ice cream without the hassle of an ice cream maker! This easy recipe captures the essence of fresh strawberries in every bite.
Ingredients
Instructions
-
In a medium bowl, combine the sliced strawberries and 1/4 cup of sugar. Toss until the strawberries are well-coated. Let them sit for 15-20 minutes to macerate and release their juices.
-
After the strawberries have macerated, mash them using a fork or a potato masher until you achieve a chunky texture, leaving some small strawberry pieces for added texture.
-
In a large mixing bowl, whip the heavy cream using a hand mixer or a stand mixer with a whisk attachment on medium-high speed until stiff peaks form.
-
Gently fold the sweetened condensed milk into the whipped cream using a spatula, maintaining the airy consistency.
-
Add the mashed strawberries (and their juices) into the whipped cream mixture. Fold gently until well combined.
-
Stir in the vanilla extract and lemon juice, if using, until thoroughly mixed.
-
Pour the ice cream mixture into a lidded, freezer-safe container or a loaf pan. Smooth the top with a spatula.
-
Cover with a lid or plastic wrap and freeze for at least 6 hours, preferably overnight, until the ice cream is firm and ready to scoop.
-
To serve, let the ice cream sit at room temperature for a few minutes to soften slightly for easier scooping.
Note
- No ice cream maker is required for this recipe.
- You can substitute strawberries with other berries or fruits for a different flavor.
- Mixing in chocolate chips or nuts can add texture and flavor variation.
- Store in the freezer for up to 2 weeks for optimal freshness.
- Enjoy this delightful homemade ice cream with friends and family as a refreshing summer treat.

