

This No-Bake Strawberry Crunch Cheesecake blends velvety cream cheese with vibrant strawberry swirls and crunchy cereal clusters for an irresistible dessert any home baker can master. With no oven needed, you’ll whisk together a buttery graham cracker crust, whip up a smooth, sweet filling, and layer in bursts of freeze-dried strawberry crunch for texture. Whether you’re craving a sweet treat for a gathering or just want a playful spin on classic cheesecake, this easy-intermediate recipe will have you smiling with each creamy, crisp bite.
Key Ingredients
Before diving into this luscious cheesecake, let’s gather the simple pantry staples and fresh additions that build its signature layers of flavor and texture.
- 1 ½ cups graham cracker crumbs (about 10 full sheets): provides the base for the crust, adding sweetness and structure.
- ¼ cup granulated sugar: sweetens and helps bind the crust, ensuring a sturdy foundation.
- 5 tablespoons unsalted butter, melted: binds the graham crumbs into a compact crust and adds rich flavor.
- 16 ounces full-fat cream cheese, softened to room temperature: creates the silky main filling with tangy richness.
- ¾ cup powdered sugar, sifted: sweetens and smooths the cream cheese base without lumps.
- 1 teaspoon pure vanilla extract: imparts warm, aromatic flavor to the cheesecake filling.
- 1 teaspoon fresh lemon juice: balances sweetness with a subtle bright tang.
- 1 cup heavy whipping cream, very cold: whips into stiff peaks, lightening the filling and adding creaminess.
- ⅓ cup strawberry preserves or jam, warmed slightly to loosen: swirled through the filling for sweet, fruity bursts.
- 1 cup freeze-dried strawberries, gently crushed: adds vibrant color and crunchy strawberry texture.
- ¾ cup crispy rice cereal or crushed cornflakes: introduces a crispy crunch layer in every bite.
- Fresh strawberry slices, for garnish: decorates and brings a fresh finish to the cheesecake.
How To Make No-Bake Strawberry Crunch Cheesecake
Ready to assemble your No-Bake Strawberry Crunch Cheesecake? This section walks you through each step, from creating the perfect graham cracker crust to swirling in vibrant strawberry preserves and adding that signature crunch layer. Grab your bowls, mixer, and a springform pan, and let’s build this show-stopping dessert layer by layer.
1. Prepare the crust. In a medium bowl, whisk graham cracker crumbs and granulated sugar until combined. Then pour in the melted butter and stir until all crumbs are moistened, ensuring the mixture holds together when pressed.
2. Press the crumb mixture firmly and evenly into the bottom of a 9-inch springform pan. Use the bottom of a measuring cup to compact the crust into a smooth, even layer. Chill in the refrigerator while you make the filling.
3. Beat the cream cheese. In a large bowl with an electric mixer, beat the softened cream cheese on medium speed for about 2 minutes until completely smooth and free of lumps.
4. Add powdered sugar, vanilla extract, and lemon juice. Continue beating on low speed until the ingredients are well combined, scraping down the sides of the bowl as needed for uniform texture.
5. Whip the cream. In a separate chilled bowl, whip the heavy cream on high speed until stiff peaks form, being careful not to over-whip or turn it grainy.
6. Fold in the whipped cream. Using a rubber spatula, gently fold one-third of the whipped cream into the sweetened cream cheese to lighten the mixture. Then fold in the remaining whipped cream until the filling is smooth and uniform.
7. Swirl in strawberry preserves. Remove one heaping tablespoon of the cheesecake filling and set aside. Spoon half of the remaining filling into the chilled crust and spread to an even layer. Dollop half of the warmed strawberry preserves over the filling and swirl gently with a skewer or the tip of a knife to create marbled ribbons.
8. Add the crunch layer. Sprinkle half of the crushed freeze-dried strawberries and half of the crispy rice cereal evenly over the first layer of filling to introduce texture.
9. Finish the filling. Spread the rest of the cheesecake mixture on top and smooth the surface. Then dollop and swirl the remaining strawberry preserves, and top with the remaining freeze-dried strawberries and cereal for an eye-catching crunch.
10. Chill thoroughly. Cover the pan with plastic wrap or a cake dome and refrigerate for at least 4 hours, preferably overnight, to allow the cheesecake to set fully.
11. Release and serve. Run a thin knife around the edge of the springform, unlock and remove the ring. Transfer to a serving platter if desired and garnish with fresh strawberry slices before slicing and serving.
Serving Suggestions
Now that your No-Bake Strawberry Crunch Cheesecake is perfectly set, let’s talk about how to serve it for maximum wow factor. Whether you’re hosting a casual brunch or an elegant dinner, these ideas will help you plate each slice so that the creamy, fruity, and crunchy layers shine. Don’t be afraid to get creative with garnishes and accompaniments—the right pairing can elevate every bite and turn this dessert into the star of your gathering.
- Fresh berries: Arrange extra strawberry slices and a few blueberries or raspberries on top to enhance the fruit-forward flavor and add color contrast.
- Whipped cream dollops: Pipe or spoon fluffy whipped cream around each slice for a classic and elegant finish that complements the creamy filling.
- Mint sprigs: Garnish with fresh mint leaves to introduce a pop of green and a refreshing herbal note that balances the sweetness.
- Chocolate drizzle: Warm a little chocolate sauce and gently drizzle over the cheesecake for a touch of decadence and visual flair.
Tips For Perfect No-Bake Strawberry Crunch Cheesecake
Perfecting a no-bake cheesecake is all about temperature, technique, and timing. Getting your cream cheese at room temperature and your whipped cream to just the right stiffness ensures a silky filling that holds up under those crunchy layers. Chilling time is crucial—give it the full 4 hours (or more!) so that each slice sets cleanly and the flavors meld. And don’t skip the fun stuff from these notes below: you’ll find tips for flavor twists, time-savers, and yummy variations that’ll make every slice even more impressive.
- You can substitute graham crackers with crushed digestive biscuits or vanilla wafers for a different flavor profile.
- For extra color, mix a few drops of pink gel food coloring into the filling before folding in whipped cream.
- Store leftovers covered in the refrigerator for up to 4 days; note that the cereal topping may soften over time.
- To make individual portions, assemble in small jars or ramekins and reduce chilling time to 2 to 3 hours.
- For a lighter version, use light cream cheese and reduced-fat whipped topping, though the texture will be slightly softer.
How To Store It
To keep every slice of this No-Bake Strawberry Crunch Cheesecake tasting fresh and delightful, proper storage is key. The creamy filling and crust stay best under cool, covered conditions, while the crunchy topping needs a bit of TLC to stay crisp. Whether you’re planning to make this ahead or have leftovers, these storage methods will help you maintain texture and flavor so that each bite tastes just as good as the first.
- Refrigerate Covered: Store the entire cheesecake in its springform pan or transfer to an airtight container, covering it securely to prevent it from picking up fridge odors. Keeps fresh up to 4 days.
- Separate Topping: For maximum crunch, store extra freeze-dried strawberries and crispy rice cereal in a sealed bag at room temperature and sprinkle on slices just before serving.
- Individual Portions: Package leftover slices in individual airtight containers or wrap them tightly in plastic wrap. This makes grabbing a quick treat easy while preserving the cheesecake’s shape.
- Freeze Slices: Place wrapped slices on a baking sheet to freeze solid (about 2 hours), then transfer them to a freezer-safe bag. Freeze up to 1 month and thaw overnight in the refrigerator.
Frequently Asked Questions
Got questions? I’ve compiled some common queries below to help you nail this No-Bake Strawberry Crunch Cheesecake with confidence.
- Q: How long does it take to prepare and set the No-Bake Strawberry Crunch Cheesecake?
A: Active prep time is about 25 to 30 minutes, which includes making the crust, whipping the cream cheese mixture, folding in whipped cream, and layering with preserves and crunch. After assembly, the cheesecake must chill for at least 4 hours, preferably overnight, to firm up fully.
- Q: How do I ensure a smooth, lump-free cream cheese filling?
A: Start with full-fat cream cheese that’s fully softened to room temperature. Beat it on medium speed for about 2 minutes until completely smooth. Scrape down the bowl sides before adding powdered sugar, vanilla, and lemon juice. Beating on low speed after adding those ingredients helps maintain a silky texture without over-aerating.
- Q: What’s the best way to know when heavy cream has reached stiff peaks without over-whipping?
A: Use a very cold bowl and chilled beaters. Begin whipping on medium-high speed and watch closely. When the cream pulls away from the sides of the bowl, lift the whisk: stiff peaks will stand straight up without collapsing. Stop immediately to avoid turning the cream grainy or buttery.
- Q: Can I substitute the graham cracker crumbs for a different crust?
A: Yes. You can replace graham crackers with crushed digestive biscuits or vanilla wafers for a slightly different flavor profile. Measure about 1 ½ cups of any crushed cookie, combine with ¼ cup granulated sugar, then proceed by stirring in melted butter and pressing into the pan as directed.
- Q: How can I keep the crispy rice cereal from becoming soggy?
A: Assemble the cereal layer just before chilling and cover the cheesecake securely with plastic wrap or a cake dome to minimize moisture contact. If you expect to serve the cheesecake more than a day later, store the cereal separately and sprinkle it on top just before serving to preserve maximum crunch.
- Q: How should I store leftovers, and how long do they last?
A: Keep the cheesecake covered in the refrigerator for up to 4 days. The crust and filling remain fine, though the cereal topping may soften over time. To refresh the crunch, add a handful of fresh freeze-dried strawberries or crispy rice cereal just before serving.
- Q: Is it possible to make individual portions, and does the chilling time change?
A: Yes. Divide the crust and filling among small jars or ramekins, layering as you would in the springform pan. Individual portions usually set faster—plan for 2 to 3 hours of refrigeration before serving. Garnish with fresh strawberry slices just before enjoying.
What Makes This Special
Here’s what sets this No-Bake Strawberry Crunch Cheesecake apart: the dreamy cream cheese layer swirled with jammy strawberry ribbons meets a playful crunch of cereal and freeze-dried berries in every forkful. It’s the perfect mix of textures and tastes—silky, sweet, tangy, and crisp—that makes it such a crowd-pleaser. Feel free to print out these notes and tuck them into your recipe box, then come back and leave a comment, share your twists, or ask questions once you’ve given it a spin!
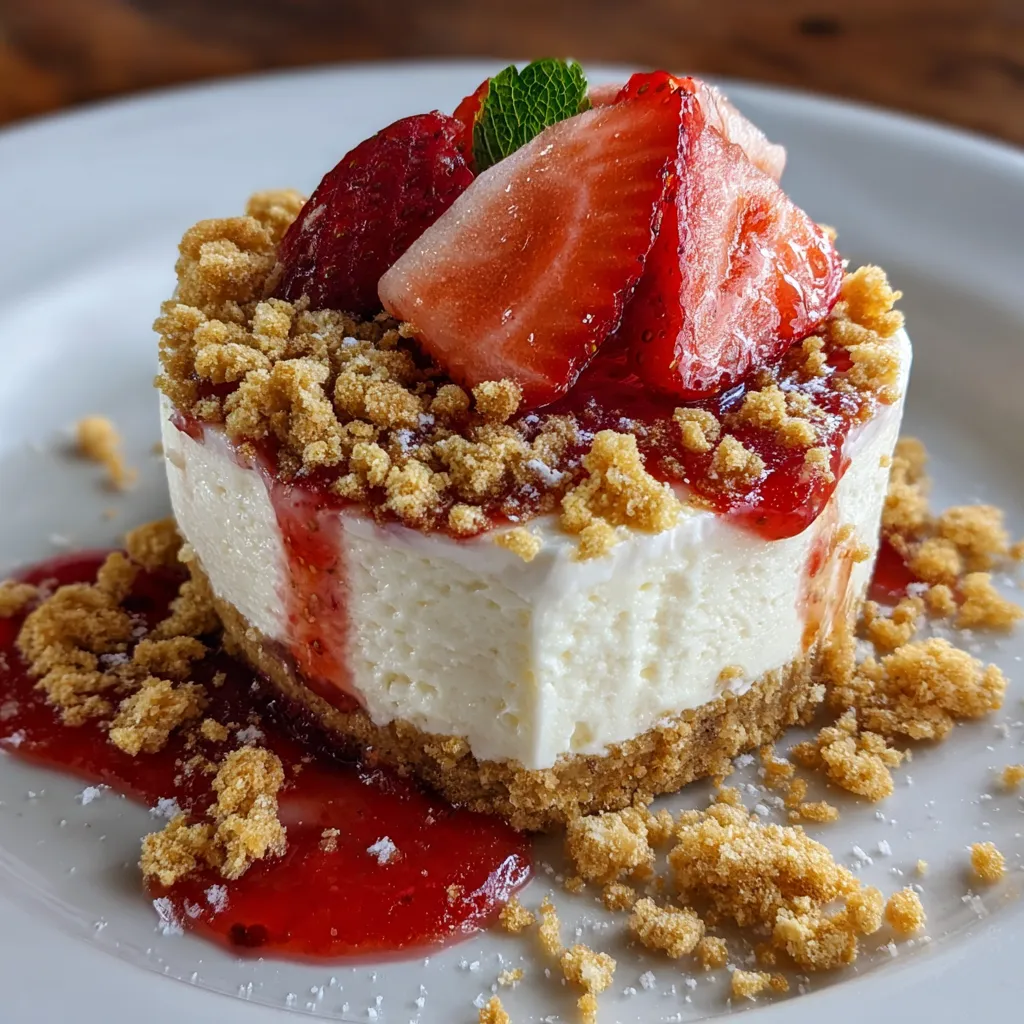

No-Bake Strawberry Crunch Cheesecake
Description
Experience a silky cream cheese filling swirled with sweet jam, topped with crispy rice cereal and freeze-dried strawberry crunch.
Ingredients
Instructions
-
Prepare the crust. In a medium bowl, whisk graham cracker crumbs and granulated sugar until combined. Pour in the melted butter and stir until all crumbs are moistened.
-
Press the crumb mixture firmly and evenly into the bottom of a 9-inch springform pan. Use the bottom of a measuring cup for an even, compact layer. Chill in the refrigerator while you make the filling.
-
Beat the cream cheese. In a large bowl with an electric mixer, beat the softened cream cheese on medium speed until smooth and free of lumps, about 2 minutes.
-
Add powdered sugar, vanilla extract, and lemon juice. Continue beating on low speed until well combined, scraping down sides of the bowl as needed.
-
Whip the cream. In a separate chilled bowl, whip the heavy cream on high speed until stiff peaks form. Take care not to over-whip.
-
Fold in the whipped cream. Using a rubber spatula, gently fold one-third of the whipped cream into the sweetened cream cheese to lighten the mixture. Then fold in the remaining whipped cream until uniform.
-
Swirl in strawberry preserves. Remove one heaping tablespoon of the cheesecake filling and set aside. Spoon half of the remaining filling into the chilled crust and spread to an even layer. Dollop half of the warmed strawberry preserves over the filling and swirl gently with a skewer or the tip of a knife.
-
Add the crunch layer. Sprinkle half of the crushed freeze-dried strawberries and half of the crispy rice cereal evenly over the first layer of filling.
-
Finish the filling. Spread the rest of the cheesecake mixture on top, smooth the surface, then dollop and swirl the remaining strawberry preserves. Top with the remaining freeze-dried strawberries and cereal for an eye-catching crunch.
-
Chill thoroughly. Cover the pan with plastic wrap or a cake dome and refrigerate for at least 4 hours, preferably overnight, to allow the cheesecake to set fully.
-
Release and serve. Run a thin knife around the edge of the springform, unlock and remove the ring. Transfer to a serving platter if desired. Garnish with fresh strawberry slices before slicing and serving.
Note
- You can substitute graham crackers with crushed digestive biscuits or vanilla wafers for a different flavor profile.
- For extra color, mix a few drops of pink gel food coloring into the filling before folding in whipped cream.
- Store leftovers covered in the refrigerator for up to 4 days; the cereal topping may soften over time.
- To make individual portions, assemble in small jars or ramekins and reduce chilling time to 2–3 hours.
- For a lighter version, use light cream cheese and reduced-fat whipped topping, though texture will be slightly softer.

