

Crunchy mini pretzels, sticky ribbons of caramel, and a glossy blanket of chocolate come together in a treat that feels indulgent without turning on the oven. These No-Bake Salted Caramel Pretzel Bars balance sweet and salty like a friendship bracelet for your taste buds. When I first whipped up this recipe for a weekend gathering, my friends couldn’t believe how effortlessly the flavors danced together. Every bite delivered a satisfying crunch from the pretzels and a luscious chew from the homemade caramel. It’s like taking a quick road trip back to childhood snack time—but with a gourmet twist that somehow makes it feel even more special.
What makes these bars truly shine is the simplicity of no-bake magic. In less than half an hour of hands-on work, you’ll have layers of buttery caramel-coated pretzels, melted chocolate that sets to a perfect snap, and a final sprinkle of flaky sea salt that elevates every flavor note. No complicated equipment, no fuss—just a saucepan, a bowl, and the pure joy of stirring ingredients that turn into a crowd-pleasing superstar dessert. Whether you’re a seasoned baker or a beginner looking for a fun weekend project, this recipe has your back. You’ll find yourself dreaming up variations, swapping in dark chocolate or adding chopped nuts, simply because it’s so easy to play around with. By the time these bars chill in the fridge and firm up, you’ll already be planning when to make them next. Trust me: these bars will become your favorite go-to sweet and salty pick-me-up, and you’ll wonder why you ever paid for store-bought snacks again.
KEY INGREDIENTS IN NO-BAKE SALTED CARAMEL PRETZEL BARS
Before diving into the fun of assembling these bars, let’s go through the star players that make this recipe shine. Each ingredient brings its own personality— from the playful crunch of pretzels to the rich depth of brown sugar caramel and the irresistible allure of melted chocolate.
- Mini pretzels
These bite-sized twists deliver the signature crunchy texture and salty edge. Breaking them into coarse pieces ensures every bar is studded with pretzel goodness, creating pockets of crunch that contrast beautifully with the creamy layers.
- Unsalted butter
A key emulsifier in the caramel, butter contributes a silky mouthfeel and rich flavor without adding extra salt. It helps the brown sugar dissolve smoothly and creates that glossy caramel coat around each pretzel piece.
- Packed light brown sugar
Full of molasses depth, brown sugar gives the caramel its warm, toffee-like notes. When simmered with butter, it thickens into a luscious sauce that clings to the pretzels, infusing each bite with sweet complexity.
- Semi-sweet chocolate chips
When melted, these chips form the decadent top layer that provides a satisfying snap. The balanced sweetness of semi-sweet chocolate keeps the bars from tipping too far into sugar territory, complementing the salty crunch below.
- Vanilla extract
A splash of vanilla brightens the caramel, adding aromatic nuance and rounding out the buttery, sugary elements. It’s the secret ingredient that brings warmth and a hint of floral sweetness.
- Sea salt
Stirred into the caramel, coarse sea salt enhances the brown sugar’s depth and balances the sweetness. It’s essential for that perfect sweet-and-salty harmony.
- Caramel sauce
A decorative drizzle of ready-made or homemade caramel sauce adds an extra layer of gooey richness. It creates a beautiful pattern on top and reinforces the caramel flavor throughout each bar.
- Flaky sea salt
Sprinkled on top as a final flourish, flaky sea salt crystals add bursts of briny crunch. Each sparkle of salt catches the light—and your taste buds—bringing out the best in chocolate and caramel.
HOW TO MAKE NO-BAKE SALTED CARAMEL PRETZEL BARS
Let’s walk through the step-by-step process of bringing these bars to life. With just a handful of techniques—lining a pan, simmering a caramel, melting chocolate, and chilling—you’ll arrive at dessert perfection without ever turning on the oven.
1. Prepare a 9×13 inch baking pan by lining it with parchment paper, leaving an overhang on two sides for easy removal of the bars once they’re set.
2. In a large bowl, gently break the mini pretzels into coarse pieces, ensuring they’re bite-sized but still chunky enough to provide crunch. Set them aside for coating.
3. In a medium saucepan set over medium heat, combine unsalted butter and light brown sugar. Stir continuously with a heat-proof spatula until you see gentle bubbling—this indicates the sugar has dissolved.
4. Allow the mixture to simmer for 2–3 minutes, stirring often. You’ll notice it thickens and turns a deeper amber color, signaling that your caramel is taking shape.
5. Remove the pan from heat, then stir in vanilla extract and sea salt. These finishers boost flavor complexity and ensure balanced sweetness.
6. Immediately pour the warm caramel over the broken pretzels. Use a spatula to toss everything together, ensuring each piece is evenly coated in glossy caramel.
7. Spread the caramel-coated pretzels into the prepared pan, pressing gently with a spatula or the back of a spoon to form an even base.
8. Place semi-sweet chocolate chips in a microwave-safe bowl. Microwave in 30-second intervals, stirring in between, until the chocolate is fully melted and smooth.
9. Pour the melted chocolate over the pretzel layer. Use a spatula to spread it into an even, thin sheet that reaches all corners of the pan.
10. Drizzle caramel sauce over the chocolate layer in a zigzag pattern for a decorative finish. Immediately sprinkle with flaky sea salt to add texture and enhance the sweet-and-salty flavor profile.
11. Transfer the pan to the refrigerator and chill for at least 2 hours, or until the bars are firm to the touch. Once set, lift the bars out using the parchment overhang and cut into squares.
SERVING SUGGESTIONS FOR NO-BAKE SALTED CARAMEL PRETZEL BARS
These bars are a conversation starter on any dessert table. From casual movie nights to elegant gatherings, they shine when paired thoughtfully and plated with a bit of flair. Whether you want a family-style platter or individual treats, these ideas will help you serve them with style and maximize their crowd-pleasing potential.
- Serve on a rustic wooden board alongside small bowls of extra caramel sauce and flaky sea salt. Guests can customize their bites by dipping corners of bars into extra caramel or sprinkling more sea salt on top.
- Make mini dessert plates by placing one bar per plate, accompanied by a dollop of whipped cream and fresh berries. The bright fruit cuts through the richness while the whipped cream adds a cloud-like contrast to the crunchy layers.
- Pair bars with coffee or espresso for a decadent afternoon treat. The deep, roasted notes of a dark roast balance the sweet caramel and chocolate, turning your snack break into a café-style experience.
- Turn them into party favors by wrapping individual bars in clear cellophane and tying with twine. Add a handwritten tag with a short note or recipe title to delight friends or family who can enjoy the bars at home.
HOW TO STORE NO-BAKE SALTED CARAMEL PRETZEL BARS
Proper storage keeps these bars at peak texture and flavor. Because of the crunchy pretzel layer and rich chocolate, they fare best when kept cool and dry. Follow these methods to maintain the bars’ crisp edges and creamy toppings, whether you’re stashing them for a week or freezing extras for later.
- Refrigerator storage: Place cut bars in a single layer inside an airtight container. For best results, separate layers with parchment paper. Store for up to one week; chilling preserves the firm chocolate and prevents the pretzels from becoming stale.
- Freezer storage: Wrap bars individually in plastic wrap, then pack them in a freezer-safe container or zip-top bag. They’ll keep for up to one month. Thaw bars in the refrigerator for a couple of hours before serving to maintain a firm texture.
- Room-temperature short-term: If you plan to eat the bars within 24 hours, you can keep them in a cool, dry spot in an airtight container. Avoid direct sunlight or heat sources to prevent the chocolate from softening.
- Layer separation tip: When stacking multiple layers in any storage method, use small squares of parchment or wax paper between layers. This prevents the chocolate drizzle and caramel from sticking and keeps each bar looking pristine.
CONCLUSION
Every home cook knows that the best recipes are the ones that bring people together, and these No-Bake Salted Caramel Pretzel Bars do just that. From the moment you mix your first batch of chewy, buttery caramel to the satisfying snap of chilled chocolate, this dessert is a journey of flavors and textures. This article walked you through every step—lining your pan, shimmering your butter and sugar into caramel, and assembling layers that set beautifully in the fridge. You’ve learned how each ingredient performs its magic, how to present the bars with flair, and how to store leftovers so the crunch and chew never fade. Feel free to print this guide out or bookmark it for future reference—having a go-to recipe on hand is always a smart plan, especially when a sweet-and-salty craving strikes.
As you head to the kitchen, remember that cooking is part science, part creativity, and a whole lot of shared joy. If you give these bars a try, I’d love to hear how they turned out for you. Do you have a twist—like chopped nuts or a swirl of dark chocolate—that took the bars to new heights? Maybe you have questions about simmer times, or you want tips on making a completely homemade caramel sauce from scratch. Let me know in the comments below. Your feedback helps me fine-tune recipes and share new ideas with fellow dessert lovers. I can’t wait to see your variations and hear about your no-bake adventures—happy snacking!
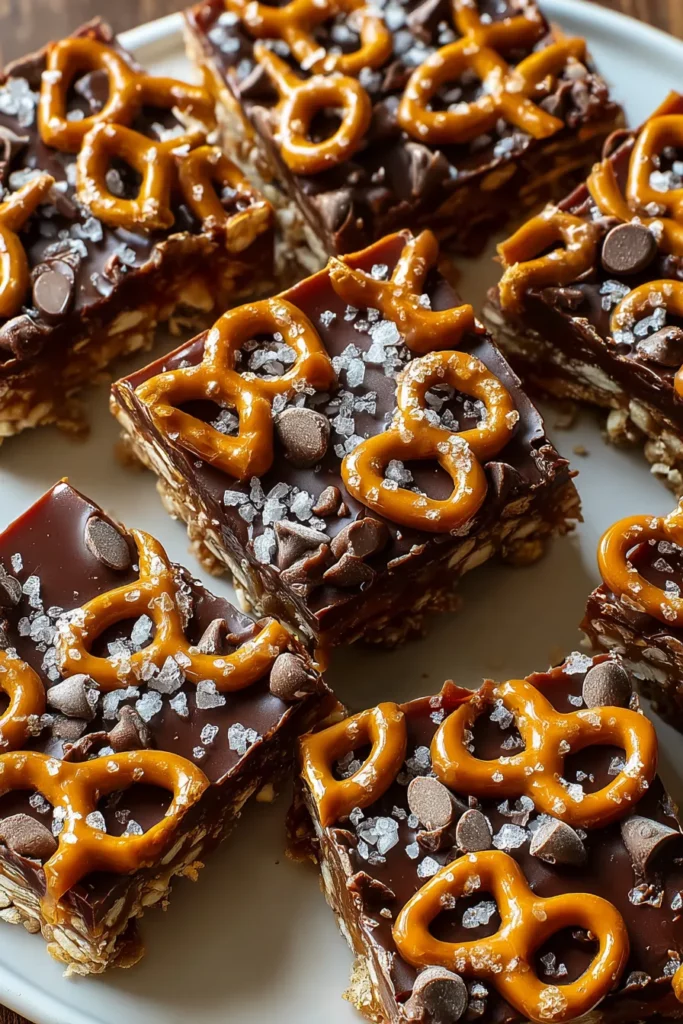

No-Bake Salted Caramel Pretzel Bars
Description
These bars combine crunchy pretzels, rich caramel, and smooth chocolate, creating a sweet and salty treat that's perfect for any occasion. Simple and satisfying!
Ingredients
Instructions
-
Prepare a 9x13 inch baking pan by lining it with parchment paper, leaving some overhang for easy removal.
-
In a large bowl, break the pretzels into coarse pieces. Set aside.
-
In a medium saucepan over medium heat, combine the unsalted butter and brown sugar. Stir continuously until the mixture comes to a simmer. Let it boil for 2-3 minutes while stirring often, until it thickens.
-
Remove the mixture from heat and stir in the vanilla extract and sea salt.
-
Pour the caramel butter mixture over the broken pretzels, stirring until all pieces are coated evenly.
-
Spread the caramel-coated pretzels evenly into the prepared baking pan, pressing gently to lay an even base.
-
In a microwave-safe bowl, melt the chocolate chips, stirring every 30 seconds until smooth.
-
Pour the melted chocolate over the pretzel layer, using a spatula to spread it evenly.
-
Drizzle the caramel sauce over the chocolate layer in a zigzag pattern to create a decorative topping. Sprinkle with flaky sea salt.
-
Refrigerate the bars for at least 2 hours or until firm enough to slice.
-
Once set, lift the bars out of the pan using the parchment overhang and cut into squares.
Note
- For a richer flavor, you can use dark chocolate instead of semi-sweet chocolate chips.
- Ensure the butter and sugar mixture is simmered just right to avoid crystallization in your caramel.
- These bars can be stored in an airtight container in the fridge for up to a week.
- Feel free to add nuts or any additional toppings for extra texture and flavor.

