

Autumn is here, and with it comes the irresistible call of all things pumpkiny and spiced. If you’re craving a quick, healthy treat that captures the essence of fall without heating up the kitchen, these No-Bake Pumpkin Bites are your new best friend. They blend creamy pumpkin puree with lush almond butter, a hint of pure maple syrup, and just the right touch of pumpkin pie spice to bring warmth with every bite. There’s something deeply satisfying about rolling these little orbs by hand, feeling that smooth mixture take shape under your fingertips. Plus, they’re naturally gluten-free, vegan-friendly (with the right chocolate chips), and easy enough for beginners to master in one afternoon.
Not only are these bites bursting with vibrant flavor, but they also pack in energizing complex carbohydrates and healthy fats—ideal for fueling busy mornings or powering you through an afternoon slump. With only 15 minutes of active prep and zero actual baking, you’ll have a dozen perfect snack balls ready after a short 30-minute chill in the fridge. Each one clocks in around 120 calories, making them a smart choice for dessert, an on-the-go nibble, or even a post-workout pick-me-up. Whether you’re serving friends at a casual gathering or sneaking one (or three) between meetings, these pumpkin bites never disappoint. So grab your mixing bowl and get ready to whip up a fall-inspired snack that’s every bit as fun to make as it is to eat.
KEY INGREDIENTS IN NO-BAKE PUMPKIN BITES
These No-Bake Pumpkin Bites come together with a handful of pantry staples and a couple of optional extras that let you customize each morsel to your taste. Each ingredient plays a vital role in crafting that perfect balance of creaminess, sweetness, and texture.
- Pumpkin Puree
Provides the moist, creamy base and vibrant color that defines these bites. It’s packed with fiber and vitamin A, giving each nugget a dose of autumn in every mouthful.
- Almond Butter
Adds richness, healthy fats, and acts as the glue that holds everything together. Its nutty undertones complement the pumpkin’s sweetness perfectly.
- Rolled Oats
Give structure and chew, soaking up moisture and creating a satisfying bite. They also contribute hearty fiber that keeps you feeling full longer.
- Pure Maple Syrup
Infuses natural sweetness and subtle caramel notes, balancing the earthiness of pumpkin with a gentle, sticky sweetness.
- Vanilla Extract
Enhances all the other flavors by adding depth and a hint of fragrant warmth.
- Pumpkin Pie Spice
A harmonious blend of cinnamon, nutmeg, ginger, and cloves that brings cozy fall vibes to every nibble.
- Salt
A tiny pinch intensifies the sweetness and rounds out the flavors.
- Mini Chocolate Chips (optional)
Offer bursts of melty sweetness and a playful crunch for those who love a chocolatey surprise.
- Shredded Unsweetened Coconut (optional)
Creates a delicate, tropical coating that adds texture and a hint of natural sweetness.
HOW TO MAKE NO-BAKE PUMPKIN BITES
Before diving into the step-by-step process, you’ll appreciate how straightforward it is to transform simple pantry items into delightful bite-sized treats. This no-fuss method requires minimal equipment—just a bowl, a spoon, and perhaps a plate for rolling—and delivers consistently delicious results with zero need to preheat an oven.
1. In a large mixing bowl, combine the pumpkin puree, almond butter, maple syrup, and vanilla extract. Use a sturdy spoon or spatula to stir until the mixture becomes smooth and fully homogeneous.
2. Add the rolled oats, pumpkin pie spice, and salt to the bowl. Continue to mix thoroughly until every oat flake is coated and the spice blend is evenly distributed.
3. If desired, gently fold in the mini chocolate chips, ensuring they’re scattered throughout the mixture for little pops of sweetness in each bite.
4. Place the entire bowl in the refrigerator and chill for about 30 minutes. This step allows the blend to firm up, making it much easier to handle and shape.
5. Once the mixture is sufficiently chilled, use a tablespoon to scoop out even portions. Roll each portion between your palms to form neat, bite-sized balls.
6. If you’re adding a coconut coating, spread the shredded unsweetened coconut on a flat plate. Gently roll each pumpkin ball in the coconut, pressing lightly so it adheres all around.
7. Transfer the finished bites to an airtight container and store in the refrigerator for up to one week, ready whenever you need a wholesome snack.
SERVING SUGGESTIONS FOR NO-BAKE PUMPKIN BITES
Whether you’re hosting a cozy autumn brunch or simply craving a sweet pick-me-up, presentation can heighten the enjoyment of these pumpkin bites. Serving them thoughtfully turns a humble snack into something memorable.
These bite-sized treats pair wonderfully with a variety of accompaniments and settings. Start by arranging them on a rustic wooden board or petite dessert plate for a charming presentation. If you’re serving a crowd, layer them on parchment paper in a tiered tray to add dimension. For a playful twist, offer a small bowl of extra mini chocolate chips, a sprinkle of cinnamon, or a side of Greek yogurt drizzled with maple syrup to let guests personalize their snack. Don’t forget a few decorative elements like fresh mint leaves or a dusting of cocoa powder to elevate the visual appeal. And of course, a steaming mug of coffee, tea, or spiced latte alongside these bites can turn a simple snack into a relaxing ritual.
- Serve them on a wooden board with clusters of fresh cranberries or figs for a festive fall display.
- Pair each bite with a small dollop of Greek yogurt and a drizzle of extra maple syrup to add creamy contrast.
- Offer them in mini cupcake liners at a brunch spread alongside seasonal fruits and cheeses for a colorful spread.
- Present them next to a warm cup of chai tea or pumpkin-spiced latte to complement the spice notes and cozy atmosphere.
HOW TO STORE NO-BAKE PUMPKIN BITES
Storing these pumpkin bites correctly ensures that they maintain their texture, flavor, and freshness throughout the week. With just a little forethought, you can keep them tasting like they were made moments ago.
Proper storage prevents them from drying out or absorbing unwanted fridge odors. If you plan to enjoy them within a few days, layering the bites between sheets of parchment paper in an airtight container will prevent them from sticking together. For longer preservation, freezing is a fantastic option that locks in freshness for weeks. Always allow the bites to chill and firm up completely before transferring them to storage containers—this reduces moisture and ensures they hold their shape.
- Refrigeration: Place bites in a single layer or separated by parchment paper in an airtight container. Store in the fridge for up to one week.
- Freezing: Arrange bites on a parchment-lined tray and freeze until solid. Once firm, transfer to a freezer-safe bag or container for up to one month—thaw in the fridge before serving.
- Moisture Control: Ensure bites are fully chilled before sealing to avoid condensation, which can make them soggy.
- Portion Packs: Divide bites into small, sealed snack bags for easy grab-and-go portions—perfect for lunchboxes or workouts.
CONCLUSION
I hope this deep dive into No-Bake Pumpkin Bites has you buzzing with excitement to whip up a batch of your own. We’ve covered everything from the core ingredients—like creamy pumpkin puree and nutty almond butter—to the simple yet essential steps that transform them into perfect snack-sized treats. With just 15 minutes of active prep, no oven required, and a brief 30-minute chill, you’ll create a dozen little power-packed bites that are as wholesome as they are delicious. The flexibility of this recipe means you can customize sweetness levels with more or less maple syrup, toss in chocolate chips, or coat your bites in shredded coconut for a textured finish. Since they’re gluten-free and vegan-friendly (with the right chocolate chips), they’re a crowd-pleaser for almost any dietary preference.
Feel free to print this article and save it for future fall celebrations, quick snacks, or mid-afternoon boosts. Below, you’ll find a handy FAQ section to answer any lingering questions about substitutions, storage, or troubleshooting sticky mixtures. If you give this recipe a whirl, I’d love to hear how your No-Bake Pumpkin Bites turn out. Leave a comment sharing your tweaks, ask any questions you have, or let me know if you need tips along the way. Your feedback helps me continue sharing delicious, approachable recipes that fit seamlessly into your kitchen and life. Enjoy every bite of cozy, spiced goodness!
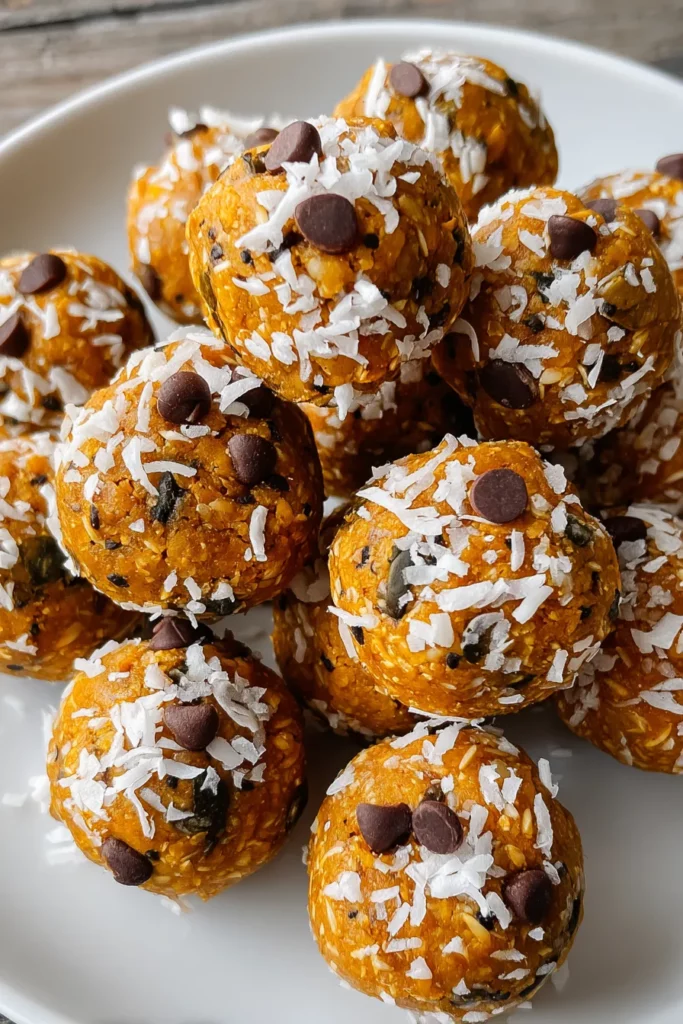

No-Bake Pumpkin Bites
Description
These no-bake pumpkin bites are bursting with fall flavors, combining creamy pumpkin and almond butter with sweet maple syrup and warming spices for an unforgettable snack.
Ingredients
Instructions
-
In a large mixing bowl, combine the pumpkin puree, almond butter, maple syrup, and vanilla extract. Stir until well combined.
-
Add the rolled oats, pumpkin pie spice, and salt to the mixture. Mix until fully incorporated.
-
If desired, stir in the mini chocolate chips for an added burst of sweetness and texture.
-
Place the mixture in the refrigerator for about 30 minutes to firm up, making it easier to handle.
-
Once the mixture is chilled, use a tablespoon to scoop out portions and roll them into small bite-sized balls with your hands.
-
If using, place the shredded coconut on a plate and roll each pumpkin bite in the coconut to coat lightly.
-
Store the bites in an airtight container in the refrigerator for up to one week.
Note
- No-bake pumpkin bites are an excellent source of energizing carbohydrates and healthy fats.
- These bites are perfect for a quick snack or healthy dessert option.
- Feel free to adjust the level of sweetness by adding more or less maple syrup.
- Try adding your favorite nuts or seeds for extra crunch and variety.
- These bites are gluten-free and can be made vegan by ensuring the chocolate chips are vegan-friendly.

