

Mini Sand Pail Pudding Cups bring a beach-inspired twist to dessert with velvety vanilla pudding swirling around fluffy whipped topping, nestled between crunchy graham cracker and vanilla wafer “sand” and crowned with chewy gummy fish candies for a playful summer vibe. These bite-sized treats capture the carefree spirit of a day by the sea, perfect for warm afternoons or backyard gatherings. Give this whimsical, textural beach party in a cup a try—you’ll be hooked after the first spoonful!
Key Ingredients
Gathering a handful of pantry staples, these Mini Sand Pail Pudding Cups come together in no time and deliver layers of creamy pudding, fluffy topping, and crispy “sand.” Here’s what you’ll need:
- 2 cups cold milk: Provides the base liquid to activate the instant pudding mix and ensure a smooth, creamy texture.
- 1 package instant vanilla pudding mix (3.4 ounce): Delivers that classic vanilla flavor and sets quickly for easy layering.
- 1 cup whipped topping: Adds a fluffy, airy layer that lightens the pudding and lends a cloud-like mouthfeel.
- 1 cup crushed vanilla wafer cookies: Forms part of the crunchy “sand” layer with sweet, buttery notes.
- 1 cup graham cracker crumbs: Contributes a golden, crunchy texture reminiscent of sandy beaches.
- 1/2 cup shredded coconut: Mixes into the crumbs for a tropical twist and extra chew.
- 1/2 cup gummy fish candies: Adds a whimsical pop of color and a chewy flourish on top.
How To Make Mini Sand Pail Pudding Cups
This simple method breaks down the process of creating these playful pudding cups into easy steps, from whisking the pudding base to layering in your crunchy “sand” and playful gummy fish. You’ll master whisking, folding, and layering like a pro as you assemble each mini sand pail. Let’s dive in:
1. In a medium bowl, whisk the cold milk and instant vanilla pudding mix for about 2 minutes until slightly thickened, ensuring the powder is fully dissolved and the mixture is smooth.
2. Refrigerate the pudding mixture for 5 minutes to allow it to fully set and develop that perfect creamy firmness.
3. Gently fold the whipped topping into the chilled pudding until smooth and creamy, taking care not to deflate the airy texture.
4. In a separate bowl, combine crushed vanilla wafer cookies, graham cracker crumbs, and shredded coconut to create the sand mixture with an even, crumbly consistency.
5. Spoon a layer of the sand mixture into the bottom of each mini sand pail or cup, pressing lightly to form a sturdy base.
6. Fill each pail halfway with the creamy pudding mixture, then top with another layer of the sand mixture, alternating textures for a beach-inspired look.
7. Garnish each pudding cup with gummy fish candies and serve immediately or chill until ready to enjoy, keeping the layers distinct and the fish perched on top.
Serving Suggestions
Once assembled, these Mini Sand Pail Pudding Cups shine at any gathering, adding a playful vibe and a burst of texture that delights both kids and adults. Serve them chilled on a bright tray or set them on a dessert table with a tropical theme. Pair with colorful napkins or tiny beach umbrellas to elevate the fun, and watch your guests dive in for seconds. Here are a few ideas to make them extra special:
- Tropical Fruit Skewers: Thread pineapple, mango, and strawberry onto small skewers and place across the rim for a fresh contrast.
- Caramel Drizzle: Lightly drizzle warm caramel sauce over the gummy fish to add a luxurious sweetness.
- Beach-Themed Platter: Arrange pudding cups on a tray lined with extra graham cracker crumbs labeled as “sand” and scatter seashell candies around.
- Mini Shovel Spoons: Serve with small plastic shovels for a playful, interactive experience that keeps the beach theme alive.
Tips For Perfect Mini Sand Pail Pudding Cups
Bringing together creamy pudding, fluffy topping, and crunchy crumbs is all about timing and texture. Begin by ensuring your pudding has fully thickened in the fridge before folding in the whipped topping—this prevents the layers from blending into one another. When creating your “sand,” aim for uniform crumbs so that each spoonful is perfectly balanced. Feel free to experiment with salty accents or homemade toppings to make it your own. And remember, assembly is easiest when all components are chilled and ready to go!
- For best results use fresh whipped topping or homemade whipped cream.
- Substitute crushed pretzels or toasted nuts in the sand mixture for a salty-sweet twist.
- Prepare the pudding cups a few hours in advance and keep covered in the refrigerator.
- Mini plastic sand pails and small shovel spoons make fun beach-themed serving vessels.
How To Store It
These pudding cups are happiest when kept cold and sealed tight. If you want to prep ahead, focus on maintaining that crisp “sand” texture and creamy pudding consistency. Always store them in the refrigerator, and consider separate storage for certain elements if you’re building far in advance. Here are a few ways to keep your mini beach treats fresh:
- Refrigeration in Airtight Containers: Store assembled cups in the fridge for up to 3 days to maintain creaminess.
- Plastic Wrap or Lids: Cover each mini pail or cup tightly to prevent absorption of other fridge odors.
- Separate Sand Layer: If making ahead, keep the crumb mixture in a sealed bag and layer just before serving to preserve crunch.
- Avoid Freezing: Freezing can alter the texture of pudding and whipped topping, so stick to chilled storage only.
Frequently Asked Questions
Here are quick answers to common queries about Mini Sand Pail Pudding Cups:
- Q: How long can I prepare Mini Sand Pail Pudding Cups in advance?
A: You can assemble the pudding cups up to 4 hours before serving. Once layered, cover each pail with plastic wrap or an airtight lid and store in the refrigerator. The pudding will remain creamy and the “sand” layer will hold its texture for several hours if kept chilled.
- Q: Can I use homemade whipped cream instead of whipped topping?
A: Yes. Whip 1 cup of heavy cream with 2 tablespoons of powdered sugar and 1 teaspoon of vanilla extract until soft peaks form. Gently fold the homemade whipped cream into the pudding mixture just as you would the whipped topping for a fresh, rich flavor.
- Q: What can I substitute in the “sand” mixture for a sweet-salty flavor?
A: Swap half of the vanilla wafer cookies with crushed pretzels or toasted nuts. For example, mix ½ cup crushed vanilla wafers, ½ cup finely chopped toasted pecans, and ½ cup graham cracker crumbs, plus ½ cup shredded coconut. This combination adds a delightful crunch and salty balance to the sweet pudding.
- Q: Which serving vessels work if I don’t have mini plastic sand pails?
A: You can use clear plastic or glass cups, mason jars, small ramekins, or even paper cups. Fill them in the same layering order—sand mixture, pudding, sand mixture—and top with gummy fish candies for the beach-themed look.
- Q: How do I keep the “sand” layer from getting soggy?
A: Ensure the pudding is fully chilled before layering. After refrigerating the pudding mix for 5 minutes, fold in the whipped topping, then immediately build your layers. Also, press the first sand layer gently to create a firmer base, which helps maintain a crisp texture until serving.
- Q: Can I make these gluten-free or dairy-free?
A: For gluten-free cups, use gluten-free vanilla wafers and graham crackers. For dairy-free, choose a plant-based instant vanilla pudding mix, substitute almond or coconut milk for cold milk, and use dairy-free whipped topping. Keep the coconut and gummy fish (check for gelatin-free options) for the themed garnish.
What Makes This Special
These Mini Sand Pail Pudding Cups capture all the joy of a beach day in one playful, layered dessert. The contrast between creamy vanilla pudding, airy whipped topping, and crunchy “sand” crumbs keeps every spoonful exciting, while gummy fish candies add a whimsical flourish. It’s the perfect blend of textures and flavors that makes people smile—and it’s so easy to prepare! Feel free to print and save this recipe for summer parties or anytime you need a taste of fun. Share your adventures, tweaks, or beach-themed mishaps below—I’d love to hear how your pudding cups turned out!
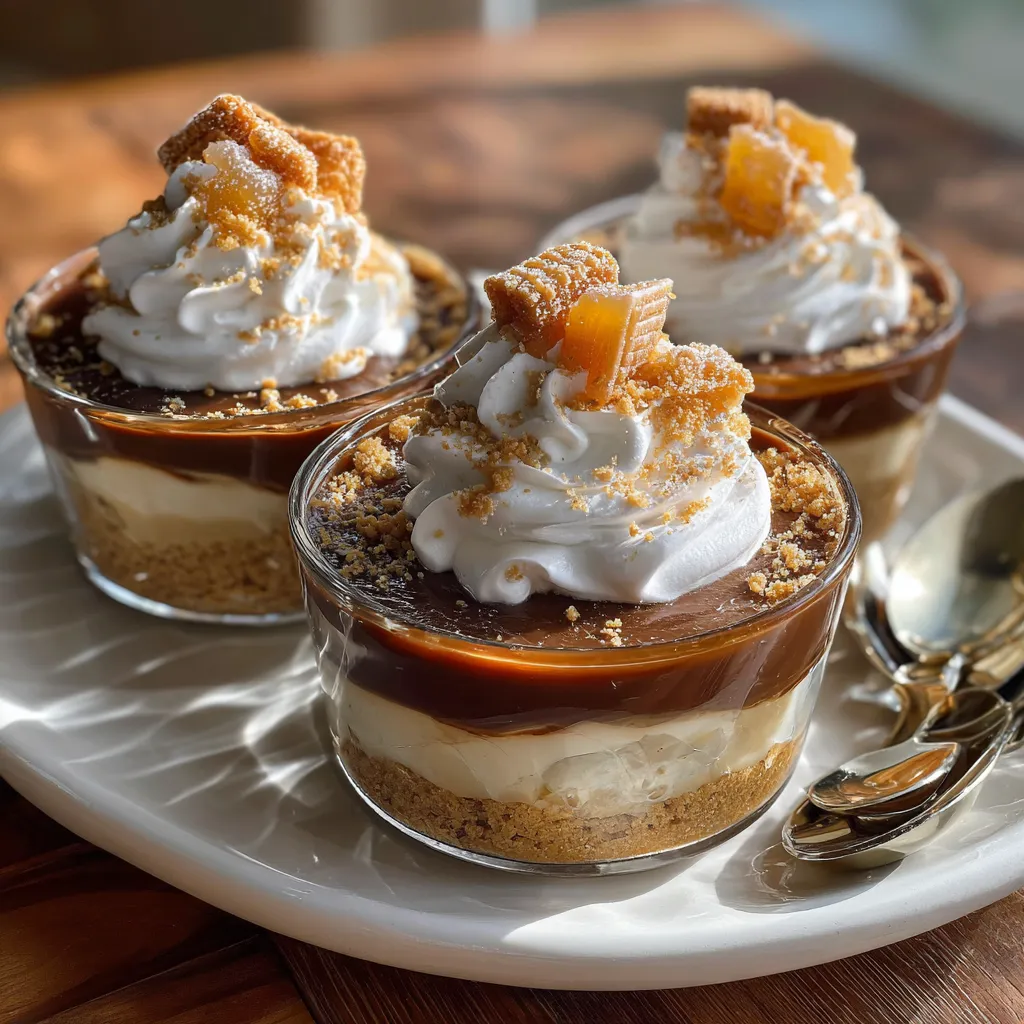

Mini Sand Pail Pudding Cups
Description
Velvety vanilla pudding swirls with fluffy whipped topping nestled between crunchy graham cracker and vanilla wafer 'sand', topped with chewy gummy fish for a whimsical, textural beach party in a cup.
Ingredients
Instructions
-
In a medium bowl whisk cold milk and instant vanilla pudding mix for about 2 minutes until slightly thickened.
-
Refrigerate the pudding mixture for 5 minutes to allow it to fully set.
-
Fold whipped topping gently into the pudding until smooth and creamy.
-
In a separate bowl combine crushed vanilla wafer cookies, graham cracker crumbs, and shredded coconut to create the sand mixture.
-
Spoon a layer of the sand mixture into the bottom of each mini sand pail or cup.
-
Fill each pail halfway with the pudding mixture, then top with another layer of the sand mixture.
-
Garnish each pudding cup with gummy fish candies and serve immediately or chill until ready to enjoy.
Note
- For best results use fresh whipped topping or homemade whipped cream.
- Substitute crushed pretzels or toasted nuts in the sand mixture for a salty-sweet twist.
- Prepare the pudding cups a few hours in advance and keep covered in the refrigerator.
- Mini plastic sand pails and small shovel spoons make fun beach-themed serving vessels.

