

Every spoonful of these Mini Crème Brûlée Cheesecakes feels like a celebration in your mouth. The first time I made them, I was curious about how a bite-sized dessert could balance a buttery graham cracker crunch, a velvety cheesecake center, and that signature caramelized sugar crown. Let me tell you, they blew my expectations out of the water! As a home cook who loves inviting friends over for casual get-togethers, I’m always on the lookout for desserts that look fancy but are surprisingly easy to whip up. These little wonders check all the boxes: they’re playful, party-ready, and totally Instagram-worthy. Plus, with just a handful of pantry staples and simple steps, you’ll end up with a tray of gorgeous, miniature brûlées without breaking a sweat.
I’ll admit, the first time I torched the sugar on top, I was a bit nervous—like a rookie chef trying to conquer a fancy technique. But once you feel that warm glow of confidence and hear the sugar crackle under your spoon, you’ll be hooked. And here’s the best part: you can make them a day ahead. They stay perfectly firm after a good chill in the fridge, and the flavors continue to meld overnight. Trust me, planning ahead never tasted so good! Whether you’re treating yourself to a solo Netflix night or dazzling a crowd of dessert lovers at your next gathering, these mini crème brûlée cheesecakes are guaranteed to earn you rave reviews. So grab your mixer, clear a little space in your fridge, and let’s dive into all the delicious details that make these bite-sized delights an absolute must for your recipe collection.
KEY INGREDIENTS IN MINI CRÈME BRÛLÉE CHEESECAKES
Every memorable dessert starts with the right combination of ingredients. In this section, I’ll walk you through the stars of the show and explain how each one contributes to the final flavor and texture you’ll adore.
- Graham Cracker Crumbs
These golden crumbs form the foundation of our crust. When mixed with melted butter and a bit of sugar, they bake up into a sturdy, buttery base that gives each cheesecake its signature crunch.
- Granulated Sugar
Used in both the crust mixture and the cheesecake filling, granulated sugar sweetens the dessert without overpowering the rich cream cheese. A final dusting of sugar on top is what transforms into the classic brûlée glassy shell.
- Unsalted Butter
Melted and mixed into the graham cracker crumbs, unsalted butter binds the crust together and adds a silky richness, elevating a simple crumb mixture into a flavorful, cohesive base.
- Cream Cheese
The heart and soul of the cheesecake filling, cream cheese provides that irresistibly smooth and tangy profile. When softened and whipped to perfection, it creates a luxurious texture that balances the sweet topping.
- Eggs
Eggs help set the cheesecake, giving it structure and a delicate, custard-like consistency. Adding them one at a time ensures your filling stays lump-free and velvety.
- Vanilla Extract
A splash of vanilla extract rounds out the flavor, adding warm, floral notes that complement the tang of the cream cheese and the sweetness of the sugar.
- Heavy Cream
Rich and smooth, heavy cream lightens the filling slightly and enhances its creaminess, creating that melt-in-your-mouth sensation.
HOW TO MAKE MINI CRÈME BRÛLÉE CHEESECAKES
Let’s roll up our sleeves and dive into the step-by-step magic that turns these simple ingredients into bite-sized masterpieces. Each phase of this recipe—from the crust to the cheesecake filling to the brûlée topping—plays a crucial role in creating the perfect balance of textures and flavors.
1. Preheat the oven to 325°F (163°C) and line a 12-cup muffin tin with paper liners to ensure easy removal and a neat presentation.
2. In a medium-sized bowl, combine the graham cracker crumbs, granulated sugar, and melted butter. Stir vigorously until the crumbs are evenly coated and the mixture resembles wet sand.
3. Press about 1 tablespoon of the graham cracker mixture into the bottom of each muffin cup, using the back of a spoon or your fingertips to firmly compact the crust. Bake for 5 minutes, then carefully remove the crusts from the oven and set aside.
4. While the crust is baking, prepare the cheesecake filling. In a large mixing bowl, beat the softened cream cheese with a hand mixer or stand mixer on medium speed until completely smooth and free of lumps.
5. Add the granulated sugar to the cream cheese and continue beating until the mixture is light and fluffy, pausing occasionally to scrape down the bowl.
6. Add the eggs one at a time, mixing on low speed after each addition until just incorporated. This gentle approach prevents overwhipping and keeps your filling silky.
7. Stir in the vanilla extract and heavy cream, then mix on low speed until the batter is homogeneous and custard-like in texture.
8. Pour the cheesecake filling over the pre-baked graham cracker crusts, filling each muffin cup nearly to the top but leaving a tiny gap for rising.
9. Bake the cheesecakes for 18–20 minutes, or until the edges are just set and the centers still have a slight jiggle. Remove the tin from the oven and allow the cheesecakes to cool to room temperature in the pan.
10. Once they’ve cooled, refrigerate the cheesecakes in the tin for at least 4 hours or, even better, overnight to ensure they firm up completely.
11. When you’re ready to serve, sprinkle a thin, even layer of granulated sugar atop each cheesecake, rotating the pan to distribute it evenly.
12. Using a kitchen torch, carefully caramelize the sugar by holding the flame a few inches above the surface and moving in a circular motion until the sugar melts and transforms into a golden-brown, crisp shell.
13. Let the caramelized sugar cool and harden for a minute or two before digging in—the signature crack of the brûlée topping is well worth the wait!
SERVING SUGGESTIONS FOR MINI CRÈME BRÛLÉE CHEESECAKES
After all that patience in chilling and torching, these mini crème brûlée cheesecakes deserve a show-stopping presentation. Whether you’re hosting a small gathering or enjoying a decadent treat solo, the right garnishes and pairings can elevate each bite to a full sensory experience. From contrasting textures to bright pops of flavor, here are some playful serving ideas that will have everyone reaching for seconds.
- Serve them on a sleek slate platter with fresh mixed berries—strawberries, raspberries, and blueberries add a tangy contrast that perfectly complements the sweet, creamy custard and crunchy caramel top.
- Add a drizzle of homemade fruit coulis, like raspberry or passion fruit, around each cheesecake for a vibrant swirl of color and sharp fruitiness that cuts through the richness.
- Pair these bite-sized delights with a small glass of sparkling Prosecco or rosé, allowing guests to sip bubbles that echo the crackle of the brûlée and cleanse the palate between spoonfuls.
- Sprinkle a few toasted almond slivers or crushed pistachios over the caramelized sugar just before serving for a nutty crunch and an earthy flavor dimension that’s utterly irresistible.
HOW TO STORE MINI CRÈME BRÛLÉE CHEESECAKES
Proper storage keeps your mini cheesecakes tasting as fresh and decadent as the day you made them. With their delicate caramel top and creamy interior, these little desserts thrive when treated with a bit of extra care. Whether you’re preparing them a day in advance or saving leftovers, follow these tips to maintain that signature crunchy brûlée layer and silky cheesecake filling.
- Store in an airtight container in the refrigerator to prevent moisture from softening the caramelized sugar top. A tight seal also protects the cheesecakes from absorbing any stray odors.
- If you need to keep them longer than two days, consider freezing the un-torched cheesecakes. Place them on a baking sheet to freeze individually, then transfer to a freezer-safe bag. When ready to serve, thaw in the fridge, sprinkle with sugar, and torch just before guests arrive.
- For the best texture, avoid stacking the cheesecakes in your container. Place parchment or wax paper between layers if you must stack to prevent the caramel crust from sticking.
- Label your storage container with the date you made them and plan to enjoy them within 4–5 days. After that, the quality of the crunchy topping and creamy filling may begin to decline.
CONCLUSION
Bringing together the buttery crunch of a graham cracker crust, the smooth richness of a cream cheese filling, and the dramatic flair of a caramelized sugar topping, Mini Crème Brûlée Cheesecakes are proof that small bites can deliver big flavor. From the moment you whisk together the first ingredients to that satisfying crack of the brûlée shell under your spoon, each step is a joy—even for an intermediate home cook. You’ve learned how to master a buttery crust, develop a lump-free custard, and wield a kitchen torch like a pro. Plus, with a total prep time of just 20 minutes, a bake of 25 minutes, and a rest time of at least 4 hours, these bite-sized desserts can easily be made a day ahead, giving you more time to relax before your event. With about 350 calories per serving, they offer a sophisticated end to any meal without going overboard—perfect for dinner parties, potlucks, or a sweet solo treat when you need a little indulgence.
Feel free to print this article or save it for later—you’ll want to have it handy when the craving for something creamy, crunchy, and caramelized strikes. And if you’re curious about some common questions or troubleshooting tips, you can find a FAQ section below. Have thoughts to share? Drop a comment, ask a question, or let me know how your Mini Crème Brûlée Cheesecakes turned out. Whether you nailed the perfect crack on your first torch or you need a pointer on smoothing out your filling, I’m here to help. Happy baking, and may every bite be as delightful as that first crack of caramelized sugar!
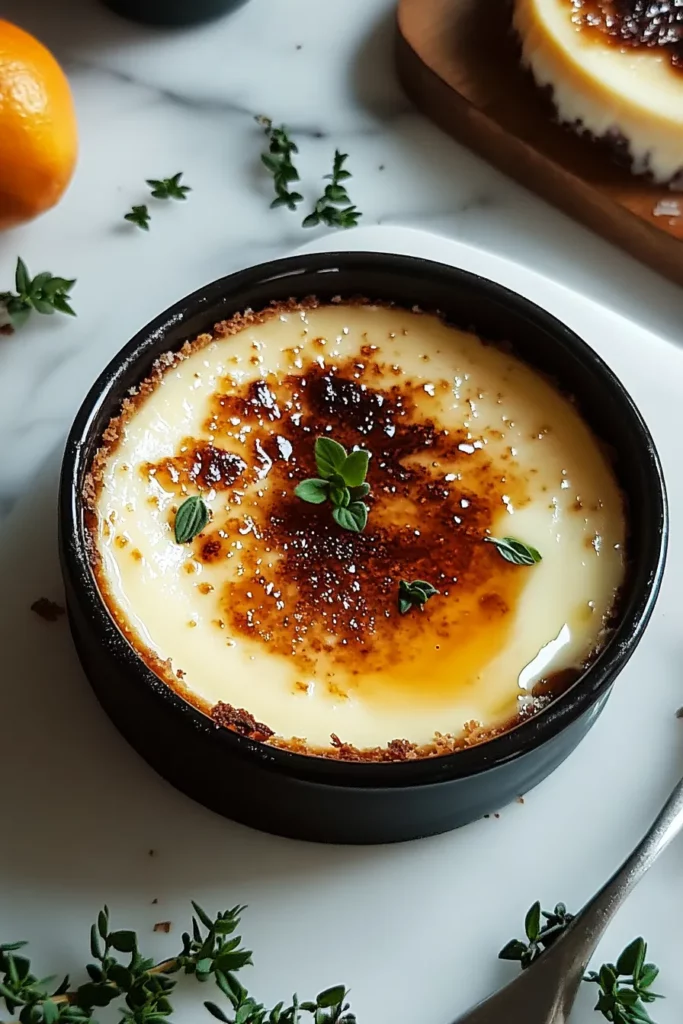

Mini Crème Brûlée Cheesecakes
Description
These little cheesecake wonders pair a buttery graham crust with velvety cream cheese and a crackling brûlée topping in every bite, perfect for gatherings or a sweet solo treat.
Ingredients
Instructions
-
Preheat the oven to 325°F (163°C). Line a 12-cup muffin tin with paper liners.
-
In a medium-sized bowl, combine the graham cracker crumbs, granulated sugar, and melted butter. Stir until well mixed and the crumbs are evenly coated with the butter.
-
Press about 1 tablespoon of the graham cracker mixture into the bottom of each muffin cup. Use a spoon or your fingers to press it down firmly to form the crust. Bake for 5 minutes and remove from the oven.
-
While the crust is baking, prepare the cheesecake filling. In a large bowl, beat the softened cream cheese with a hand mixer or stand mixer until smooth and creamy.
-
Add the granulated sugar to the cream cheese and continue to beat until well combined.
-
Add the eggs one at a time, beating after each addition until fully incorporated.
-
Add the vanilla extract and heavy cream, and mix until smooth.
-
Pour the cheesecake filling over the pre-baked graham cracker crusts, filling each muffin cup almost to the top.
-
Bake the cheesecakes for 18-20 minutes, or until the edges are set but the centers are still slightly jiggly. Remove from the oven and allow them to cool to room temperature.
-
Once cooled, refrigerate the cheesecakes for at least 4 hours or overnight to firm up.
-
Before serving, sprinkle a thin, even layer of granulated sugar over the top of each cheesecake.
-
Using a kitchen torch, caramelize the sugar by holding the torch a few inches above the surface and moving it in a circular motion until the sugar melts and turns golden brown.
-
Let the caramelized sugar cool and harden before serving.
Note
- Make sure the cheesecake filling is smooth and free of lumps for the best texture.
- A kitchen torch works best for caramelizing the sugar, but if you don’t have one, you can place the cheesecakes under the broiler for a few seconds to achieve the same result.
- These mini cheesecakes can be made a day in advance, which allows the flavors to develop and ensures they firm up nicely in the fridge.
- The graham cracker crust adds a perfect crunch and a delicious flavor contrast to the creamy filling.
- You can customize the toppings by adding fresh berries or a drizzle of fruit sauce if you like.

