

If you’ve ever found yourself craving that perfect combination of crisp crunch and gooey cheese, you’re in for a treat with these Loaded Cheesy Pocket Tacos. There’s something endlessly satisfying about biting into a warm flour tortilla that’s been transformed into a golden pocket melting with cheddar and mozzarella, all hugged by savory, seasoned meat. Whether you’re winding down after a long day or gearing up for a gathering with friends, these pocket tacos come together so quickly that you’ll feel like you’ve unlocked a secret shortcut to happiness. They’re the kind of recipe that welcomes improvisation: swap in ground turkey for a leaner profile, sneak in some beans for extra fiber, or even experiment with bold spices if you like to live on the edge of flavor town.
Beyond their irresistible texture, these pocket tacos capture the spirit of home cooking—easy, affordable, and endlessly customizable. The mixture of crunchy tortilla, lush melted cheese, and juicy meat creates a harmony that instantly transports you to a cozy kitchen, armed with laughter, good tunes, and maybe a cold drink in hand. You’ll want to share this recipe with everyone you know, because let’s face it: food tastes better when you watch your loved ones take that first, blissful bite. And if you’re anything like me, you’ll find yourself dreaming up new variations the next time you swing through the grocery store. Ready to dive in? Let’s roll up our sleeves and load up those pockets!
KEY INGREDIENTS IN LOADED CHEESY POCKET TACOS
These Loaded Cheesy Pocket Tacos rely on a handful of superstar components that come together to create layers of flavor, texture, and color. From the seasoned meat base to the vibrant toppings, each ingredient plays its part in making these tacos an all-time favorite. You’ll also notice plenty of room for personalization—swap, tweak, or add as you see fit!
- Ground beef (or ground chicken/turkey)
Acts as the hearty foundation of these tacos, providing rich umami and meaty texture. Choosing leaner poultry keeps things light without sacrificing protein.
- Taco seasoning
Delivers that signature Tex-Mex kick, blending chili powder, cumin, garlic, and paprika. Feel free to use a store‐bought packet or shake up your own homemade mix.
- Olive oil
Ensures the meat browns evenly and adds a fruity undertone. A small amount goes a long way in preventing sticking and boosting flavor.
- Flour tortillas
The vessel that holds all the goodness. Warmed until pliable, they become golden and crispy in the oven, sealing in the cheese and meat.
- Shredded cheddar cheese
Brings sharp, tangy notes and vibrant color, complementing the seasoned meat with plenty of melty goodness.
- Shredded mozzarella cheese
Known for its stringy stretch and mild, milky flavor. When combined with cheddar, it creates an irresistible cheese pull.
- Sour cream
Provides a cool, creamy counterpoint to the heat of the meat and jalapeños. It also helps bind toppings in place.
- Salsa
Adds fresh tomato brightness and a touch of acidity. Choose your favorite heat level, from mild to fiery, depending on your taste buds.
- Red onion
Offers crisp, slightly sharp snaps in every bite. Finely chopped, it distributes evenly for bursts of flavor.
- Cilantro
Lends herbal freshness and vibrant green hues. A sprinkle right before serving brightens the entire dish.
- Jalapeños (optional)
For those who crave more heat, sliced jalapeños pack a punch. Leave them out or swap for pickled peppers if you prefer.
- Diced tomatoes
Juicy, colorful chunks that contrast beautifully with the crispy pocket shell. They add lightness and a pop of sweet acidity.
- Black olives
Introduce a salty, briny dimension. The sliced rounds also make the taco pockets look extra inviting.
- Salt and pepper
Simple seasonings that adjust and balance all the flavors to your personal preference.
HOW TO MAKE LOADED CHEESY POCKET TACOS
Bringing these Loaded Cheesy Pocket Tacos to life is a straightforward adventure full of simple techniques that yield impressive results. From browning seasoned meat to warming tortillas and baking until golden, each step builds layers of taste and texture. Read through the instructions once, gather your ingredients, and get ready to enjoy a relaxed cooking experience that ends with everyone around the table cheering for seconds.
1. In a large skillet, heat the olive oil over medium heat. Add the ground beef (or ground chicken/turkey) and cook until browned, using a spoon to break the meat apart as it cooks. If there’s excess fat, drain it off to keep the pockets from going soggy.
2. Sprinkle in the taco seasoning and follow package directions—usually adding some water and letting the mixture simmer. Stir thoroughly so every morsel of meat is cloaked in spices. Let it simmer for about five minutes until the flavors become fully integrated.
3. While the meat simmers, heat a second skillet over medium heat. Place each flour tortilla in the pan for about 20–30 seconds per side, just long enough to make them soft and pliable. Stack them on a plate and cover with a clean dish towel to stay warm.
4. Preheat your oven to 375°F (190°C), ensuring it’s at the right temperature when you’re ready to bake.
5. On a flat surface, lay one warm tortilla down. Use a spoon to portion some of the seasoned meat mixture into the center. Top with a generous handful of both cheddar and mozzarella cheese, creating that ooey-gooey core.
6. Carefully fold the tortilla in half to form a neat pocket, making sure all the filling stays tucked inside for maximum melty goodness.
7. Repeat the filling and folding process with the remaining tortillas and meat until you have eight loaded pockets.
8. Arrange the folded pocket tacos on a baking sheet lined with parchment paper or a light coating of oil to prevent sticking.
9. Bake in the preheated oven for about 10–12 minutes, or until the tortillas turn golden brown and the cheese inside becomes fully melted and gooey.
10. While the tacos bake, whisk together sour cream, salsa, and a pinch of salt in a small bowl. This creamy topping brings a tangy balance to the rich pockets.
11. Remove the taco pockets from the oven and let them rest for a few minutes. Top each one with the sour cream–salsa mixture, then scatter cilantro, tomatoes, red onion, black olives, and jalapeños for extra texture, flavor, and pop of color.
SERVING SUGGESTIONS FOR LOADED CHEESY POCKET TACOS
Serving these Loaded Cheesy Pocket Tacos is where your creativity can really shine. Think of vibrant sides, complementary dips, and crisp garnishes that turn a simple meal into a festive spread. Whether it’s a casual weeknight dinner or a celebratory gathering, these taco pockets adapt effortlessly and bring a playful twist to traditional tacos. From bright salads to refreshing beverages, you can build an atmosphere of fun, flavor, and community around this dish, making every bite feel like a small fiesta in your home.
- Mexican Rice on the Side
Serve warm, fluffy Mexican rice that’s spiced with tomatoes, garlic, and cumin. The soft grains absorb any drips of sour cream or salsa for an extra tasty element.
- Homemade Guacamole
Whip up a bowl of creamy guacamole with ripe avocados, lime juice, garlic, and cilantro. Its cool, tangy notes contrast perfectly with the warm, cheesy pockets.
- Pickled Jalapeño and Onions
Offer a side of quick-pickled jalapeños and red onions in a vinegar brine. These add a crisp, tangy pop and a bright pink hue that looks as good as it tastes.
- Refreshing Cucumber-Lime Salad
Combine crisp cucumber slices, fresh lime juice, and a sprinkle of chili powder for a light, hydrating salad. It cleanses the palate and complements all the rich flavors.
HOW TO STORE LOADED CHEESY POCKET TACOS
Storing your leftover taco pockets properly ensures that every bite stays as delicious as the first time around. Whether you’re meal-prepping for a busy week or saving extras for a quick snack, these methods will help maintain the perfect balance of crisp tortilla and melted cheese. Keep in mind that proper cooling, airtight containers, and gentle reheating are the keys to preserving quality and flavor.
- Airtight Container in the Fridge
Place cooled taco pockets in a single layer inside an airtight container, separating layers with parchment paper. They’ll stay good for up to 3–4 days. Reheat in a 350°F oven to crisp them back up.
- Freezer-Friendly Wrap
Wrap each cooled pocket individually with plastic wrap and then aluminum foil. Store in a freezer bag for up to 2 months. Thaw overnight in the fridge before reheating.
- Separate Toppings
Keep the sour cream–salsa mix and fresh veggies unmixed in small containers. This prevents sogginess. Add them back right before serving to retain maximum freshness.
- Oven Reheat Method
To reheat refrigerated or thawed pockets, place them on a baking sheet and warm in a 350°F (175°C) oven for about 8–10 minutes, or until heated through and the tortilla is crisp again.
CONCLUSION
Bringing Loaded Cheesy Pocket Tacos into your regular rotation is a surefire way to add some excitement to your mealtime routine. From the moment you brown that seasoned meat to the second you slice into a steaming pocket oozing cheese, every step feels like a celebration of home cooking at its most approachable and satisfying. These tacos are perfect for cooks of all levels—whether you’re a beginner looking to master a fun new dish or a seasoned pro aiming to impress a crowd. The combination of quick prep, endless customization, and comforting flavors makes them a standout choice for dinner parties, weeknight dinners, or even meal prep.
Feel free to print out this article and tuck it into your favorite recipe binder or bookmark it on your device for easy reference. You’ll also find a handy FAQ section below to address any questions that might pop up as you go. If you give these Loaded Cheesy Pocket Tacos a try, please share your thoughts—whether it’s a tweak you made, a tip you discovered, or a question you have about the process. Your feedback and comments help make this kitchen community even richer, and I can’t wait to hear how you make this recipe your own. Enjoy every crispy, cheesy bite!
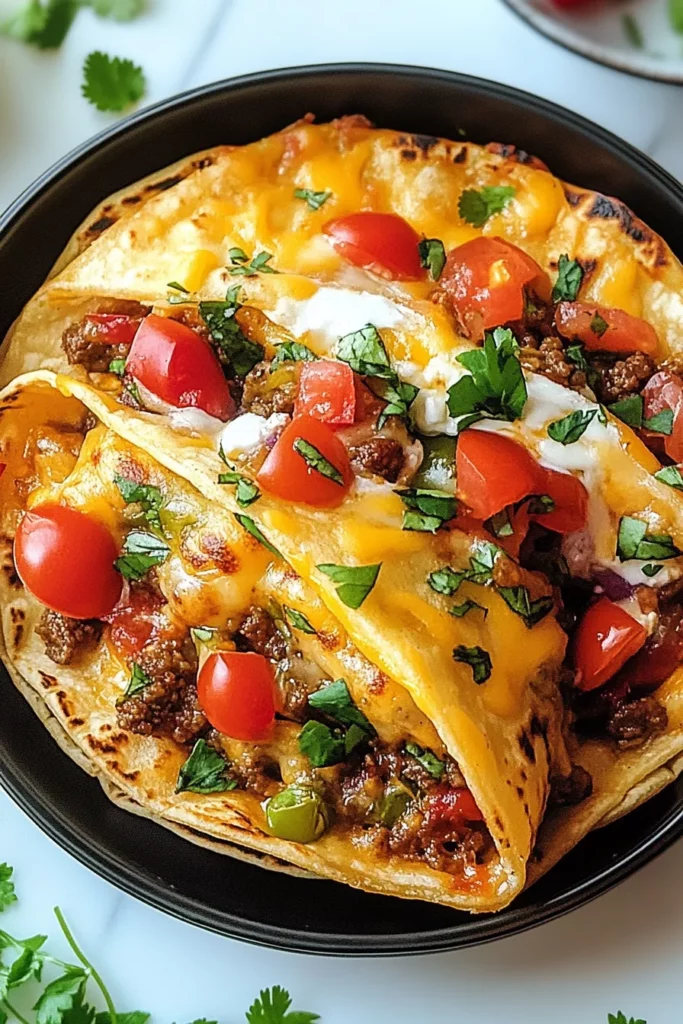

Loaded Cheesy Pocket Tacos
Description
Packed with savory ground meat and melting cheese, these loaded pocket tacos are a fun twist on traditional tacos. Customize with fresh toppings for a burst of flavor!
Ingredients
Instructions
-
In a large skillet, heat the olive oil over medium heat. Add the ground beef (or ground chicken/turkey) and cook until browned, breaking it apart with a spoon as it cooks. Drain excess fat if necessary.
-
Add the taco seasoning to the meat and follow the package instructions (usually adding water and simmering). Stir well to ensure the meat is coated in seasoning. Let it simmer for about 5 minutes until the flavors meld together.
-
While the meat is simmering, heat another skillet over medium heat. Warm each flour tortilla for about 20-30 seconds on each side, just until they become soft and flexible. Set aside.
-
Preheat your oven to 375°F (190°C).
-
Take one warm tortilla and place it on a flat surface. Spoon some of the seasoned meat mixture into the center of the tortilla. Add a generous amount of both shredded cheddar and mozzarella cheese on top of the meat.
-
Carefully fold the tortilla in half to form a pocket, ensuring the filling is securely inside.
-
Repeat this process with the remaining tortillas and filling.
-
Place each folded pocket taco onto a baking sheet lined with parchment paper or lightly greased.
-
Bake the taco pockets in the preheated oven for about 10-12 minutes, or until the tortillas are golden and crispy, and the cheese is fully melted inside.
-
While the tacos are baking, prepare the toppings. In a small bowl, mix the sour cream, salsa, and a pinch of salt. Set aside.
-
Once the taco pockets are done, remove them from the oven and let them cool slightly. Top with the sour cream-salsa mixture, fresh chopped cilantro, diced tomatoes, red onion, black olives, and jalapeños for added flavor and texture.
Note
- You can easily swap the ground meat for a vegetarian option like black beans or lentils for a plant-based version.
- For an extra cheesy experience, sprinkle some additional cheese on top of the folded taco pockets before baking.
- These taco pockets make great party snacks, and you can customize the fillings based on your preferences (guacamole, grilled veggies, or even pulled pork would be delicious additions).
- Serve with a side of Mexican rice or guacamole for a complete meal!

