

There’s something irresistibly satisfying about a dish that brings together sweet, savory, and just a hint of heat in one glorious bite—and these Honey Garlic Chicken Breasts deliver exactly that. Tender, juicy chicken breasts take center stage, getting a quick pan-sear to achieve a golden-brown crust before being bathed in a luscious, sticky honey garlic sauce. Each mouthful bursts with layers of flavor: the mellow sweetness of honey, the rich umami notes of soy sauce, and the bright tang of apple cider vinegar all play off a warm kiss of ginger and garlic. As the sauce thickens to a glossy, clingy perfection, it transforms simple chicken into a weeknight superstar that looks and tastes like it took hours to create—yet you’ll be in and out of the kitchen in under forty minutes.
Whether you’re a busy parent juggling homework and activities, a beginner cook eager to impress, or someone craving a comforting meal that’s anything but boring, this recipe has your name on it. With just a handful of pantry staples and fresh ingredients, you can whip up a crowd-pleasing dinner that feels both homey and special. The seasoning ritual and dredging in flour add that satisfying crust, while a brief rest time ensures tender, juicy results every single time. Gather your skillet, your whisk, and perhaps a glass of something chilled, and get ready to dive into one of the most delicious, easy, and versatile chicken recipes you’ll ever try.
KEY INGREDIENTS IN HONEY GARLIC CHICKEN BREASTS
Before we get cooking, let’s talk about the stars of the show. Each ingredient plays a specific role, from building savory depth to adding that signature sweetness and helping the sauce cling just right. Here’s what you’ll need and why it matters:
- Chicken breasts
These boneless, skinless cuts form the hearty base of the dish. They’re lean, quick to cook, and absorb the sauce beautifully, staying moist when seared to a golden finish.
- All-purpose flour
A light dredge in flour creates a delicate crust on the chicken, giving it a slight crispness and helping to thicken the sauce as it simmers.
- Salt
The simplest seasoning, salt enhances and balances all other flavors. It ensures every bite has the right level of savoriness.
- Black pepper
Freshly ground black pepper adds a gentle heat and complexity, rounding out the sweetness of honey.
- Olive oil
This high-smoke-point oil is perfect for pan-searing, helping you achieve a beautiful, even browning without sticking.
- Honey
The sweet star of the show, honey creates that glossy, luscious glaze. It also helps caramelize the exterior of the chicken for extra depth.
- Soy sauce
With its rich umami profile, soy sauce deepens the flavor, contributing saltiness and a subtle earthiness that balances the honey’s sweetness.
- Apple cider vinegar
A splash of acidity cuts through the sweetness and brightens the overall taste, ensuring the sauce is vibrant and never cloying.
- Garlic
Four cloves of minced garlic (or more, if you’re a garlic lover) infuse the sauce with a pungent, aromatic backbone.
- Ground ginger
Ginger introduces a warm, spicy undertone that pairs perfectly with garlic, adding depth and a hint of zing.
- Chili flakes (optional)
For those who like a bit of heat, chili flakes bring a gentle kick that highlights the sweet and tangy notes.
- Cornstarch
Combined with water to form a slurry, cornstarch thickens the sauce quickly and smoothly, giving it a silky texture that clings to the chicken.
- Water
Used to dissolve the cornstarch into a lump-free slurry, ensuring the sauce reaches the perfect consistency.
- Fresh parsley
A sprinkling of chopped parsley adds a pop of color and a hint of fresh, herbaceous flavor to finish the dish.
HOW TO MAKE HONEY GARLIC CHICKEN BREASTS
Let’s walk through the cooking process step by step. This recipe is straightforward, making it perfect for beginner cooks or anyone looking for a fuss-free dinner idea. Just follow these detailed instructions, and you’ll have succulent chicken breasts coated in a sticky, flavor-packed sauce in no time.
1. Season and Dredge the Chicken
Pat the chicken breasts dry, then sprinkle both sides with salt and pepper. Place the all-purpose flour in a shallow dish and lightly dredge each breast, shaking off any excess. This creates a thin coating that crisps up beautifully and helps the sauce adhere.
2. Pan-Sear the Chicken
Heat the olive oil in a large skillet over medium heat until shimmering. Add the chicken breasts and cook for about 5–7 minutes on each side, rotating only once to achieve an even golden-brown crust. Once fully cooked through, transfer the chicken to a plate and set aside.
3. Combine the Sauce Ingredients
In the same skillet (no need to clean it out!), pour in the honey, soy sauce, and apple cider vinegar. Add the minced garlic, ground ginger, and chili flakes if you’re using them. Stir thoroughly to dissolve any browned bits from the chicken and meld the flavors together.
4. Simmer the Sauce
Let the sauce mixture gently simmer for 2–3 minutes, stirring occasionally. This step helps the flavors concentrate and starts the caramelization process.
5. Thicken with Cornstarch Slurry
In a small bowl, whisk together the cornstarch and water until completely smooth. Pour this slurry into the skillet and stir constantly to avoid lumps. The sauce will begin to thicken and take on that glossy sheen.
6. Recoat the Chicken
Return the seared chicken breasts to the skillet, spooning sauce over the top. Flip each piece to ensure both sides are coated in the thickened glaze. Cook for another 2 minutes, just long enough to heat through and let the chicken soak up those flavors.
7. Plate and Garnish
Transfer the chicken breasts to a serving platter, spooning any remaining sauce over them. Finish with a sprinkle of chopped fresh parsley for a burst of color and a touch of fresh herb aroma.
SERVING SUGGESTIONS FOR HONEY GARLIC CHICKEN BREASTS
Once your Honey Garlic Chicken Breasts are glazed and ready, it’s time to think about the perfect accompaniments. This dish pairs beautifully with a variety of sides that soak up every last drop of that sweet-savory sauce. Here are some ideas to turn your meal into a complete, balanced plate that will have everyone at the table smiling—and coming back for seconds.
- Steamed Jasmine Rice
Fluffy, fragrant rice is the ultimate partner for these saucy chicken breasts. The grains soak up the honey garlic glaze, ensuring no flavor is left behind. Simply cook rice according to package instructions and serve alongside the chicken for a classic combo.
- Sautéed Vegetables
Brighten up your plate with a medley of crisp-tender broccoli, bell peppers, and snap peas. A quick stir-fry with a drizzle of sesame oil complements the sweet and savory notes of the chicken while adding color and nutrition.
- Garlic Mashed Potatoes
Creamy mashed potatoes studded with roasted garlic provide a cozy, comforting base. Their buttery richness contrasts beautifully with the sweet-tangy glaze, creating a hearty, soul-warming meal.
- Fresh Green Salad
A simple arugula or mixed greens salad with a light lemon vinaigrette adds a refreshing counterpoint. The peppery greens and bright citrus dressing cut through the richness of the sauce, offering balance on the palate.
HOW TO STORE HONEY GARLIC CHICKEN BREASTS
Storing your Honey Garlic Chicken Breasts properly is key to maintaining their delicious texture and vibrant flavor. Whether you’re prepping ahead, saving leftovers for tomorrow’s lunch, or freezing for future meals, these tips will help you keep your dish tasting fresh and irresistible.
- Refrigerate in an Airtight Container
Allow the chicken to cool to room temperature (no longer than two hours). Place the breasts and sauce in a sealed container and store in the fridge for up to 3–4 days. Gently reheat in a skillet over low heat to preserve juiciness.
- Freeze for Longer Storage
If you want to keep your chicken longer, transfer cooled portions into freezer-safe bags or containers. Label with the date and freeze for up to 2 months. Thaw overnight in the refrigerator before reheating slowly on the stovetop.
- Separate Sauce and Chicken
For the best texture, consider storing the chicken breasts and sauce in two separate containers. This prevents the chicken from becoming overly soft and allows you to reheat each component optimally.
- Reheat with Moisture
When it’s time to dig into leftovers, reheat gently in a skillet or microwave with a splash of water or extra honey-soy mixture. This revives the sauce’s sheen and keeps the chicken succulent.
CONCLUSION
We’ve taken a simple list of ingredients—chicken breasts, honey, garlic, and a handful of pantry staples—and transformed them into a dish that feels like a celebration on your plate. From the crispy, golden exterior achieved by dredging in flour to the rich, aromatic sauce that clings like caramel, these Honey Garlic Chicken Breasts hit every note: sweet, savory, tangy, and even a little spicy if you opt for those chili flakes. With just 20 minutes of prep, 20 minutes of cooking, and a brief rest, you can have a meal that’s elegant enough to impress guests yet simple enough for a busy weeknight dinner. Remember, this recipe is flexible—feel free to adjust the garlic level, add more chili heat, or pair it with your favorite sides.
Now that you have all the tips, tricks, and step-by-step guidance, this article is yours to print, save, and refer back to whenever you need a quick, crowd-pleasing dinner. Scroll down to find a handy FAQ section, where you’ll discover answers to common questions about substitutions, serving sizes, and more. And of course, I’d love to hear from you! If you try this recipe or have any questions about the process—whether it’s about achieving that perfect golden crust or tweaking the sauce to suit your taste—please leave a comment below. Your feedback and cooking stories are what make this community so vibrant and fun!
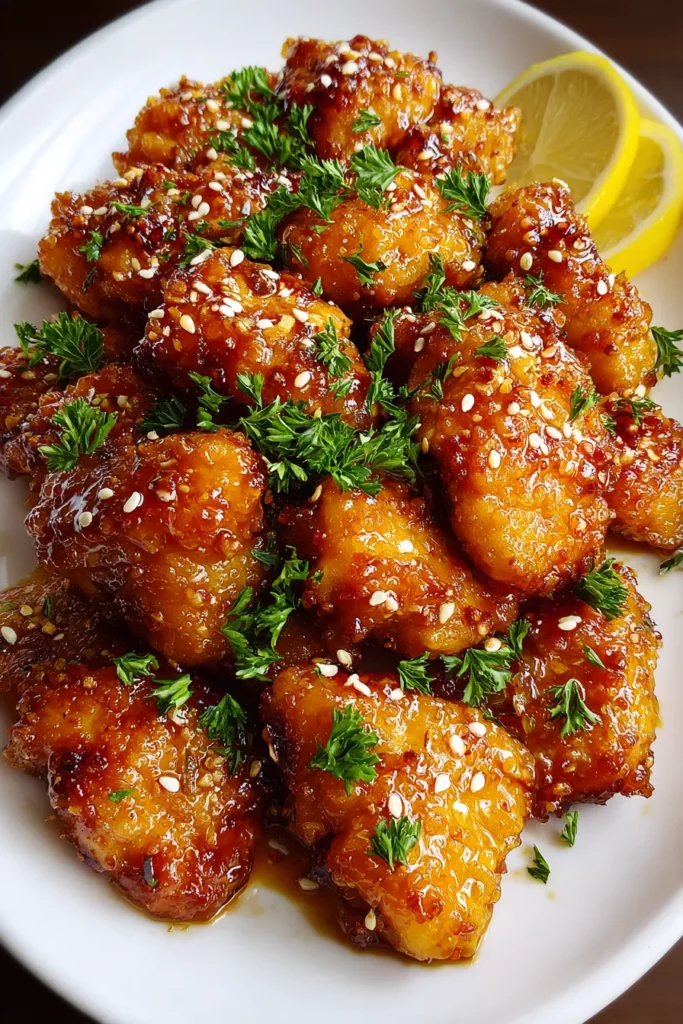

Honey Garlic Chicken Breasts
Description
Tender, juicy chicken breasts pan-seared to perfection, then smothered in an irresistible, sticky honey garlic sauce. A truly satisfying and quick meal!
Ingredients
Instructions
-
Begin by seasoning the chicken breasts with salt and pepper. Lightly dredge each breast in the flour, shaking off any excess.
-
Heat olive oil in a large skillet over medium heat. Add the chicken breasts and cook for about 5-7 minutes on each side, until they are golden brown and fully cooked. Remove the chicken from the skillet and set aside.
-
In the same skillet, add honey, soy sauce, apple cider vinegar, minced garlic, ground ginger, and chili flakes (if using). Stir well to combine all ingredients.
-
Allow the sauce to simmer gently for 2-3 minutes.
-
In a small bowl, mix the cornstarch with water until smooth. Add this mixture to the sauce in the skillet, stirring constantly to make sure it thickens without any lumps.
-
Return the chicken breasts to the skillet, flipping them over to coat them evenly with the thickened sauce. Cook for another 2 minutes, ensuring the chicken is heated through and well glazed.
-
Transfer the chicken breasts to a serving plate. Drizzle some sauce over the top and garnish with chopped fresh parsley if desired.
Note
- This dish pairs wonderfully with rice or steamed vegetables.
- For a more intense garlic flavor, increase the garlic cloves to 6 or 7.
- If you prefer a spicier dish, add more chili flakes or use hot sauce.
- Leftovers heat well and can be used as a filling for sandwiches or wraps.

