

With Homemade Ramen Noodles, you can transform simple pantry staples into springy, chewy noodles that rival restaurant bowls. Using bread flour, eggs, and a hint of baking soda, you’ll knead a silky dough, roll it to paper-thin sheets, slice perfect ribbons, and boil until they bounce back with that signature bite. This intermediate dinner recipe brings authentic Japanese noodles from kitchen to table, inviting you to level up your ramen game and savor each homemade strand.
Key Ingredients
Before you dive in, gather these essentials to build your springy, chewy ramen foundation:
- 300 grams bread flour: Provides the structure and high gluten content for that signature chewy texture.
- 1 teaspoon baking soda: Creates an alkaline environment that boosts elasticity and gives a subtle yellow hue.
- 1 teaspoon salt: Enhances overall flavor and strengthens the dough’s gluten network.
- 2 tablespoons vegetable oil: Adds moisture and helps produce a smoother, more pliable dough.
- 120 milliliters water: Hydrates the flour and dissolves the alkaline agent for uniform texture.
- 2 large eggs: Contribute richness, color, and extra protein to improve elasticity.
How To Make Homemade Ramen Noodles
Ready to roll up your sleeves and bring a bowl of authentic ramen home? This recipe walks you through mixing an alkaline-enriched dough, kneading it to develop gluten, resting for maximum elasticity, and then rolling and cutting into perfect strands. With just a pasta machine or rolling pin, you’ll learn how to coax each batch into that irresistible bounce that defines great ramen noodles.
1. In a small bowl dissolve baking soda and salt in the water, then whisk in the vegetable oil and beaten eggs. This ensures even distribution of the alkaline solution and enriches the dough with fat and protein.
2. Place the flour in a large mixing bowl and make a well in the center. Creating a well helps contain the liquid and makes incorporation easier.
3. Pour the liquid mixture into the well and use chopsticks or a fork to gradually incorporate the flour until a shaggy dough forms. Gradual mixing prevents lumps and starts building the gluten network.
4. Transfer the dough to a lightly floured surface and knead for 10 minutes until smooth and elastic. Proper kneading aligns the gluten strands for that perfect springy bite.
5. Wrap the dough in plastic wrap and let it rest at room temperature for 30 minutes. Resting relaxes the gluten, making it easier to roll out thinly without snapping back.
6. Divide the dough into portions and roll each portion through a pasta machine or with a rolling pin to a thickness of about 1.5 millimeters. Keep the surface lightly dusted with flour to prevent sticking.
7. Dust the rolled dough with flour and cut into 2-millimeter-wide strips to form noodles. A sharp blade or pasta cutter yields clean, uniform strands.
8. Bring a large pot of water to a rolling boil, then add the noodles and cook for 2 to 3 minutes until al dente. Stir gently to separate the strands.
9. Drain the noodles and rinse briefly under cold water to remove excess starch. The cold rinse stops cooking and sharpens the bite.
10. Add the noodles to your prepared broth and serve immediately. Fresh noodles absorb the flavors perfectly, so enjoy at once.
Serving Suggestions
These homemade noodles shine when paired with glowing broths and vibrant toppings. Here are four ways to serve them like a pro:
- Classic Shoyu Bowl: Ladle hot soy-based broth over noodles and top with a soft-boiled egg, sliced scallions, and nori for an umami-rich experience.
- Spicy Miso Twist: Stir spicy red miso paste into your broth, drizzle with chili oil, and garnish with bean sprouts and sesame seeds for extra crunch.
- Tanuki Style: Scatter crispy tempura bits (tenkasu) and chopped green onions over the noodles for delightful texture contrasts.
- Vegetarian Delight: Use a kombu and shiitake mushroom stock, then finish with bok choy, sweet corn, and a sprinkle of toasted sesame for a veggie-packed bowl.
Tips For Perfect Homemade Ramen Noodles
Getting perfect Homemade Ramen Noodles is all about a few simple tweaks and attention to detail. From choosing the right flour to giving your dough a solid rest, each step builds the texture and flavor that make your bowl shine. Whether you swap alkaline agents for an authentic twist or want to master that bouncy bite, these extra pointers will have you churning out noodle perfection. Let’s dive into some friendly tips that’ll turn your kitchen into a ramen lab.
- Use bread flour for a chewier texture similar to restaurant-style ramen.
- Allowing the dough to rest improves its elasticity and makes it easier to roll.
- Baking soda can be replaced with an equal amount of food-grade kansui for authentic flavor.
- Rinse cooked noodles briefly to prevent them from sticking and to sharpen the bite.
How To Store It
Whether you’re meal prepping or planning ahead, storing your ramen dough and noodles properly preserves their texture and taste. With the right method, you can keep your creations springy and ready for any weeknight craving. Here are a few ways to stash your homemade noodles and dough so they stay fresh, flavorful, and just as satisfying when you’re ready to cook.
- Refrigerate Dough: Wrap tightly in plastic wrap and place in the fridge for up to 24 hours. Let it come to room temperature before rolling.
- Freeze Dough: Seal chunks of dough in airtight bags and freeze for up to one month. Thaw overnight in the fridge for best results.
- Chill Cooked Noodles: After boiling, drain and rinse with cold water, then store in an airtight container with a little oil for up to 2 days.
- Freeze Cut Noodles: Dust strands with flour, arrange in loose nests on a baking sheet, freeze until firm, then transfer to a sealed container for up to two weeks.
Frequently Asked Questions
Curious minds want to know—here are answers to the most common ramen noodle queries:
- Why is bread flour recommended for these homemade ramen noodles?
Bread flour contains a higher protein (gluten) content than all-purpose flour, which develops a strong, elastic dough when kneaded. This elasticity yields the signature chewy texture of restaurant-style ramen. If you use all-purpose flour, the dough will be less resilient and the finished noodles may be softer and lack that characteristic “bite.”
- What role does the baking soda play, and can I replace it with kansui?
Baking soda raises the dough’s pH, creating an alkaline environment that strengthens the gluten network and produces a springy, yellowish noodle. You can substitute an equal amount of food-grade kansui (alkaline mineral water) for baking soda to achieve an even more authentic flavor and color. If you omit or underuse alkaline agents, the noodles can turn out pale and less chewy.
- How do I know when the dough has been kneaded enough?
After about 10 minutes of kneading on a lightly floured surface, the dough should feel smooth, slightly tacky but not sticky, and it should spring back gently when you press it with your finger. If it tears easily or feels too dry, add a few drops of water; if it sticks, dust with a little extra flour. Proper kneading aligns the gluten strands for elasticity and strength.
- Why is it important to let the dough rest for 30 minutes before rolling it out?
Resting relaxes the gluten network developed during kneading, making the dough more extensible and easier to roll out thinly without bouncing back. Skipping the rest period can result in a dough that resists stretching, tears easily, or springs back when you try to flatten it, making it difficult to achieve the desired thickness of about 1.5 mm.
- How do I prevent the noodles from sticking together after cutting?
After cutting the dough into 2 mm strips, dust the noodles lightly with flour or a bit of cornstarch to keep them separated. When cooking, boil them in plenty of vigorously boiling water and stir gently for the first 30 seconds. Immediately after draining, rinse briefly under cold water to remove surface starch, which further reduces stickiness and sharpens the noodle bite.
- Can I freeze the dough or the cut noodles for later use?
Yes. For dough, wrap tightly in plastic wrap and freeze for up to one month; thaw in the refrigerator before rolling. For cut noodles, dust thoroughly with flour, portion into loose nests on a baking sheet, freeze until firm, then transfer to a sealed container for up to two weeks. Cook frozen noodles by adding an extra 30 seconds to one minute to the regular 2–3 minute boil.
- How can I adjust the noodle thickness or width to suit different dishes?
For thinner or thicker noodles, adjust your pasta machine settings or rolling-pin thickness accordingly—thinner for lighter broth dishes, slightly thicker for heartier stocks. To change the width, swap the 2 mm cutter for a wider attachment or hand-cut wider strips. Just remember that thicker or wider noodles will need an extra 30 seconds to one minute of cooking time to reach al dente.
What Makes This Special
Homemade Ramen Noodles hit that sweet spot between kitchen adventure and comfort food satisfaction. By mastering the art of kneading, resting, and slicing, you unlock chewy strands that soak up every drop of your favorite broth. Whether you go classic shoyu or spicy miso, these noodles shine with homemade love. Go ahead and print out this recipe, tuck it in your cookbooks, and dust it off whenever the ramen cravings strike. If you give it a go or have any noodle quandaries, drop a comment below—I’m always here to noodle out solutions with you!
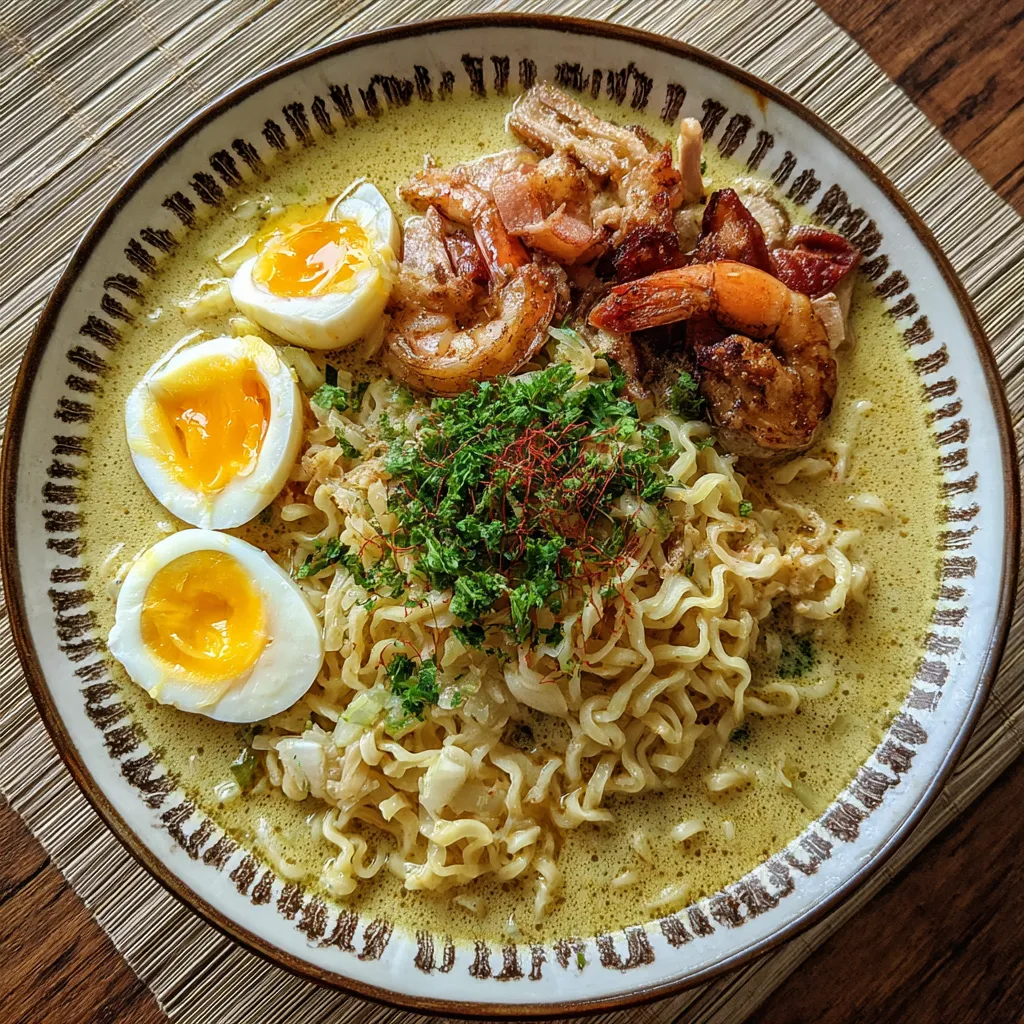

Homemade Ramen Noodles
Description
Make your own ramen noodles with bread flour, eggs, and a hint of baking soda. Knead to a silky dough, roll to paper-thin sheets, slice into perfect ribbons, then boil until they bounce with a springy bite.
Ingredients
Instructions
-
In a small bowl dissolve baking soda and salt in the water, then whisk in the vegetable oil and beaten eggs.
-
Place the flour in a large mixing bowl and make a well in the center.
-
Pour the liquid mixture into the well and use chopsticks or a fork to gradually incorporate the flour until a shaggy dough forms.
-
Transfer the dough to a lightly floured surface and knead for 10 minutes until smooth and elastic.
-
Wrap the dough in plastic wrap and let it rest at room temperature for 30 minutes.
-
Divide the dough into portions and roll each portion through a pasta machine or with a rolling pin to a thickness of about 1.5 millimeters.
-
Dust the rolled dough with flour and cut into 2-millimeter-wide strips to form noodles.
-
Bring a large pot of water to a rolling boil, then add the noodles and cook for 2 to 3 minutes until al dente.
-
Drain the noodles and rinse briefly under cold water to remove excess starch.
-
Add the noodles to your prepared broth and serve immediately.
Note
- Use bread flour for a chewier texture similar to restaurant-style ramen.
- Allowing the dough to rest improves its elasticity and makes it easier to roll.
- Baking soda can be replaced with an equal amount of food-grade kansui for authentic flavor.
- Rinse cooked noodles briefly to prevent them from sticking and to sharpen the bite.

