

There’s something undeniably comforting about slicing into a loaf that’s been lovingly kneaded, proofed, and baked until its crust yields to a tender, chocolate-infused crumb. Homemade Chocolate Bread brings together the simple pleasures of baking with the indulgent richness of cocoa, delivering a treat that’s simultaneously familiar and extraordinary. Whether you’re an early riser craving a sweet breakfast companion or a chocolate lover looking for a new afternoon pick-me-up, this bread has your name written all over it. With each bite, you’ll discover moist, fluffy texture kissed by deep chocolate flavor, punctuated by pockets of melting chips that ooze warmth and sweetness. It’s like morning coffee and dessert all rolled into one glorious slice.
Baking this bread is more than just a recipe—it’s a joyful ritual, from the moment you whisk together cocoa and flour to the second you hear that satisfying hollow thump as the loaf cools. You’ll bask in the anticipation of the dough’s slow rise over 1-2 hours, watch as it puffs up in the warmth, and feel the pride of coaxing something so delightful from humble pantry staples. With a prep time of just 20 minutes, a quick 35 minutes in the oven, plus a couple hours of proofing, you’ll be rewarded with twelve generous slices, each clocking in at around 300 calories. Whether you’re sharing it with loved ones or savoring moments of solo indulgence, this Intermediate-level recipe promises delicious success and plenty of fond memories.
KEY INGREDIENTS IN HOMEMADE CHOCOLATE BREAD
Every great loaf starts with a handful of pantry heroes. These ingredients work in harmony to create a bread that’s rich in chocolate flavor, tender in texture, and satisfying in every sense. Let’s dive into what makes each component so essential.
- All-purpose flour
Provides the structural backbone for the bread, offering the right balance of protein to develop gluten while still yielding a soft crumb.
- Unsweetened cocoa powder
Infuses deep, earthy chocolate flavor without extra sweetness; it also contributes to a slightly denser, more tender loaf.
- Instant yeast
Acts as the leavening agent, producing carbon dioxide bubbles that make the dough rise and achieve that airy, fluffy texture.
- Salt
Enhances overall flavor by balancing sweetness and intensifying the chocolate notes, while also regulating yeast activity.
- Granulated sugar
Feeds the yeast for a robust rise and adds a gentle sweetness that complements the cocoa.
- Warm milk
Hydrates the dough, helps activate the yeast, and brings richness and moisture for a tender bite.
- Melted unsalted butter
Adds silkiness to the dough and contributes to a softer, more flavorful crumb.
- Vanilla extract
Lends a warm, aromatic note that highlights the chocolate and rounds out the flavor profile.
- Semi-sweet chocolate chips or chopped chocolate
Delivers pockets of gooey, melty chocolate throughout the bread for a truly decadent experience.
- Egg & water (for egg wash, optional)
When whisked together and brushed on top, they create a glossy, golden crust that’s as beautiful as it is tasty.
HOW TO MAKE HOMEMADE CHOCOLATE BREAD
Now that you’ve gathered your ingredients, it’s time to transform them into a stunning loaf of Homemade Chocolate Bread. This step-by-step process guides you through mixing, kneading, proofing, and baking to ensure perfect results every time.
1. In a large mixing bowl, combine the flour, cocoa powder, instant yeast, salt, and sugar. Whisk these dry ingredients together thoroughly to ensure even distribution of the cocoa and leavening agents.
2. Gradually add the warm milk, melted butter, and vanilla extract to the dry ingredients. Use a sturdy spoon or your hands to mix until all the flour is hydrated and a soft dough forms.
3. Transfer the dough to a lightly floured surface and knead for about 8–10 minutes, working the dough until it’s smooth, elastic, and slightly tacky but not sticky.
4. Gently fold in the chocolate chips or chopped chocolate, making sure they’re evenly distributed without deflating all the precious air you’ve built up.
5. Place the dough in a greased bowl, cover with a damp cloth or plastic wrap, and let it rise in a warm spot for 1–2 hours, or until it has doubled in size.
6. After the dough has risen, gently punch it down to release excess air. Shape the dough into a loaf by folding and tucking the edges, then place it into a greased loaf pan.
7. Cover the loaf pan with a towel and let the dough rise again for about 30–40 minutes, or until it has reached the top of the pan.
8. Preheat your oven to 350°F (175°C) to ensure it’s fully heated and ready for baking.
9. If desired, make an egg wash by beating the egg with the tablespoon of water and brushing it over the bread’s surface for a glossy finish.
10. Bake in the preheated oven for 30–35 minutes, or until the bread sounds hollow when tapped on the bottom and has developed a deep, chocolatey crust.
11. Allow the bread to cool in the pan for 10 minutes before carefully transferring it to a wire rack to cool completely—this prevents sogginess and helps the crumb set.
SERVING SUGGESTIONS FOR HOMEMADE CHOCOLATE BREAD
When it comes to enjoying your freshly baked loaf, the possibilities are as delightful as the bread itself. Whether you want to keep it simple or elevate each slice with a little extra flair, these serving ideas will make your chocolate bread shine. Grab your favorite mug or dessert plate and prepare for a burst of chocolate happiness.
- Warm with butter
Slice and toast a piece lightly, then slather on room-temperature butter. The contrast of warm, chocolate-rich bread and melting butter creates a luscious combination that’s perfect for breakfast.
- Chocolate-hazelnut spread swirl
Spread a thin layer of Nutella or any chocolate-hazelnut spread, then top with a sprinkle of chopped toasted nuts for an added crunch and nutty aroma.
- Mascarpone and fresh berries
Whip mascarpone with a touch of honey, dollop generously atop each slice, and crown with plump raspberries or strawberries for a sophisticated brunch treat.
- Ice cream sandwich
Cut thick slices, sandwich a scoop of vanilla or coffee ice cream between two, and press gently. Wrap in parchment and freeze for a fun, chilled dessert.
HOW TO STORE HOMEMADE CHOCOLATE BREAD
Keeping your chocolate bread fresh ensures every slice is as delectable as the first. Proper storage methods will preserve moisture, maintain that tender crumb, and prevent staleness. Below are some tried-and-true techniques for storing your loaf, whether you’ll enjoy it over a few days or save it for later indulgence.
- Room-temperature storage
Wrap the cooled loaf tightly in plastic wrap or place it in an airtight container. Store on the countertop away from direct sunlight for up to 3 days; this helps retain moisture without making the crust soggy.
- Refrigerator
If you live in a warm, humid environment, refrigerate slices in a sealed bag with excess air squeezed out. Consume within 5 days for the best flavor and texture, though be aware the crumb may firm up slightly.
- Freezer
Slice the bread first for quick thawing: wrap individual slices in parchment and foil, then place them in a freezer-safe bag. Freeze for up to 2 months. To enjoy, simply remove a slice and thaw at room temperature or gently toast.
- Reviving stale slices
If the bread loses some of its fresh-baked magic, reheat slices in a toaster or oven at low heat (300°F/150°C) for 5–7 minutes. The gentle warmth restores moisture and softens the crumb beautifully.
CONCLUSION
This Homemade Chocolate Bread recipe has taken you from mixing bowls to warm, chocolate-studded slices in just a few hours of delightful baking. We’ve explored every aspect—from gathering the right ingredients and mastering the knead to serving suggestions that turn each piece into a gourmet treat. With an Intermediate difficulty level, this loaf is accessible to passionate home cooks who are ready to step up their baking game. Don’t forget that you can print this article and save it for later, tucking it into your favorite recipe collection or plating it alongside your morning coffee ritual. You’ll find all the tips on prepping, rising, baking, and storing in one comprehensive guide that’s ready whenever that chocolate craving strikes. And yes, there’s even an FAQ section waiting just below to address any questions that pop up as you bake your next masterpiece!
We’d love to hear how your Homemade Chocolate Bread turned out. Your experiences—the tweaks you made, the flavor combos you tried, or any challenges you encountered—help our baking community grow and learn. Feel free to leave comments, ask questions, or share feedback if you need help at any stage of the process. Whether you’re celebrating a loaf perfectly risen or troubleshooting why yours collapsed, your voice matters here. Happy baking, and may every slice be a cocoa-kissed delight worth savoring!
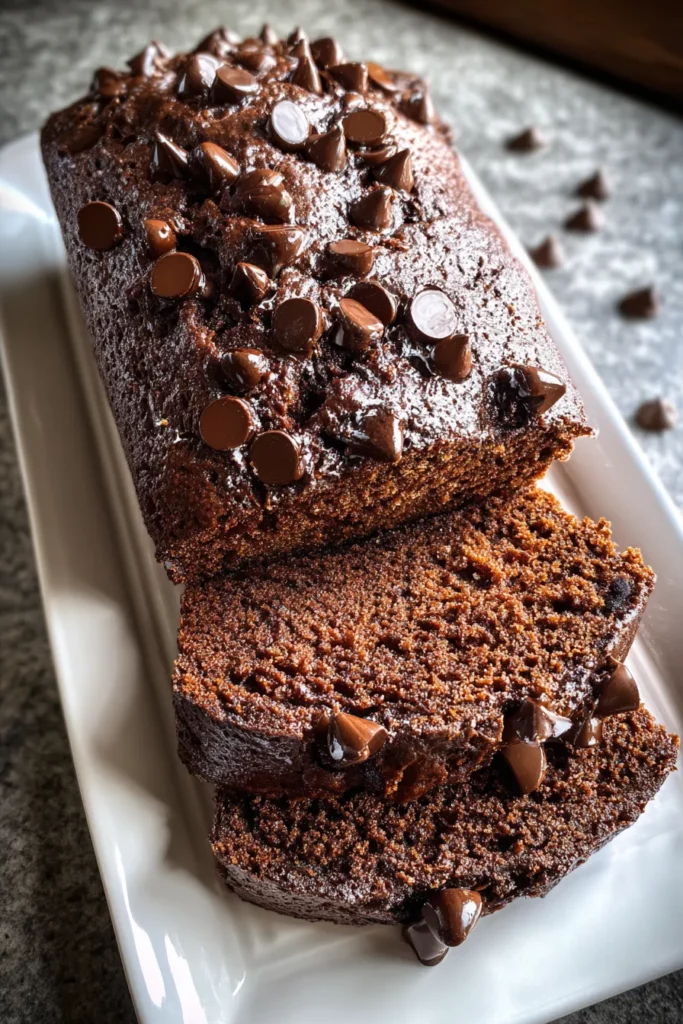

Homemade Chocolate Bread
Description
Moist, fluffy, and infused with deep chocolate flavor, this homemade chocolate bread is perfect for breakfast, desserts, or snacking anytime.
Ingredients
Instructions
-
In a large mixing bowl, combine the flour, cocoa powder, instant yeast, salt, and sugar.
-
Gradually add the warm milk, melted butter, and vanilla extract to the dry ingredients. Mix everything together until a soft dough forms.
-
Transfer the dough to a lightly floured surface and knead for about 8-10 minutes until smooth and elastic.
-
Gently fold in the chocolate chips or chopped chocolate into the dough until evenly distributed.
-
Place the dough in a greased bowl, cover with a damp cloth or plastic wrap, and let it rise in a warm place for 1-2 hours or until doubled in size.
-
After the dough has risen, punch it down gently to release air bubbles. Shape it into a loaf and place it into a greased loaf pan.
-
Cover the loaf pan with a towel and let the dough rise again for about 30-40 minutes or until it has reached the top of the pan.
-
Preheat your oven to 350°F (175°C).
-
If desired, make an egg wash by beating the egg with the tablespoon of water and brush it over the bread for a glossy finish.
-
Bake in the preheated oven for 30-35 minutes or until the bread sounds hollow when tapped on the bottom.
-
Allow the bread to cool in the pan for 10 minutes before transferring it to a wire rack to cool completely.
Note
- The bread is perfect for breakfast or as a sweet treat.
- For a richer flavor, consider using dark chocolate chips.
- Store in an airtight container to keep the bread fresh for a few days.
- This bread freezes well, slice it beforehand for easy thawing.
- Experiment with adding nuts or dried fruit for different versions.

