

Transform your morning routine with this delightful Homemade Apple Jam that captures the sweetness and spice of fresh apples in every spoonful. Whether you’re a breakfast enthusiast or someone who loves experimenting in the kitchen, this beginner-friendly recipe will have you stirring up jars of golden goodness in no time. With a preparation time of just 30 minutes and cooking time of 20 minutes, plus a couple of hours to rest, you’ll have a homemade spread that’s perfect for toast, pastries, or a cheeky spoonful straight from the jar. This jam is bursting with apple flavor, enriched by hints of cinnamon and nutmeg, and brightened by a touch of lemon juice. It’s an easy recipe that yields about five servings and clocks in around 600 calories total. Best of all, you can tailor the taste by choosing tart Granny Smiths or sweet Fujis, or even adding a vanilla bean or fresh rosemary sprig for an extra twist.
This apple jam isn’t just a condiment—it’s a memory maker. As the apples simmer and meld with sugar and spice, your kitchen will come alive with warm, comforting notes that invite you to stay a little longer. And because this recipe uses fruit pectin, you’ll achieve a beautifully thick consistency that holds up perfectly on everything from flaky biscuits to crunchy crackers. Whether you plan to enjoy it right away or water–bath can for long-term storage, this jam is as versatile as it is delicious. So gather your ingredients, clear some counter space, and get ready to create a jar of homemade magic that you’ll want to spread on everything.
KEY INGREDIENTS IN HOMEMADE APPLE JAM
Every great jam starts with the right ingredients. In this Homemade Apple Jam, simple pantry staples come together to create a spread that’s both comforting and exciting. Here’s what you’ll need:
- Apples
Soft, juicy apples provide the foundation of our jam. When peeled, cored, and finely chopped, they break down beautifully during cooking, lending body and a natural sweetness that shines through.
- Lemon juice
A splash of bright acidity balances the sweetness and helps prevent the apples from browning. It also enhances the fruit’s natural flavors, making each bite feel fresh and lively.
- Granulated sugar
Sugar is more than just sweetness here—it helps gel the jam and preserves it. As it dissolves into the warm apple mixture, it binds with the pectin to create that signature jam texture.
- Ground cinnamon (optional)
A warm dusting of cinnamon adds depth and a subtle spice note that evokes cozy autumn days. It’s optional but highly recommended for an extra layer of flavor.
- Ground nutmeg (optional)
Nutmeg brings a hint of earthiness that pairs perfectly with cinnamon. Even a small pinch can elevate the jam’s aromatic profile.
- Water
Water helps the apples cook down evenly and ensures they soften without sticking to the pan. It also creates the right consistency before sugar and pectin are added.
- Fruit pectin
Pectin is the jam maker’s secret weapon. It locks in structure and thickness so your jam sets properly, giving you that perfect spreadable texture every time.
HOW TO MAKE HOMEMADE APPLE JAM
Before diving into the step-by-step process, know that making this jam is all about layering flavors and textures in a controlled, attentive way. You’ll transform raw apples into a silky, spiced jam by gently simmering, sweetening, and thickening. Follow these instructions closely, and you’ll end up with jars of jam that gleam with a beautiful, golden hue.
1. Begin by preparing your apples. Make sure to peel, core, and finely chop them for a smooth jam texture that breaks down evenly during cooking.
2. In a large saucepan, combine the chopped apples, lemon juice, and water. Stir well to mix the lemon juice evenly, which will prevent the apples from browning and ensure consistent flavor.
3. Place the saucepan over medium heat and bring the mixture to a simmer. Cook for about 10 minutes or until the apples have softened and started to fall apart at the edges.
4. Add the granulated sugar to the saucepan, stirring continuously until the sugar is fully dissolved into the apple mixture. This prevents graininess and helps the jam set properly.
5. If desired, sprinkle in the ground cinnamon and nutmeg to add a warm spice profile to your jam. Stir to distribute the spices evenly throughout the fruit base.
6. Increase the heat to high and bring the apple mixture to a rolling boil. Once boiling, stir in the fruit pectin quickly and thoroughly for consistent thickening.
7. Continue to boil for about 1–2 minutes, ensuring that you stir constantly to prevent burning and achieve a thick, glossy consistency.
8. Remove the saucepan from heat and skim off any foam that has formed on the surface of the jam. This creates a clear, attractive final product.
9. Carefully pour or ladle the hot jam into sterilized jars, leaving about 1/4 inch of headspace at the top of each jar to allow for expansion.
10. Seal the jars with lids immediately and let them cool to room temperature. Once cooled, store the jam in the refrigerator for up to 3 weeks or process in a water bath for longer preservation.
SERVING SUGGESTIONS FOR HOMEMADE APPLE JAM
Once your homemade apple jam is ready, the real fun begins—finding all the delicious ways to enjoy it. This sweet, aromatic spread is perfect for breakfast, baking, and even gifting. Below are some of our favorite serving ideas to help you make the most of every jar.
- Spread on warm, buttered toast or crisp bagels for a breakfast treat that balances sweet and tart perfectly. The jam’s smooth texture clings delightfully to the bread, while the hint of cinnamon and nutmeg adds an extra flavor kick.
- Swirl into plain Greek yogurt or oatmeal to instantly elevate your morning bowl. The fruity sweetness mingles with creamy yogurt or hearty oats, creating a satisfying combination of textures and flavors.
- Use as a filling for pastries like croissants, turnovers, or thumbprint cookies. Simply spoon a dollop of jam into the center of your dough before baking for a gooey surprise in every bite.
- Package a jar as a homemade gift alongside freshly baked bread or muffins. Tie a ribbon around the neck and include a small wooden spoon for a charming, thoughtful present that friends and family will adore.
HOW TO STORE HOMEMADE APPLE JAM
Proper storage ensures that your Homemade Apple Jam maintains its freshness, flavor, and gorgeous texture for as long as possible. Here are some tips to store your jam safely and maximize its shelf life.
- Refrigeration: Once jars have cooled to room temperature, store them in the refrigerator for up to 3 weeks. Keep them sealed tightly to prevent moisture loss and absorb any odors from other foods.
- Water-Bath Canning: For long-term storage, process your sealed jars in a water bath for 10 minutes. This method creates a vacuum seal, allowing you to store jars at room temperature for up to one year. Be sure to follow standard canning safety guidelines.
- Freezing: Spoon jam into freezer-safe containers, leaving a bit of headspace for expansion. Thaw in the refrigerator overnight when you’re ready to use it. Frozen jam can last up to one year, though texture may become slightly softer.
- Cool, Dark Pantry: If you’ve water–bath canned your jars, keep them in a cool, dark pantry away from direct sunlight and heat sources. Optimal storage temperatures range between 50–70°F (10–21°C).
CONCLUSION
This Homemade Apple Jam recipe brings the very essence of fresh apples, warm spices, and kitchen coziness to your tabletop. From peeling and chopping apples to the final skim of foam, every step invites you to slow down and savor the process. With just a handful of ingredients—apples, sugar, lemon juice, water, and pectin—you can craft a spread that’s as versatile as it is delicious. Whether you’re a beginner home cook or a seasoned canning enthusiast, this recipe offers a satisfying project that yields jars of pure, golden delight. Don’t forget that you can print this article or save it digitally for quick reference whenever the apple season rolls around again. And if you prefer to preserve your apples for the long haul, a simple water-bath canning session extends shelf life while retaining all that fresh jam flavor.
Feel free to experiment with apple varieties, add extra spices like a vanilla bean or a sprig of rosemary, or stir in fresh ginger for a unique twist. This jam makes a heartwarming gift, a breakfast staple, or a baking secret weapon. If you have any questions, run into a snag, or just want to share your own tips, please leave a comment below. We love hearing about your kitchen adventures, troubleshooting challenges together, and celebrating every successful jar. Keep an eye out for the FAQ section below for answers to common queries, and let us know how your apple jam turns out. Happy cooking!
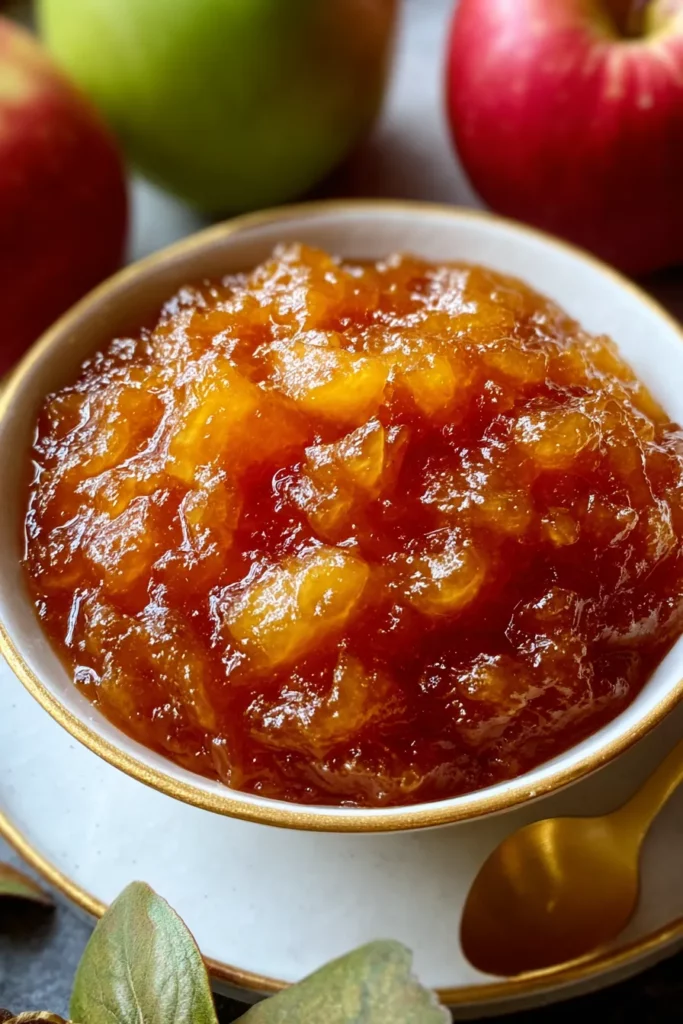

Homemade Apple Jam
Description
This apple jam is sweet, aromatic, and rich in apple goodness, with hints of cinnamon and nutmeg. It's the perfect complement to toast or baking!
Ingredients
Instructions
-
Begin by preparing your apples. Make sure to peel, core, and finely chop them for a smooth jam texture.
-
In a large saucepan, combine the chopped apples, lemon juice, and water. Stir well to mix the lemon juice evenly, which will prevent the apples from browning.
-
Place the saucepan over medium heat and bring the mixture to a simmer. Cook for about 10 minutes or until the apples have softened.
-
Add the granulated sugar to the saucepan, stirring continuously until the sugar is fully dissolved into the apple mixture.
-
If desired, sprinkle in the ground cinnamon and nutmeg to add a warm spice profile to your jam.
-
Increase the heat to high and bring the apple mixture to a boil. Once boiling, stir in the fruit pectin.
-
Continue to boil for about 1-2 minutes, ensuring that you stir constantly to prevent burning and achieve a thick consistency.
-
Remove the saucepan from heat and skim off any foam that has formed on the surface of the jam.
-
Carefully pour or ladle the hot jam into sterilized jars, leaving about 1/4 inch of headspace at the top of each jar.
-
Seal the jars with lids immediately and let them cool to room temperature, storing them in the refrigerator for up to 3 weeks.
Note
- For a more varied texture, you can leave some apple chunks in the jam rather than finely chopping all apples.
- Experiment with different apple varieties for unique flavors—Granny Smith for tartness or Fuji for sweetness.
- The jam can also be water-bath canned for longer preservation if preferred.
- This apple jam makes a lovely homemade gift, especially when paired with freshly baked bread.
- For an extra twist, add a vanilla bean or a sprig of fresh rosemary during the cooking process for a subtle flavor infusion.

