

Bright, tart rhubarb chunks meet a honey-kissed almond–coconut crust in these Healthy Paleo Rhubarb Bars, and trust me, they’re the perfect balance of tangy and sweet. Whether you’re new to grain-free baking or a seasoned paleo pro, this recipe delivers a golden, crumbly bite every time. With simple pantry staples and juicy rhubarb, you’ll be slicing into snack-worthy bars that freeze beautifully and bake up with a crisp, buttery top. Give these a whirl—you’ll wonder why you waited so long to bake rhubarb!
Key Ingredients
Before we dive into baking, let’s chat about the magic behind these bars. Each ingredient plays a key role in creating that tender crust, juicy filling, and perfect gluten-free texture.
- 1 1/2 cup almond flour: Provides a nutty, moist base that’s naturally gluten-free and rich in healthy fats.
- 1/4 cup coconut flour: Adds absorbing power to balance moisture and keep crumbs tender.
- 2 tbsp arrowroot powder: Acts as a light thickener, giving the dough structure without heaviness.
- 1/4 tsp salt: Enhances all the sweet and tart flavors, rounding out the crust.
- 1/4 cup coconut oil, melted: Binds the dough while imparting a subtle tropical richness.
- 1/4 cup honey: Sweetens the crust with natural sugars and helps create that golden color.
- 1 tsp vanilla extract: Boosts aroma and depth, making every bite more fragrant.
- 2 large eggs: Provide structure and moisture, keeping the bars soft yet sturdy.
- 2 cup rhubarb, chopped: The star ingredient—bright, tangy stalks chopped for juicy bursts in every bar.
- 1/4 cup honey: Sweetens the filling, balancing rhubarb’s natural tartness.
- 1 tbsp arrowroot powder: Thickens the filling into a jam-like consistency.
- 1 tbsp lemon juice: Adds a citrusy kick that lifts the rhubarb’s flavor.
- 1/2 tsp vanilla extract: Blends with the citrus for a smooth, sweet finish.
How To Make Healthy Paleo Rhubarb Bars
Getting these bars from your kitchen to the table is a breeze—grab your mixing bowls, parchment paper, and let’s roll! We’ll work through the crust, layer in the vibrant rhubarb filling, top with more crumbly dough, then bake until golden perfection. Ready to get hands-on? Follow these detailed steps for success:
1. Preheat the oven to 350°F and line an 8×8-inch baking pan with parchment paper, letting a bit overhang for easy removal later.
2. In a bowl, whisk together almond flour, coconut flour, arrowroot powder, and salt until the mixture is evenly combined and light.
3. Stir in melted coconut oil, 1/4 cup honey, vanilla extract, and eggs using a spatula until a crumbly dough forms—don’t worry if it looks loose; it will press together.
4. Press half of the dough firmly and evenly into the bottom of the prepared pan, creating a solid crust layer.
5. In a separate bowl, combine chopped rhubarb, 1/4 cup honey, arrowroot powder, lemon juice, and vanilla extract, tossing until each piece is coated.
6. Spread the rhubarb mixture over the crust in an even layer, making sure no gaps remain.
7. Crumble the remaining dough over the rhubarb filling, covering most of the fruit with small, even bits of dough.
8. Bake for 30 to 35 minutes, or until the top turns golden brown and the filling bubbles around the edges.
9. Allow the bars to cool completely in the pan (about 45–60 minutes) before using the parchment overhang to lift them out and cut into squares.
Serving Suggestions
Once your Healthy Paleo Rhubarb Bars have cooled and you’ve sliced them, it’s time to serve them up with flair. Whether you’re hosting brunch, packing snacks, or simply craving a sweet treat, these ideas will elevate your presentation and taste:
- Warm with coconut cream: Reheat a bar in the oven for 5 minutes and drizzle with chilled coconut cream for a rich, dairy-free indulgence.
- Berry compote pairing: Serve alongside a spoonful of mixed berry compote to amplify the tang-and-sweet contrast.
- Yogurt parfait layer: Crumble a bar into layers of coconut yogurt and fresh raspberries for a quick breakfast or dessert parfait.
- Ice cream sandwich: Place a scoop of paleo vanilla ice cream between two bars for a handheld, frozen delight.
Tips For Perfect Healthy Paleo Rhubarb Bars
Nailing these bars is all about fresh rhubarb texture, balanced sweetness, and the right crust consistency. Here are some friendly pointers to ensure your batch turns out just right:
- You can use frozen rhubarb if fresh isn’t available; thaw and drain excess liquid first to keep the filling from becoming watery.
- Store leftovers in an airtight container in the refrigerator for up to 5 days, preserving that crumbly crust and tangy filling.
- For extra sweetness, drizzle additional honey over the cooled bars to add a glossy finish and boost flavor.
- These bars freeze well; wrap individually and freeze for up to 2 months, then thaw in the fridge for a quick snack.
How To Store It
Keeping your Healthy Paleo Rhubarb Bars tasting fresh is easy with the right storage methods. Whether you want to chill, freeze, or simply slice and serve later, these tips will maintain their texture and flavor:
- Refrigerator storage: Place cooled bars in an airtight container and chill for up to 5 days—this helps the filling stay set and the crust crisp.
- Freezer method: Wrap individual bars in plastic wrap and store in a freezer bag for up to 2 months; thaw in the fridge overnight before eating.
- Layer protection: If stacking bars, separate layers with parchment paper to prevent sticking and preserve the crumbly top.
- Room temperature: For short-term enjoyment (1 day), keep bars covered on the counter—just ensure they’re in a cool, dry spot away from direct sunlight.
Frequently Asked Questions
Here are answers to the most common questions about making (and enjoying) these Healthy Paleo Rhubarb Bars:
- Q: How long does it take to prepare this recipe?
A: It takes about 15 minutes to prepare the crust and filling, plus 30 to 35 minutes to bake. You should also allow 45 to 60 minutes for the bars to cool completely before cutting, so plan for roughly 1.5 to 2 hours from start to finish.
- Q: Can I use frozen rhubarb instead of fresh?
A: Yes—you can thaw frozen rhubarb and then drain any excess liquid thoroughly before combining it with the other filling ingredients to prevent the bars from becoming soggy.
- Q: What can I substitute if I don’t have arrowroot powder?
A: You can swap equal parts tapioca starch for arrowroot powder to achieve the same thickening effect. If you’re not strictly following a paleo diet, cornstarch also works at a 1:1 ratio for both the crust mixture and the rhubarb filling.
- Q: How should I store leftover bars?
A: Once cooled, store the bars in an airtight container in the refrigerator for up to 5 days. For longer storage, wrap individual bars tightly in plastic wrap or foil and freeze them for up to 2 months. Thaw frozen bars in the refrigerator or at room temperature before serving.
- Q: Can I use a different sweetener instead of honey?
A: Yes—maple syrup can be used as a 1:1 replacement for honey, though the texture may be slightly softer. If substituting a liquid sweetener, reduce any additional liquid in the crust by about 1 tablespoon to maintain the proper dough consistency.
- Q: Why is it important to let the bars cool completely before cutting?
A: The rhubarb filling needs time to set as it cools. Cutting into the bars while they’re still warm can cause the filling to run and the bars to lose their shape.
- Q: My crust is too dry and crumbly. How can I fix it?
A: If the crust mixture isn’t holding together, add an extra teaspoon or two of melted coconut oil or a splash of water and mix until the dough binds. Press the dough firmly and evenly into the pan to form a solid base.
What Makes This Special
There’s something delightfully playful about tucking tangy rhubarb into a buttery, almond–coconut crust—that sweet-and-sour dance makes these bars stand out from every other dessert in your repertoire. This recipe works because it balances textures (crisp crumbs, juicy filling) and flavors (honey sweetness, lemon kiss) in perfect harmony. Go on, print and save this article—you’ll thank yourself next time rhubarb season rolls around. Drop a comment or question below if you give it a try or need a hand; I’m here to chat all things baking!
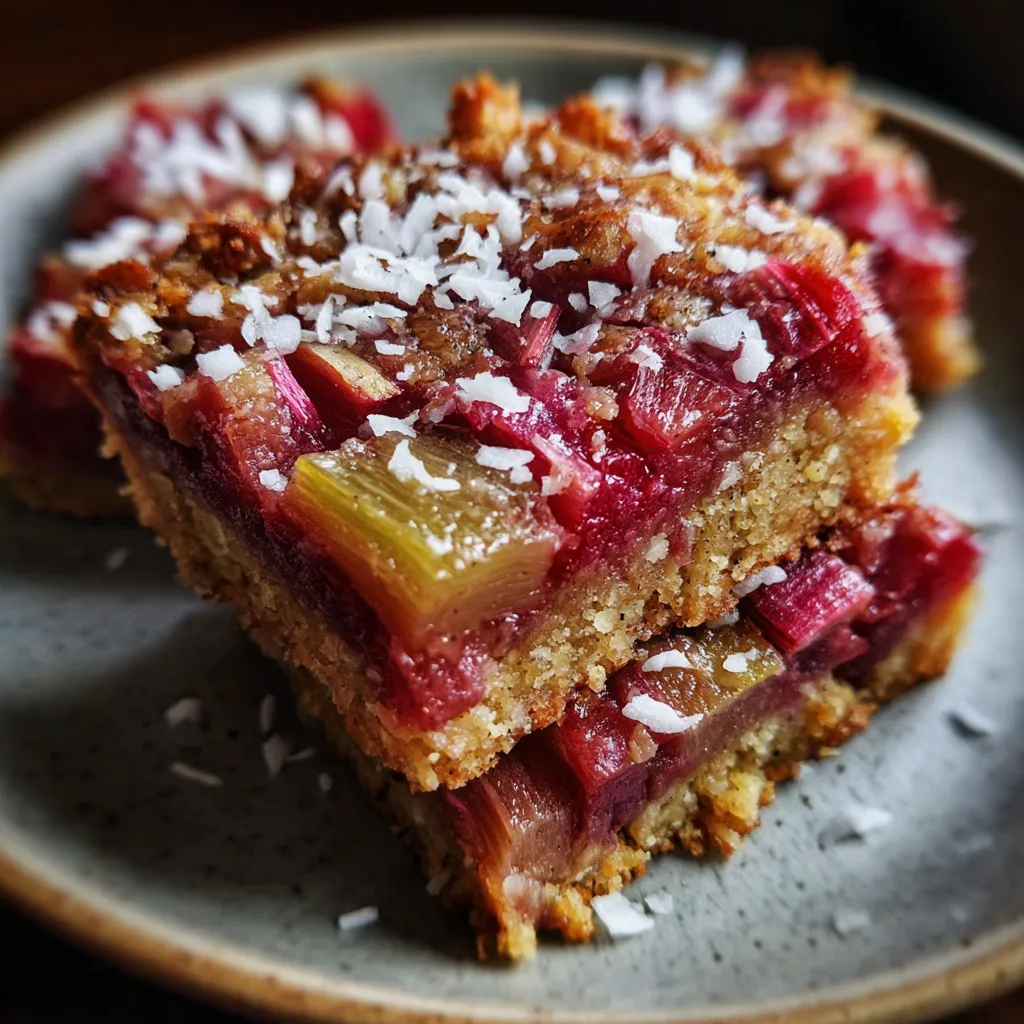

Healthy Paleo Rhubarb Bars
Description
Tangy rhubarb chunks soak in honey and vanilla, tucked into a tender almond-coconut crust that bakes to golden perfection. Each bite offers crisp, buttery crumbs giving way to juicy, citrus-kissed filling.
Ingredients
Instructions
-
Preheat the oven to 350°F and line an 8x8-inch baking pan with parchment paper.
-
In a bowl, whisk together almond flour, coconut flour, arrowroot powder, and salt.
-
Stir in melted coconut oil, honey, vanilla extract, and eggs until a crumbly dough forms.
-
Press half of the dough evenly into the bottom of the prepared pan to form the crust.
-
In a separate bowl, combine chopped rhubarb, honey, arrowroot powder, lemon juice, and vanilla extract.
-
Spread the rhubarb mixture over the crust in an even layer.
-
Crumble the remaining dough over the rhubarb filling.
-
Bake for 30 to 35 minutes, or until the top is golden and the filling is bubbly.
-
Allow the bars to cool completely in the pan before lifting out and cutting into squares.
Note
- You can use frozen rhubarb if fresh isn’t available; thaw and drain excess liquid first
- Store leftovers in an airtight container in the refrigerator for up to 5 days
- For extra sweetness, drizzle additional honey over the cooled bars
- These bars freeze well; wrap individually and freeze for up to 2 months

