

Summer days can be scorching, but that doesn’t mean you have to sacrifice your sweet tooth or your health. This creamy, guilt-free banana nice cream is a breeze to make and perfect for hot days! With just a handful of ingredients and minimal prep, you’ll have a vegan, dairy-free dessert that tastes like pure indulgence yet clocks in at only about 100 calories per serving. It’s beginner-friendly, requires just 10 minutes of active prep time, zero cooking time, and a brief two-hour freeze, so you can spend less time in the kitchen and more time soaking up sunshine.
Whether you’re craving a midday pick-me-up, an after-dinner treat, or a healthy snack for the kids, this frozen banana delight has your back. No fancy equipment is required beyond a simple food processor or high-speed blender, and you can customize it endlessly with your favorite toppings. From crunchy nuts to juicy berries or a drizzle of honey, every bite feels like a mini celebration. Let’s dig into how four ripe bananas and a splash of vanilla can transform into the creamiest dessert you’ll ever taste!
Craving a closer look at what you’ll need? Let’s break down the star players in this recipe before we dive into the method.
KEY INGREDIENTS IN HEALTHY BANANA NICE CREAM
Every ingredient in this nice cream plays an essential role in achieving that silky-smooth texture and natural sweetness. You don’t need a long shopping list—just a few pantry staples and a couple of fresh produce items to create a dessert that feels decadent but is completely good-for-you.
- Bananas
Ripe bananas are the heart and soul of this recipe. Their natural sugars caramelize slightly as they ripen, giving the nice cream its heavenly sweetness without any added refined sugar. They also provide the creamy, ice-cream-like body that makes each spoonful feel like a treat.
- Vanilla Extract
Just a splash of vanilla extract adds depth and warmth, turning simple frozen bananas into something reminiscent of classic vanilla ice cream. It elevates the flavor profile, balancing the bananas’ sweetness and adding a comforting aroma.
- Optional Toppings
From sliced almonds and chopped nuts to fresh berries or a drizzle of honey, toppings allow you to personalize each bowl. They introduce textures—crunchy, juicy, or gooey—and create visual appeal that makes every serving look as inviting as it tastes.
Ready to whip up this creamy wonder? Let’s move on to the step-by-step process.
HOW TO MAKE HEALTHY BANANA NICE CREAM
You’re just a few simple steps away from a refreshing, dairy-free treat that tastes like a dream. Follow the instructions below carefully, and don’t rush the blending process—patience is key to achieving that perfectly smooth, scoopable texture.
1. Peel and slice the bananas into thin rounds and place them in a single layer on a baking sheet lined with parchment paper. This prevents them from clumping together and makes them easier to process later.
2. Freeze the banana slices for at least 2 hours or until they are completely frozen. This ensures that your nice cream will have that ice-cream-like firmness when you blend it.
3. Once the bananas are frozen solid, transfer the slices into a food processor or high-speed blender. Use a sturdy machine to handle the cold fruit without straining the motor.
4. Add the vanilla extract directly to the frozen banana slices. This step infuses subtle, warm notes into the dessert.
5. Blend on high until the mixture is smooth and creamy, pausing occasionally to scrape down the sides with a spatula. This may take a few minutes, so be patient and let the machine work its magic.
6. Once the banana mixture reaches a creamy consistency—just like soft-serve—transfer it into a bowl or container using a spatula.
7. If you’re enjoying your nice cream right away, scoop it into individual bowls and pile on your choice of optional toppings for extra flair.
8. If you prefer a firmer texture, place the nice cream in the freezer for an additional 30 minutes before serving. This step gives it that classic scoopable ice cream feel.
Now that your nice cream is ready, let’s talk about fun ways to serve and elevate it even further!
SERVING SUGGESTIONS FOR HEALTHY BANANA NICE CREAM
Choosing how to present your banana nice cream is half the fun—after all, we eat with our eyes first! Whether you’re serving it for a casual family snack or impressing guests at a backyard gathering, these tips will help you take your dessert from simple to spectacular. Feel free to mix, match, and experiment with colors, shapes, and textures to make each bowl a personal masterpiece.
- Serve in crystal-clear bowls to showcase the creamy swirls, then top with a handful of bright berries and a sprig of fresh mint for a pop of color. The contrast between the white banana base and vivid fruit is utterly eye-catching.
- Spoon your nice cream into a chilled waffle cone, then roll the edges in chopped nuts or toasted coconut flakes. This playful twist adds a crunchy soundtrack to each bite and makes dessert on-the-go totally doable.
- Create a banana split by layering scoops between halved bananas in a classic boat dish. Drizzle with raw honey or a dairy-free caramel sauce, and scatter dark chocolate shavings on top for a grown-up indulgence.
- Whip up a nice cream smoothie bowl by letting the mixture thaw just enough to blend into a pourable consistency. Pour into a bowl and garnish with chia seeds, granola, and sliced fruit for a nourishing breakfast or post-workout treat.
With these serving ideas, your healthy banana nice cream will be the star of any table!
HOW TO STORE HEALTHY BANANA NICE CREAM
Storing your nice cream properly ensures that you always have a refreshing treat at your fingertips, without sacrificing flavor or texture. Because it’s free of stabilizers and dairy, it’s especially important to take a few extra steps to maintain its creamy consistency and prevent freezer burn. Follow these tips to keep your dessert tasting as fresh as the day you made it.
- Store in an airtight container and press a piece of parchment paper directly onto the surface before sealing. This minimizes ice crystal formation and maintains a smooth top layer.
- Label the container with the date and use within one week. While the flavor holds up nicely, the texture can gradually become icy if it sits too long.
- For a quick thaw to scoopable perfection, leave the container on the counter for 5–10 minutes before serving. This short rest will soften the edges without turning the entire batch runny.
- If you notice any ice crystals on the surface, simply stir the top layer with a fork before scooping. This helps redistribute moisture and revives the creaminess.
By following these storage methods, every time you dig into your nice cream, it will feel like a freshly made treat!
CONCLUSION
This healthy banana nice cream has everything to love: it’s dairy-free, vegan-friendly, beginner level, and ready in just 10 minutes of hands-on prep plus a couple of hours in the freezer. With its naturally sweet banana base, a hint of vanilla, and endless topping possibilities, you’ve got a guilt-free dessert that feels rich and satisfying. Whether you’re beating the heat on a sweltering afternoon or need a fun, nutritious snack for the whole family, this recipe checks all the boxes. Keep this article handy—feel free to print it out and save it in your recipe binder for quick reference any time you need a cool pick-me-up.
Below, you’ll also find a handy FAQ section to address any questions that might pop up as you make your batch of banana nice cream. If you try this recipe or have your own twists—maybe a dash of cinnamon or a swirl of peanut butter—drop a comment and share your experience! I’d love to hear how it turned out, what toppings you went wild with, or any challenges you ran into. Your feedback not only helps me refine future recipes but also inspires other home cooks to dive in and get creative. Happy blending and enjoy every scoopsome moment!
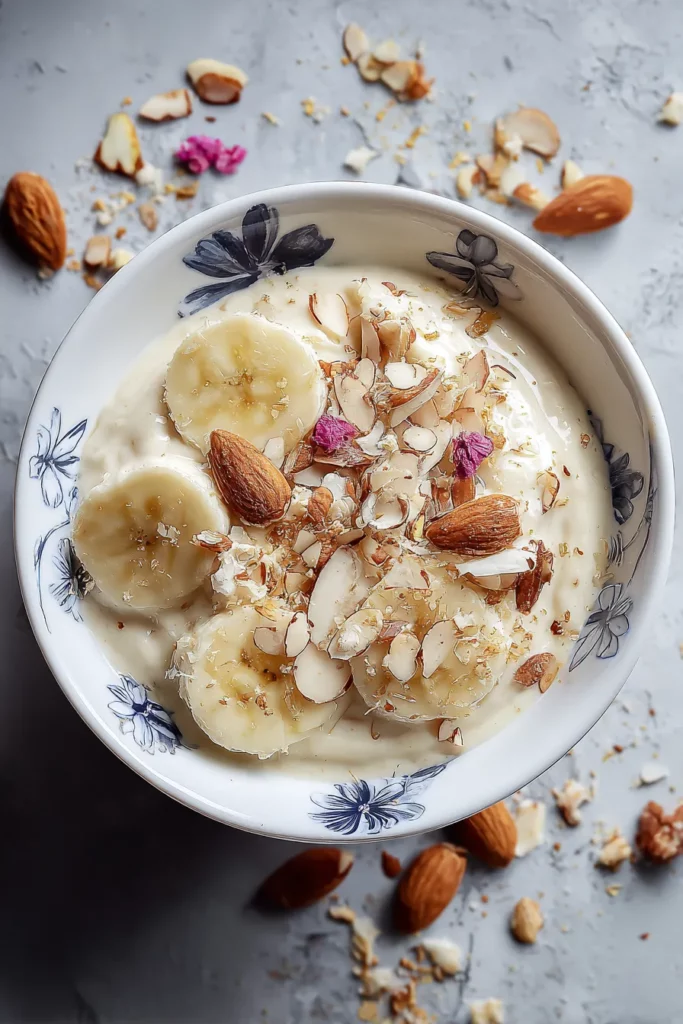

Healthy Banana Nice Cream
Description
This healthy banana nice cream is a refreshing, dairy-free treat that packs a banana punch. Its creamy texture and sweetness make it irresistible, especially with fun toppings!
Ingredients
Instructions
-
Peel and slice the bananas into thin rounds and place them in a single layer on a baking sheet lined with parchment paper.
-
Freeze the banana slices for at least 2 hours or until they are completely frozen.
-
Once frozen, transfer the banana slices into a food processor or high-speed blender.
-
Add the vanilla extract to the frozen banana slices.
-
Blend on high until the mixture is smooth and creamy, using a spatula to scrape down the sides as needed. This may take a few minutes, so be patient.
-
Once the banana mixture reaches a creamy consistency, transfer it into a bowl or container.
-
If serving immediately, scoop the nice cream into bowls and top with your choice of optional toppings.
-
If you prefer a firmer texture, place the nice cream in the freezer for an additional 30 minutes before serving.
Note
- This recipe is dairy-free and vegan-friendly.
- Nice cream is a great way to use overripe bananas.
- For a chocolate twist, add 1 tablespoon of cocoa powder when blending.
- You can experiment with other flavors, such as adding a spoonful of peanut butter or a dash of cinnamon.
- Store any leftover nice cream in an airtight container in the freezer for up to one week.

