

Sink your teeth into a snack that feels like a warm hug from your favorite diner: Garlic Parmesan Cheeseburger Bombs. These bite-sized marvels start with juicy seasoned beef, rolled into perfect little meatballs, then tucked inside pillowy biscuit dough. As they bake, the cheddar cheese inside melts into a gooey core, while the outside turns golden and crisp under a lavish brushing of garlic butter and Parmesan. Each bomb is a flavor explosion—savory beef, sharp cheddar, aromatic garlic, and nutty cheese—wrapped into one irresistible, handheld package.
I still remember the first time I made these for a casual Friday night at home. The clock was ticking, and my kids were circling the kitchen like buzzards, eager for a teaser bite. By the time the oven timer chimed at 15 minutes, the table was a battlefield of tiny cheesy orbs, disappearing faster than I could plate them. Whether you’re hosting a laid-back game night, craving quick comfort food after a long day, or just looking for a fun cooking project with the family, these bombs have your back. They’re beginner-friendly (trust me, if I can do it, anyone can), require just about 25 minutes of prep, and clock in around 440 calories apiece—perfect for guilt-free indulgence when shared, of course.
With straightforward ingredients you probably already have in your pantry—ground beef, cheddar, refrigerated biscuits, butter, garlic, and Parmesan—this recipe transforms ordinary components into extraordinary bites. Plus, you can mix in extras like bacon bits, pickles, or even a dash of hot sauce for a custom twist. Preheat your oven to 375°F, and in no time, you’ll be serving up a platter of golden, cheesy bombs that deliver big on flavor and fun. Ready to take your appetizer game to the next level? Let’s dive into the must-have ingredients before we roll up our sleeves and get cooking!
KEY INGREDIENTS IN GARLIC PARMESAN CHEESEBURGER BOMBS
Before you get started, make sure your kitchen is stocked with these essential players. Each ingredient brings its own magic to the party—combining to create that perfect harmony of savory, cheesy, and buttery goodness.
- Ground beef
Provides hearty flavor and juicy texture as the core of each meatball, ensuring each bomb has meaty satisfaction with every bite.
- Garlic powder
Infuses a warm, savory depth into the beef mixture so that every mouthful sparkles with garlicky undertones even before the butter brush.
- Onion powder
Adds a subtle sweetness and aromatic richness to balance the strong flavors of garlic and beef.
- Worcestershire sauce
Brings a tangy, umami boost that elevates the beef from simple to sensational, tying all the spices together.
- Salt and pepper
Essential seasonings that heighten and round out all the flavors, making sure nothing tastes flat or underwhelming.
- Shredded cheddar cheese
The melty, gooey heart of the bomb, offering sharp, creamy pockets of cheddar that delight every cheese lover in the room.
- Refrigerated biscuit dough
Provides a soft, tender exterior that crisps up around the edges, creating a fluffy casing for the meat and cheese.
- Unsalted butter
Acts as the luxurious base for the garlic butter brush, delivering richness and helping the Parmesan stick.
- Minced garlic
Piled into the melted butter, it offers fresh aromatic pops that toast up golden in the oven, infusing each bomb with bold flavor.
- Grated Parmesan cheese
Sprinkled over the buttered tops, it forms a savory, slightly crunchy crust that contrasts beautifully with the soft biscuit.
- Chopped fresh parsley
Adds a bright, herbaceous finish that cuts through the richness, giving each bite a fresh, colorful flourish.
HOW TO MAKE GARLIC PARMESAN CHEESEBURGER BOMBS
Ready to dive in? This recipe breaks down into simple steps that even a beginner can master, delivering maximum flavor with minimal fuss.
1. Preheat your oven to 375°F (190°C), ensuring it reaches the perfect temperature before you start assembling, for a uniformly golden bake.
2. In a large bowl, combine the ground beef, garlic powder, onion powder, Worcestershire sauce, salt, and pepper. Use your hands or a spatula to mix until the seasonings are evenly distributed and the beef is ready to be shaped.
3. Shape the beef mixture into small balls, about 1 to 1.5 inches in diameter. Aim for uniform size so they cook evenly. Set each meatball aside on a clean plate.
4. Open the refrigerated biscuit dough and separate it into individual rounds. On a lightly floured surface, flatten each biscuit into a circle large enough to fully envelop a meatball.
5. Place one meatball in the center of a flattened biscuit. Top the meatball with a small pinch of shredded cheddar cheese, ensuring it sits snugly atop the beef.
6. Carefully wrap the dough around the meatball and cheese, bringing the edges together and pinching firmly to seal each bomb completely so no cheese leaks out.
7. Arrange the sealed biscuit bombs seam-side down on a baking sheet lined with parchment paper, spacing them evenly to ensure proper airflow.
8. In a small bowl, mix together the melted butter, minced garlic, and grated Parmesan cheese until combined into a fragrant garlic butter.
9. Generously brush the garlic butter mixture over the tops and sides of each biscuit bomb, coating them thoroughly for flavor and browning.
10. Bake for 15–20 minutes, or until the biscuit dough is golden brown and fully cooked through, with cheese bubbling inside.
11. Remove from the oven and sprinkle with chopped fresh parsley before serving to add a burst of color and freshness.
SERVING SUGGESTIONS FOR GARLIC PARMESAN CHEESEBURGER BOMBS
When it comes to enjoying these cheesy, garlicky parcels, presentation and pairing can take them from tasty to unforgettable. Whether you’re hosting a lively gathering or looking for a cozy movie-night snack, these serving ideas will ensure your bombs shine on any table.
- Build a Dipping Station
Offer an array of dipping sauces—creamy ranch, zesty ketchup, tangy mustard, or chipotle aioli. Place small bowls around a platter of bombs so guests can customize each bite.
- Party Platter Centerpiece
Arrange the bombs in a circular pattern on a large wooden board, garnished with extra parsley and grated Parmesan. Surround them with colorful veggies like cherry tomatoes and mini bell peppers for a festive vibe.
- Family Style Dinner
Serve alongside a crisp garden salad and a basket of garlic knots to turn these bombs into a well-rounded meal. Let everyone pick their favorites from the table to encourage sharing and conversation.
- Game Night Fuel
Keep a warm skillet of bombs on the table, with tongs for easy grabbing. Pair with cold beer or soda in mason jars for a laid-back, communal feel that keeps the action moving.
HOW TO STORE GARLIC PARMESAN CHEESEBURGER BOMBS
You’ve got leftovers (or you want to prep ahead)—no worries! Proper storage keeps these little gems tasting fresh and maintaining their texture for days or weeks to come. Here’s how to preserve their garlicky, cheesy goodness.
- Refrigeration
Allow the bombs to cool completely, then place them in a single layer inside an airtight container. Use parchment paper between layers if stacking. Store in the fridge for up to 3 days, reheating in the oven to crisp the exterior.
- Freezing Before Baking
After assembling and sealing the bombs, lay them on a baking sheet flash-freeze for 1 hour. Transfer to a freezer bag or container, removing as much air as possible. Keep frozen for up to 1 month; bake from frozen, adding a few extra minutes to the cooking time.
- Freezing After Baking
Let fully baked bombs cool, then wrap each individually in plastic wrap and foil. Place in a freezer-safe container for up to 2 months. Reheat from frozen or thaw overnight in the fridge before warming.
- Reheating Tips
For best results, reheat in a preheated oven at 350°F (175°C) for about 10 minutes (from refrigerated) or 15–20 minutes (from frozen). Using an air fryer at 325°F (160°C) for 5–7 minutes also revives that crispy exterior.
CONCLUSION
From the first melty bite to the last crispy crust, these Garlic Parmesan Cheeseburger Bombs bring the ultimate crowd-pleasing punch to your table. We’ve covered everything—from gathering the key ingredients and following easy, beginner-friendly steps, to creative serving ideas and foolproof storage methods. Whether you’re whipping them up for a party, serving them as a fun family dinner, or batch-making ahead for quick snacks, these bombs check all the boxes for flavor, convenience, and sheer joy. Print this article or save it somewhere handy—you’ll want to revisit these cheesy bites whenever you crave a little culinary fun or need a quick, comforting dish for guests.
You’ll also find a helpful FAQ section below to troubleshoot any questions that might pop up—no guessing games here! If you give this recipe a try, I’d love to hear how it turned out. Share your tweaks, ask questions, or let me know if you ran into any kitchen mysteries. Happy cooking, and here’s to many more delicious adventures in your home kitchen!
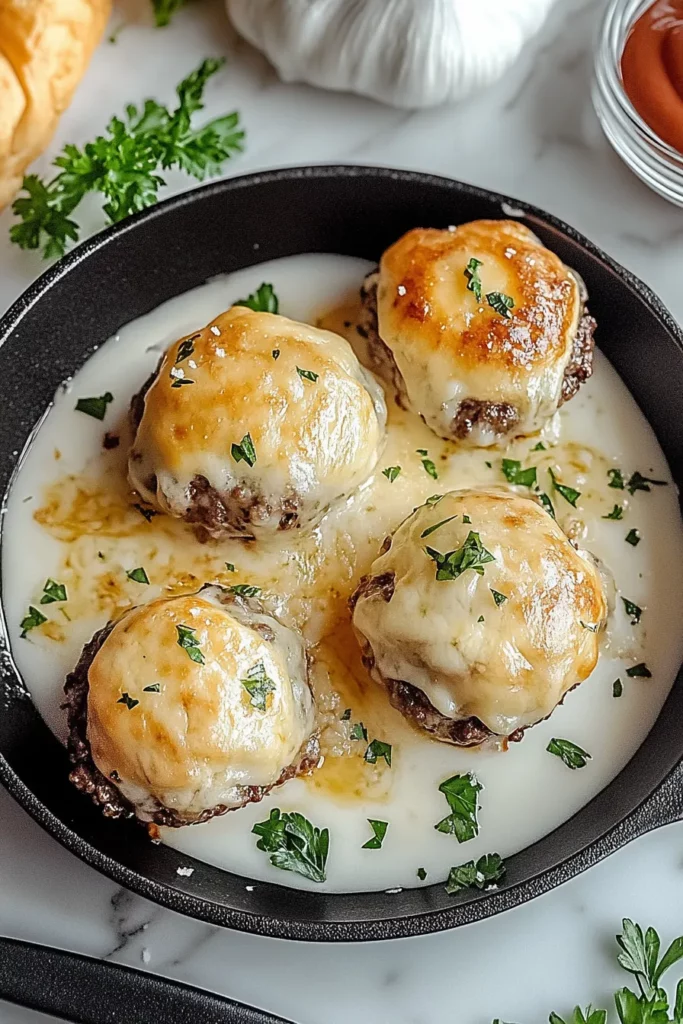

Garlic Parmesan Cheeseburger Bombs
Description
Juicy seasoned beef encased in soft biscuit dough, stuffed with melty cheddar, then bathed in garlic butter and Parmesan for an irresistible crispy, cheesy finish that’s sure to disappear fast.
Ingredients
Instructions
-
Preheat your oven to 375°F (190°C).
-
In a large bowl, combine the ground beef, garlic powder, onion powder, Worcestershire sauce, salt, and pepper. Mix well until fully combined.
-
Shape the beef mixture into small balls, about 1 to 1.5 inches in diameter, and set aside.
-
Open the biscuit dough and separate it into individual biscuits. Flatten each biscuit into a small circle, large enough to wrap around a meatball.
-
Place a meatball in the center of each flattened biscuit. Top each meatball with a small portion of shredded cheddar cheese.
-
Carefully wrap the dough around the meatball and cheese, pinching the edges to seal the dough completely around the filling.
-
Arrange the biscuit bombs seam-side down on a baking sheet lined with parchment paper.
-
In a small bowl, mix together the melted butter, minced garlic, and Parmesan cheese.
-
Brush the garlic butter mixture generously over the tops of each biscuit bomb.
-
Bake for 15-20 minutes, or until the biscuit dough is golden brown and cooked through.
-
Remove from the oven and sprinkle with fresh parsley before serving.
Note
- These can be served as an appetizer or a fun dinner option for kids and adults alike.
- Try adding other fillings like bacon or pickles to customize the bombs to your taste.
- For a spicier kick, mix in some crushed red pepper flakes or hot sauce in the beef mixture.
- You can make the meatballs ahead of time and refrigerate them until you’re ready to assemble and bake.
- Serve these with a side of dipping sauce, such as ketchup, mustard, or ranch.

