

When velvety fudge meets vibrant crimson in one luscious bite, you know you’re in for something extraordinary. These Fudgy Red Velvet Brownies aren’t just another dessert—they’re a joyful celebration of color and texture, marrying the classic appeal of red velvet with the rich, gooey satisfaction of a brownie. From the moment you whisk in that splash of red food coloring, the batter transforms into a jewel-toned promise of decadence. And don’t be fooled by their elegant appearance: they’re surprisingly easy to whip up, making them perfect for beginner bakers and seasoned pros alike.
With just a handful of pantry staples and a dash of enthusiasm, you’ll create brownies that boast a deep cocoa kiss, punctuated by bursts of semi-sweet chocolate chips. Each fudgy square carries the gentle tang of cocoa powder and the warmth of vanilla, harmonized by a subtle saltiness that keeps everything balanced. Incredibly moist yet perfectly set, these treats will quickly become your go-to dessert when chocolate cravings strike or whenever you need a showstopper for friends and family. And trust me, once you slice into that bright red center, you’ll find it hard to share!
Rolling up my sleeves to bake these red velvet brownies was one of those kitchen experiments that turned into an instant family favorite. My first batch emerged brilliantly glossy on top, with edges that were crisp enough to hold their shape yet soft enough to melt in your mouth. Gathering around the cutting board, my nieces and nephews watched in awe as I lifted each square, like revealing a hidden gem. It wasn’t long before my recipe notebook was splattered with notes: “Reduce oven time by 2 minutes for extra gooeyness,” “Try bittersweet chips for more depth,” and “Add a swirl of cream cheese frosting next time!” These brownies not only satisfy a chocolate fix but also inspire creativity with every tweak. Whether you’re baking for a casual movie night, a festive celebration, or simply treating yourself after a long day, these brownies deliver on flavor, texture, and that magical red velvet flair.
KEY INGREDIENTS IN FUDGY RED VELVET BROWNIES
Before diving into the mixing bowl, let’s take a quick look at the stars of our show. Each ingredient plays an essential role in creating that signature fudgy texture, vibrant color, and balanced sweetness that makes these brownies unforgettable.
- Unsalted butter
Provides the rich, silky fat that gives brownies their fudgy consistency and glossy finish. Using unsalted allows you to control the salt level precisely.
- Granulated sugar
Sweetens the batter while helping to create a tender crumb and that classic crackly top. It also aids in moisture retention, keeping the centers delightfully soft.
- Eggs
Act as binding agents to structure the brownies, while their natural fats contribute to a moist, cohesive texture. Beating them one at a time ensures a smooth, well-emulsified batter.
- Vanilla extract
Introduces warm, aromatic notes that round out the chocolate flavor. A teaspoon is just enough to brighten and deepen the overall taste profile.
- Red food coloring
Delivers the iconic red velvet hue. Whether you prefer a bold scarlet or a softer rose tone, adjust the amount to suit your aesthetic without altering texture.
- Unsweetened cocoa powder
Infuses each bite with bittersweet chocolate essence and that slight tang characteristic of red velvet. It also helps achieve the deep color contrast against the red batter.
- Salt
Enhances all the flavors by balancing sweetness and deepening the chocolate notes. Just a pinch is all you need to elevate the overall taste.
- All-purpose flour
Provides the structure for these brownies, ensuring they hold together while remaining tender. It’s the backbone that supports all the luscious fudginess.
- Semisweet chocolate chips
Add melty pockets of chocolate goodness throughout each square. They bring extra dimension and textural contrast without overwhelming the red velvet base.
HOW TO MAKE FUDGY RED VELVET BROWNIES
Let’s walk through the steps to transform these simple ingredients into a batch of irresistible, fudgy delights. With clear techniques and easy-to-follow instructions, you’ll be savoring warm brownies in no time.
1. Preheat your oven to 350°F (175°C). Line an 8×8-inch baking pan with parchment paper or lightly grease it to guarantee effortless removal once the brownies are baked and cooled.
2. In a medium saucepan over medium heat, melt the butter completely. As soon as it liquefies, remove the pan from heat and vigorously stir in the sugar until the mixture is smooth and glossy.
3. Crack the eggs into the pan one at a time, whisking thoroughly after each addition. This ensures proper emulsification and a velvety batter. Stir in the vanilla extract and red food coloring until the color is uniformly vibrant.
4. In a separate bowl, sift together the cocoa powder, salt, and flour. Gently fold this dry blend into the wet ingredients, stirring just until no streaks of flour remain—overmixing can make brownies cakey.
5. Sprinkle the chocolate chips into the batter and carefully fold them in to achieve an even distribution, ensuring every corner of the pan will have pockets of molten chocolate.
6. Pour the batter into your prepared pan, then use a spatula to spread it evenly, reaching all edges and smoothing the top for an even bake.
7. Bake for 25–30 minutes, or until a toothpick inserted into the center comes out with a few moist crumbs attached—this is the hallmark of perfectly fudgy brownies.
8. Remove the pan from the oven and let the brownies cool completely on a wire rack to finish setting. Patience now means cleaner slices later!
9. Once cooled, lift the brownies out by the parchment overhang. Transfer to a cutting surface and slice into squares or rectangles to your preferred size.
SERVING SUGGESTIONS FOR FUDGY RED VELVET BROWNIES
Serving these red velvet brownies is as much fun as baking them. Their striking color and fudgy texture make them a standout at any gathering, but there are simple ways to elevate the experience even further. Whether you’re aiming for a festive presentation, a cozy solo treat, or a sophisticated dessert platter, these suggestions will help you showcase your brownies in style while enhancing their rich flavors.
- Cream cheese frosting swirl
Add a classic red velvet twist by swirling a tangy cream cheese frosting on top of your warm brownies. Dollop spoonfuls of frosting, then use a skewer to create whimsical patterns before serving.
- Dusting of powdered sugar
For an elegant, understated finish, lightly dust the cooled brownie tops with powdered sugar. The stark white against crimson red makes for a beautiful contrast and adds a touch of sweetness.
- Vanilla ice cream scoops
Serve each brownie with a generous scoop of cold vanilla ice cream. The hot-and-cold sensation highlights the fudgy texture and balances the deep cocoa flavor with creamy sweetness.
- Fresh berry garnish
Top each square with a few fresh raspberries or strawberries. Their bright acidity cuts through the richness, and the red hues harmonize perfectly with the velvet backdrop.
HOW TO STORE FUDGY RED VELVET BROWNIES
Keeping your brownies fresh and fudgy over time is all about proper storage. Whether you’re planning to enjoy them over several days or need a way to prep ahead, these methods will preserve flavor, moisture, and texture so every bite tastes as sumptuous as the first.
- Room temperature in an airtight container
Once completely cooled, place brownies in a single layer inside a sealed container. Add a piece of parchment between layers if stacking. Stored this way, they stay moist and delicious for up to 4 days.
- Refrigeration for extended freshness
If you live in a warmer climate or want to stretch their life further, wrap cooled brownies tightly in plastic wrap, then bag them in a resealable container. Chill for up to a week, but allow them to come to room temperature before serving for peak fudginess.
- Freezing for long-term storage
Individually wrap each brownie square in plastic wrap, then nestle them in a freezer-safe bag or container. They can be frozen for up to 3 months. Thaw at room temperature or gently warm in the microwave for about 15–20 seconds.
- Avoid moisture and odors
Keep brownies away from strong-smelling foods both in the fridge and freezer. Ensure containers are airtight to prevent them from absorbing other flavors or developing freezer burn.
CONCLUSION
We’ve journeyed through every step of creating these sensational Fudgy Red Velvet Brownies, from reviewing the essential ingredients and baking techniques to exploring delightful serving ideas and foolproof storage tips. You now have all the insights you need to whip up a batch of these vibrant, chocolate-kissed squares that promise to be the highlight of any dessert spread. Whether you’re baking for a birthday celebration, a cozy night in, or simply indulging your sweet tooth, this recipe delivers on both ease and decadence. Remember the balance of butter, sugar, and cocoa, the magic of that crimson hue, and the simple joy of biting into a brownie that’s as pleasing to the eye as it is to the palate.
Feel free to print this article and tuck it into your recipe binder for future baking adventures. You’ll also find a handy FAQ below to answer any lingering questions about substitutions, troubleshooting texture, or flavor customizations. And if you decide to give these brownies a whirl, I’d love to hear how they turned out—drop your comments, questions, or feedback below! Whether you’re curious about adding almond extract, tweaking the sweetness, or mastering that perfect fudgy center, let’s chat and make every batch even better together.
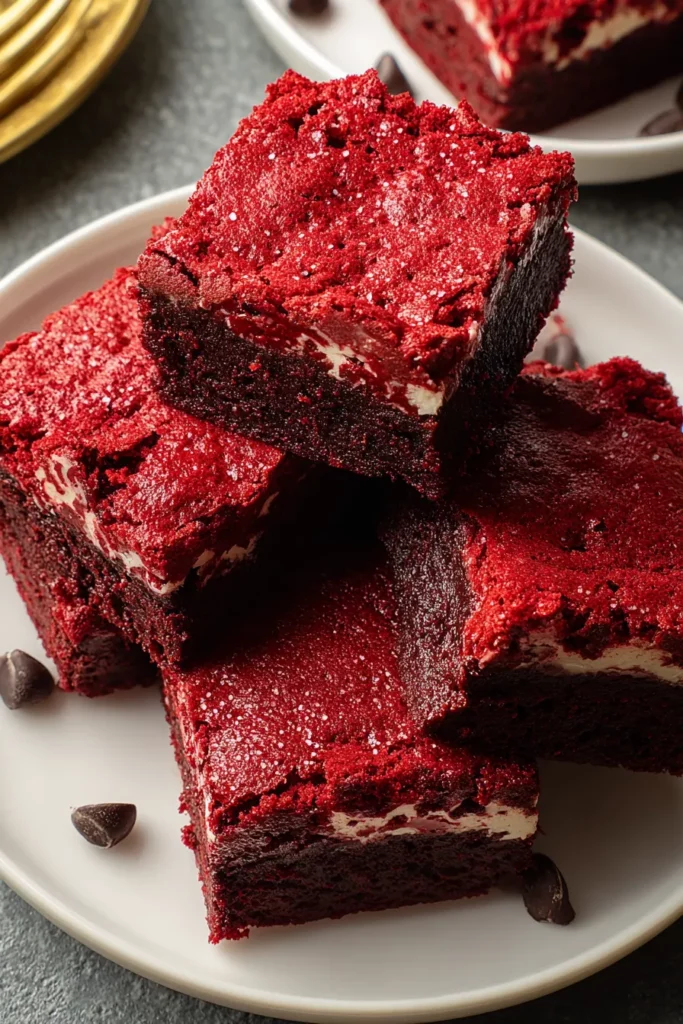

Fudgy Red Velvet Brownies
Description
These Fudgy Red Velvet Brownies combine the classic red velvet flavor with a rich, chocolatey texture. They're fudgy, decadent, and perfect for sharing—or enjoying all by yourself!
Ingredients
Instructions
-
Preheat your oven to 350°F (175°C). Line an 8x8-inch baking pan with parchment paper or lightly grease it for easy removal of the brownies.
-
In a medium saucepan, melt the butter over medium heat until completely melted. Remove from heat and stir in the sugar until well combined.
-
Add the eggs, one at a time, mixing well after each addition. Stir in the vanilla extract and red food coloring until the batter is evenly colored.
-
In a separate bowl, combine the cocoa powder, salt, and flour. Gradually fold this dry mixture into the wet ingredients, stirring until just combined.
-
Gently fold in the chocolate chips, ensuring they're evenly distributed throughout the batter.
-
Pour the batter into the prepared baking pan, spreading it evenly to the edges using a spatula.
-
Bake in the preheated oven for 25-30 minutes, or until a toothpick inserted into the center comes out with just a few moist crumbs attached.
-
Once baked, remove the brownies from the oven and allow them to cool completely in the pan on a wire rack.
-
Once cooled, remove the brownies from the pan using the parchment overhang (if applicable), then slice into squares or rectangles.
Note
- For a more intense chocolate flavor, use bittersweet chocolate chips.
- If you prefer a less intense red color, reduce the amount of red food coloring used.
- Adding a cream cheese frosting can enhance the traditional red velvet cake flavor.
- Store brownies in an airtight container at room temperature for up to 4 days.
- For an almond twist, add 1/2 teaspoon of almond extract along with the vanilla extract.

