

Get ready to transform your fridge into a colorful, flavor-packed pickling haven with this Fridge Pickled Radish & Vegetables recipe. Vibrant radish and veggie slices bathed in a tangy, sweet-salty brine bring a crunchy, zesty twist to sandwiches, salads, or snack plates. Ready in just a day, these quick fridge pickles are beginner-friendly and endlessly customizable—so grab a handful of fresh produce and let’s dive into a tangy, crisp adventure!
Key Ingredients
Before we jump into the pickling process, let’s highlight the stars of the show and their roles in making these veggies irresistible:
- 1 cup radishes, thinly sliced: Peppery crunch that stands up beautifully to the tangy brine.
- 1 cup cucumbers, thinly sliced: Cool, crisp texture that balances the sharper flavors.
- 1 cup carrots, julienned: Natural sweetness and vibrant color for visual appeal.
- 1 cup bell peppers (any color), thinly sliced: Bright crunch and mild sweetness to round out the mix.
- 1 cup white vinegar: Acidic backbone that preserves and flavors every slice.
- 1 cup water: Dilutes vinegar to create a balanced, drinkable brine.
- 2 tablespoons granulated sugar: Sweet note that counteracts the sharpness of the vinegar.
- 1 tablespoon sea salt: Draws out moisture and enhances overall flavor.
- 1 teaspoon mustard seeds: Warm, pungent pop for subtle texture and spice.
- 1 teaspoon peppercorns: Aromatic heat that layers in complexity.
- 2 cloves garlic, sliced: Savory depth and aromatic richness.
- 1/2 teaspoon red pepper flakes (optional): Optional heat kick for those who love a little fire.
- Fresh dill (optional, for flavor): Herbal freshness that brightens every bite.
How To Make Fridge Pickled Radish & Vegetables
Let’s walk through how to turn crisp produce into tangy fridge pickles in just a few easy steps. You’ll prepare your veggies, whip up a flavorful brine, pack everything into jars, and let time do the rest—no special equipment needed!
1. Prep the vegetables
Thoroughly wash under cold running water to remove any dirt. Pat dry with kitchen towels to keep extra moisture out of the brine. Thinly slice the radishes and cucumbers, julienne the carrots, and cut bell peppers into slim strips. Transfer all the prepped vegetables into a large bowl.
2. Make the brine
In a medium saucepan, combine the white vinegar, water, granulated sugar, sea salt, mustard seeds, peppercorns, sliced garlic, and red pepper flakes (if using). Place over medium heat and stir constantly until the sugar and salt fully dissolve and the mixture reaches a gentle boil.
3. Cool the brine
Once boiling, remove the saucepan from heat and let the brine sit for about 10 minutes. This resting period helps prevent the hot liquid from wilting your vegetables when you pour it in.
4. Pack the jars
Grab sterilized glass jars and pack in the sliced vegetables. Layer as you like—start with a radish layer, then cucumbers, carrots, and bell peppers—pressing gently to eliminate air pockets.
5. Add the brine
After the brine has cooled slightly, carefully pour it over the vegetables in each jar. Ensure every piece is fully submerged, leaving about half an inch of headspace at the top.
6. Add herbs (optional)
If you love an herbal note, tuck a few fresh dill sprigs on top of the veggies in each jar before sealing.
7. Seal and chill
Secure the lids and let the jars cool to room temperature. Once they’re no longer warm, transfer them to the refrigerator.
8. Marinate
Allow the pickled vegetables to sit in the fridge for at least 24 hours. The longer they rest—up to 2–3 days—the deeper and more complex the flavors become.
Serving Suggestions
These vibrant pickles are as versatile as they come—here are four fun ways to enjoy them:
- Sandwich topper: Layer these crunchy pickles on your favorite sandwich for a tangy crunch boost.
- Taco addition: Add a handful to fish or grilled chicken tacos to brighten up each bite.
- Charcuterie board: Arrange the pickled veggies alongside cheeses and cured meats for a colorful platter.
- Salad mix-in: Chop and toss into green salads or grain bowls for an extra pop of zesty flavor.
Tips For Perfect Fridge Pickled Radish & Vegetables
Nail this simple fridge-pickling routine every time with these friendly tips:
- Store the jars in the back of the fridge to keep temperatures consistent and enjoy your pickles for up to 2 weeks without losing that satisfying crunch.
- Want to shake things up? Add veggies like cauliflower florets or green beans for exciting textures and flavors.
- Patience pays off: the longer your veggies marinate in the brine, the more deeply flavored they’ll become—try sampling at 2 and 5 days to find your ideal tang level.
- Play with the balance: tweak the sugar and salt amounts to match your taste—just be sure there’s enough salt for safe preservation.
How To Store It
Proper storage is key to keeping those pickles crisp and flavorful. Always use sterilized jars and lids to prevent contamination. Once sealed, place the jars in the coldest part of your fridge—usually the back shelf—to maintain a steady chill. Label each jar with the date you made them so you can track freshness. If you notice any floating veggies, press them back down or use a small weight to keep everything submerged in the brine. Stored this way, your fridge pickles will stay at their best for up to two weeks.
Frequently Asked Questions
Here are some quick answers to keep your pickling game strong:
- How long should I let the pickled vegetables marinate before eating?
For best flavor, refrigerate the jars for at least 24 hours to allow the brine to fully penetrate the vegetables. While you can taste them after a few hours, the tang and crunch deepen over 2–3 days. After about a week, the flavors will be even more pronounced, though the vegetables may soften slightly.
- How long will these fridge pickles last in the refrigerator?
Stored properly in sealed sterilized jars, these pickled vegetables will keep in the refrigerator for up to 2 weeks. Always use a clean utensil to remove vegetables and check for any off-smells or mold before eating. Discard the contents if you notice any signs of spoilage.
- What’s the purpose of cooling the brine before pouring it over the vegetables?
Allowing the brine to cool for about 10 minutes prevents the hot vinegar mixture from cooking or wilting the vegetables on contact, preserving their crisp texture. It also minimizes jar breakage due to sudden temperature changes.
- Can I customize the flavor by adjusting sugar, salt, or vinegar types?
Yes, this recipe is flexible. Reduce or increase the granulated sugar and sea salt to suit your taste—just ensure enough salt for preservation. You can also swap white vinegar for apple cider or rice vinegar for a milder or fruitier note. Adjust liquid ratios to maintain roughly equal parts vinegar and water.
- Do I need to sterilize the jars before pickling?
Sterilizing jars is recommended to extend shelf life and prevent contamination. Wash jars and lids in hot, soapy water, rinse well, then either boil them in water for 10 minutes or run them through a hot dishwasher cycle without detergent. Let them air-dry before packing your vegetables.
- What happens if some vegetables float above the brine?
Vegetables exposed to air can develop mold or lose crispness. To prevent this, press down gently on the packed vegetables to eliminate air pockets before sealing. If necessary, use a clean fermentation weight, small zip-top bag of brine, or a folded cabbage leaf to keep everything fully submerged.
- Can I add other vegetables or spices to this recipe?
Absolutely. You can include cauliflower florets, green beans, asparagus, or onions—just slice or cut them to similar thickness as the radishes and carrots for even pickling. Additional seasonings like coriander seeds, bay leaves, or sliced ginger also pair well. Adjust brine volume so all items stay submerged.
- Why are mustard seeds, peppercorns, and garlic included in the brine?
Mustard seeds and peppercorns infuse the brine with warm, pungent undertones that complement the sharp vinegar taste, while garlic adds depth and aromatic richness. Together, they create a complex flavor profile and slight textural interest in each bite.
What Makes This Special
This fridge-pickled radish & vegetables recipe is the perfect example of how a handful of pantry staples can turn everyday produce into a crunchy, tangy delight. It works because the balanced sweet-salty brine highlights each vegetable’s natural character while mustard seeds, peppercorns, and garlic layer in complexity. Whether you’re a pickling newbie or a seasoned pro, these quick pickles come together in minutes and only improve with time—so print this article, save it for later, and let us know how your jar turned out or if you’ve got any questions!
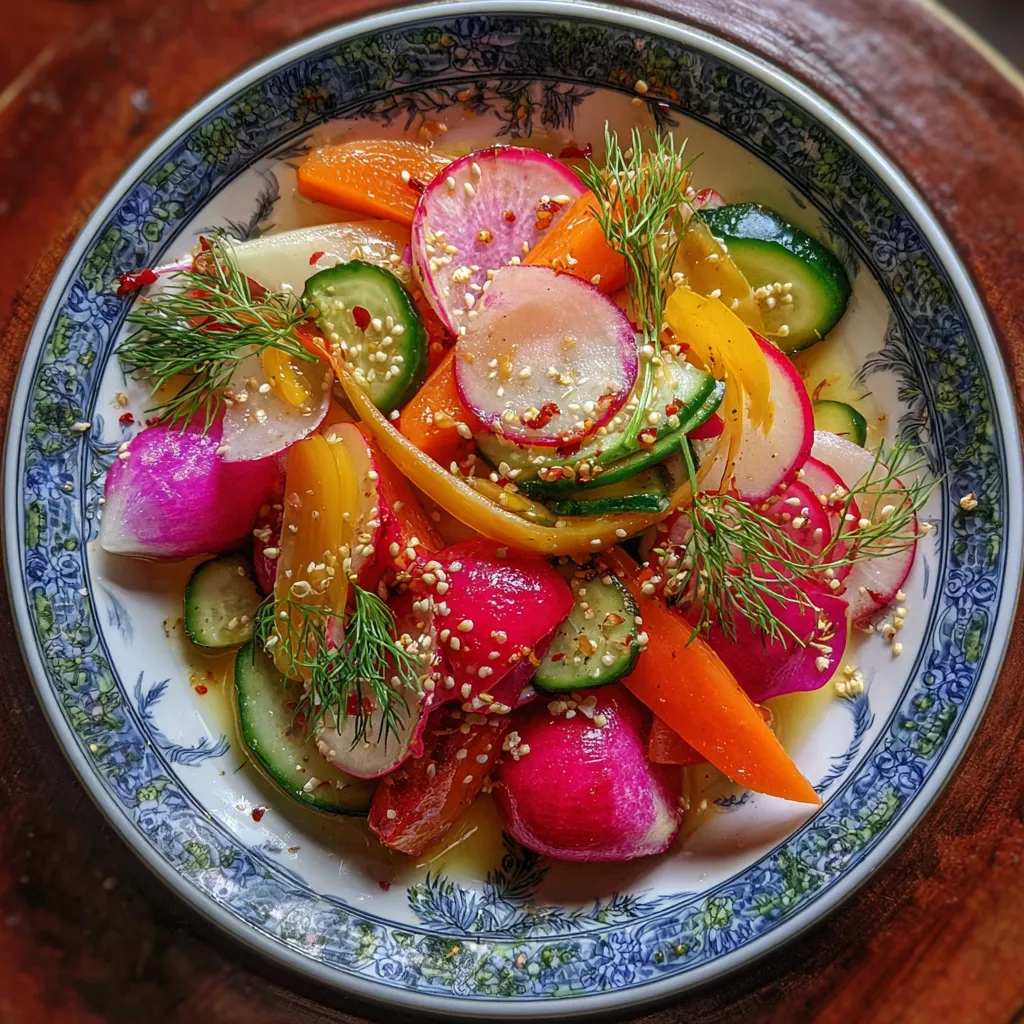

Fridge Pickled Radish & Vegetables
Description
Crunchy radishes, cucumbers, carrots, and peppers soak up a zesty vinegar brine spiced with mustard seeds and garlic. Ready in just a day, they add a bright pop of flavor to any meal or snack.
Ingredients
Instructions
-
Prepare the vegetables by thoroughly washing and slicing the radishes, cucumbers, carrots, and bell peppers. Place the vegetables in a large bowl.
-
In a separate saucepan, combine the white vinegar, water, granulated sugar, sea salt, mustard seeds, peppercorns, sliced garlic, and red pepper flakes (if using). Bring the mixture to a boil over medium heat, stirring until the sugar and salt dissolve completely.
-
Once the brine is boiling, remove the saucepan from heat. Allow it to cool for about 10 minutes.
-
Meanwhile, pack the sliced vegetables into sterilized glass jars. You can layer them as you wish, perhaps starting with the radishes, followed by the cucumbers, carrots, and bell peppers.
-
Once the brine has cooled slightly, carefully pour it over the packed vegetables in the jars, ensuring that all vegetables are submerged. Leave about half an inch of headspace at the top of the jars.
-
If using, add fresh dill sprigs on top of the vegetables in each jar for additional flavor.
-
Seal the jars with their lids and let them cool to room temperature. Once cooled, refrigerate the jars.
-
Allow the pickled vegetables to marinate in the fridge for at least 24 hours before consuming for maximum flavor.
Note
- These pickled vegetables can last up to 2 weeks in the refrigerator.
- Feel free to customize with additional vegetables like cauliflower or green beans.
- The longer the vegetables sit in the brine, the more flavorful they become.
- This recipe is flexible; adjust the sugar and salt levels to your taste preference.

