

If you’ve been on the hunt for a snack that feels both cozy and a little bit fancy, these French Dip Squares are about to become your new obsession. Soft, flaky layers cradle tender slices of roast beef, and each bite is enriched by melty provolone that forms little pockets of gooey goodness. When you pour rich beef broth across the layers before baking, it seeps into every nook and cranny, creating a deliciously moist interior and a golden, slightly crisp top. Whether you’re feeding a crowd at a casual get-together or sneaking a square during your next Netflix binge, these squares hit that sweet spot between handheld convenience and gourmet flavor.
Beyond the layers of dough and cheese, this recipe offers comfort-food vibes with a twist of sophistication. It’s the kind of dish that makes your kitchen smell like a bustling French bistro (without the pretentiousness), and yet it’s totally approachable—even if you’re brand-new to baking. The moment you bring these warm squares out of the oven, you’ll notice friendly chatter starting to build around the table as everyone reaches for a piece and a little bowl of extra dip. Gather your favorite people, because once you serve these squares, you’ll all be trading stories and dipping strategies in no time.
KEY INGREDIENTS IN FRENCH DIP SQUARES
Before you roll up your sleeves and get mixing, let’s take a closer look at the superstar ingredients that make these squares so irresistible.
- Roast beef
Thinly sliced to ensure tender bites, this is the savory heart of the dish. It provides rich, meaty flavor that pairs perfectly with the melty cheese and seasoned batter.
- Beef broth
Poured over the layers to infuse every bit of the batter and beef with deep, savory moisture. It doubles as a dipping sauce for extra richness.
- Provolone cheese
Shredded to melt effortlessly, these mild, creamy strands wrap around the meat for those satisfying gooey pockets in each square.
- Flour
The foundation of our batter, flour gives structure to the layers and helps create that light, tender crumb.
- Baking powder
Acting as our leavening agent, it helps the batter rise and yields the flaky texture that makes these squares so delightful.
- Salt
Enhances all the flavors, balancing richness and ensuring every savory note pops.
- Unsalted butter
Added for richness and moisture, it contributes to a melt-in-your-mouth quality in the baked layers.
- Milk
Moisturizes the dry ingredients while keeping the batter smooth and tender.
- Egg
Binds everything together, adding a touch of richness and aiding in the structure.
- Garlic powder
Infuses a gentle, savory aroma without overwhelming the beef and cheese.
- Black pepper
Adds a subtle, warming kick that complements the savory profile.
- Worcestershire sauce
A splash of umami that deepens the beefy essence and ties all the flavors together.
- Fresh parsley
Brightens each square with a pop of color and a hint of herbaceous freshness when used as a garnish.
HOW TO MAKE FRENCH DIP SQUARES
These squares come together in straightforward steps, layering flavor upon flavor until you have the ultimate handheld French dip experience. Follow along for an easy-to-master process that yields bakery-quality results from your home oven.
1. Preheat your oven to 375°F (190°C) and grease a 9×9-inch baking dish or line it with parchment paper to ensure easy removal and cleanup.
2. In a large mixing bowl, whisk together the flour, baking powder, salt, garlic powder, and black pepper until the dry ingredients are evenly incorporated and free of lumps.
3. In a separate bowl, cream together the softened butter and milk until the mixture is smooth and slightly fluffy. Add the egg and Worcestershire sauce, then whisk until the wet ingredients are fully combined and glossy.
4. Gradually pour the wet mixture into the dry ingredient bowl and mix gently until just combined. It’s important not to overmix—some small lumps are perfectly fine for a tender crumb.
5. Spread half of the batter into the prepared baking dish, smoothing the top with a spatula to create an even base layer.
6. Arrange the thinly sliced roast beef in an even layer over the batter, pressing down lightly so it sits snugly. Sprinkle the shredded provolone cheese over the meat for a gooey middle layer.
7. Pour the beef broth evenly over the cheese-covered beef to ensure every bite stays moist and flavorful.
8. Dollop spoonfuls of the remaining batter over the top and gently spread it out to cover the beef and cheese completely, taking care not to dislodge the layers below.
9. Bake for 30–35 minutes, or until the top is a beautiful golden brown and a toothpick inserted into the center comes out clean.
10. Remove from the oven and let the squares cool in the pan for about 10 minutes—this resting time helps them set.
11. Once cooled slightly, slice into nine even squares. Serve warm, garnished with chopped fresh parsley if desired, and don’t forget an extra bowl of beef broth on the side for dipping.
SERVING SUGGESTIONS FOR FRENCH DIP SQUARES
When it comes to sharing these irresistible squares, presentation and pairings can make all the difference. Think of ways to complement their hearty richness with bright, contrasting textures and flavors. Whether you're hosting a casual game night or an elegant appetizer spread, these ideas will help you serve French Dip Squares like a pro and get everyone excited to dig in.
- Offer extra beef broth in small dipping bowls so guests can control how saucy they like their squares. A ladle or mini pitcher makes for a charming presentation and ensures no one misses out on that signature dip experience.
- Surround the platter with a crisp green salad tossed in a zesty vinaigrette. The refreshing crunch and acidity cut through the richness, turning each bite into a well-balanced flavor adventure.
- Add a side of pickled vegetables—think tangy cornichons or pickled red onions—to introduce a bright, acidic contrast. The sharpness will highlight the savory layers and cleanse the palate between squares.
- Elevate your gathering by arranging these squares on a charcuterie board alongside cured meats, artisan cheeses, and crusty bread. Guests can mix and match bites, creating their own flavor combinations and making the dish feel extra festive.
HOW TO STORE FRENCH DIP SQUARES
Keeping your French Dip Squares fresh and flavorful is easy when you follow a few simple storage methods. Proper storage not only prevents soggy textures but also maintains the integrity of the layers, so every reheated square tastes as good as the first day you baked them.
- Refrigerate in an airtight container: Once completely cooled, place the squares in a single layer or separated by parchment paper to prevent sticking. Store in the fridge for up to 4 days, then reheat gently in the oven or toaster oven to revive the crispy top.
- Freeze for longer preservation: Wrap individual squares tightly in plastic wrap, then place them in a freezer-safe bag or container. They can be frozen for up to 2 months. When you’re ready to enjoy, thaw overnight in the refrigerator and reheat in a preheated oven for best results.
- Use vacuum sealing: If you have a vacuum sealer, this is a top-notch way to eliminate air and lock in moisture. Vacuum-sealed squares can last even longer in the freezer without risk of freezer burn.
- Reheat with care: Avoid microwaving if possible, as it can make the layers rubbery. Instead, place your squares on a baking sheet and warm them in a 350°F (175°C) oven for 8–10 minutes, just until heated through and lightly crisp on top.
CONCLUSION
This French Dip Squares recipe brings together the comforting flavors of tender roast beef, melty provolone, and savory broth, all nestled between light, fluffy layers. We’ve walked through gathering the key ingredients, detailed every step of the simple preparation, and shared tips for both serving and storing these delicious bites. Whether you’re a beginner in the kitchen or a seasoned home cook, you’ll find this dish to be both approachable and impressive—a perfect addition to lunch menus, party spreads, and casual snack times alike. Be sure to print or bookmark this article so you can easily reference it the next time you’re planning a gathering or craving something out-of-the-ordinary yet comforting.
You’ll also find a handy FAQ below to answer any lingering questions, but in the meantime, I’d love to hear how your baking adventure goes. Did you add a personal twist with sautéed onions or mushrooms? Did your friends rave about the dipping broth? Leave a comment, ask a question, or share your own tips and tricks—you never know who might be inspired by your experience. Let’s keep the conversation going and make every French Dip Square moment as delightful as the first bite. Enjoy!
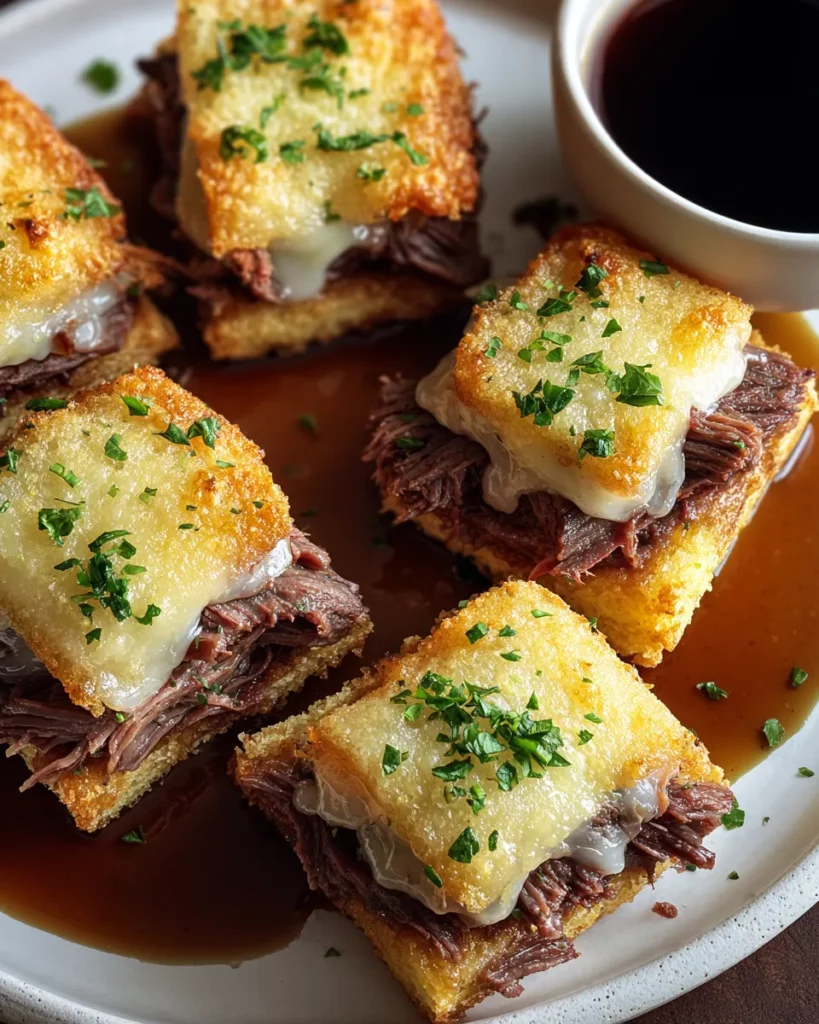

French Dip Squares
Description
These delightful squares combine flaky layers, hearty roast beef, and melted provolone, all enhanced by a delicious beef broth for dipping—perfect for any gathering!
Ingredients
Instructions
-
Preheat your oven to 375°F (190°C) and grease a 9x9-inch baking dish or line it with parchment paper.
-
In a large mixing bowl, combine the flour, baking powder, salt, garlic powder, and black pepper. Mix well to ensure even distribution of dry ingredients.
-
In another bowl, cream together the softened butter and milk until smooth, then add in the egg and Worcestershire sauce. Whisk until well combined.
-
Gradually add the wet mixture to the dry ingredients and mix until just combined. Do not overmix; it’s okay if there are a few lumps.
-
Spread half of the batter into the prepared baking dish, smoothing it out evenly. This will be your base layer.
-
Layer the thinly sliced roast beef evenly over the batter, then sprinkle the shredded provolone cheese on top of the beef.
-
Pour the beef broth evenly over the layers to ensure flavor and moisture.
-
Spoon the remaining batter on top of the cheese, spreading it out gently to cover the beef and cheese completely.
-
Bake in the preheated oven for 30-35 minutes, or until the top is golden brown and a toothpick inserted in the center comes out clean.
-
Once cooked, remove from the oven and let it cool for about 10 minutes before slicing into squares.
-
Serve your French Dip Squares warm, optionally garnished with fresh parsley, and with additional beef broth on the side for dipping.
Note
- Feel free to substitute the provolone cheese with other cheeses like mozzarella or cheddar for a different flavor.
- These squares can be made ahead of time and reheated, making them perfect for meal prep or gatherings.
- Consider adding sautéed onions or mushrooms for an additional burst of flavor and texture.
- This dish is great for parties as it’s easy to serve and share with guests.

