

Flaky, buttery layers that practically melt in your mouth—that’s the magic of a freshly baked cruffin. These delightful pastries marry the tender crumb and lightness of a croissant with the cozy, satisfying shape of a muffin. Each bite reveals a symphony of textures: crisp outer edges giving way to pillowy, buttery ribbons of dough. When you hold a warm cruffin, you’ll feel its gentle steam rise, carrying whispers of sweetness and richness that instantly brighten your morning. Whether you’re planning a leisurely brunch or simply treating yourself on a busy weekday, these cruffins deliver an irresistible combination of elegance and comfort.
The best part is how approachable they are, considering they look like a gourmet bakery masterpiece. With a handful of pantry staples and a little patience in waiting for the dough to rise, you’ll be rewarded with flaky crescents nestled in muffin tins, each one promising layers upon layers of flavor. As you twist and shape the dough, there’s a joyful hands-on experience—like crafting edible art—that makes baking even more fun. And once they’re out of the oven, you can personalize them with a dusting of sugar, a swirl of jam, or enjoy them unadorned to appreciate their buttery purity. Let’s dive into everything you need to create these delectable breakfast treats from scratch.
KEY INGREDIENTS IN FLAKY BUTTERY BAKED CRUFFINS
Before you get your hands floured and your oven preheated, let’s break down what makes these cruffins so irresistible. Each ingredient plays a starring role, from building structure to delivering that signature buttery lift and sweetness.
- Active dry yeast
Provides the essential rise, creating air pockets in the dough that give cruffins their light, airy texture. Properly activated, it ensures a tender crumb and perfectly puffed layers.
- Warm water
Activates the yeast and helps dissolve sugar for a consistent proof. The temperature jump-starts fermentation without killing the yeast, crucial for a strong, even rise.
- Sugar
Feeds the yeast during the initial proof, and adds a subtle sweetness that balances the buttery richness. It also aids in browning, giving cruffins a golden crust.
- All-purpose flour
The foundation of the dough, providing structure and elasticity. Extra flour for dusting keeps things smooth while kneading and rolling, preventing sticking.
- Salt
Enhances flavor and strengthens gluten bonds, resulting in a dough that holds its shape and has well-developed, resilient layers.
- Melted unsalted butter
Incorporated into the dough for richness, tenderness, and moisture. It also contributes to the overall buttery flavor that defines these cruffins.
- Granulated sugar
Added to the dough for sweetness and helping caramelize the exterior during baking, creating a slightly crisp shell.
- Softened unsalted butter
Spread between layers to achieve the classic laminated effect, producing those signature, flaky ribbons when baked.
- Optional toppings
A dusting of sugar or a swirl of your favorite jam adds an extra touch of sweetness and visual appeal, letting you customize each pastry to your taste.
HOW TO MAKE FLAKY BUTTERY BAKED CRUFFINS
Rolling up your sleeves and mastering these steps will reward you with bakery‐style cruffins right at home. Follow each stage carefully to build layers and flavor that will delight everyone at the table.
1. In a small bowl, dissolve the yeast and sugar in the warm water. Let it sit for about 5–10 minutes until it becomes frothy, signaling that the yeast is active and ready.
2. In a large mixing bowl, combine the flour, salt, melted butter, and granulated sugar. Pour in the yeast mixture, then stir until the dough begins to come together in a shaggy mass.
3. Transfer the dough to a lightly floured surface and knead for 6–8 minutes, working until it’s smooth, elastic, and no longer sticky. This develops the gluten for a tender, stretchable dough.
4. Lightly oil a clean bowl, place the dough inside, and cover it with a cloth or plastic wrap. Let it rise in a warm spot for 1–2 hours, or until it has doubled in size.
5. Gently punch down the risen dough to release excess air. Divide it into equal portions—typically 8–12—depending on how large you’d like each cruffin.
6. Working with one piece at a time, roll the dough into a thin 12-inch rectangle on a floured surface, ensuring even thickness for consistent layers.
7. Spread a thin layer of the softened butter evenly over the surface of each rectangle, leaving a tiny border to keep things neat.
8. Starting from one long edge, tightly roll the rectangle into a log. Use a sharp knife to cut the log lengthwise, exposing the laminated layers within.
9. With the cut sides facing outward, twist each half loosely to form a spiral or knot, then place them carefully into well-buttered muffin tins.
10. Cover the filled muffin tray and let the cruffins rise again for about 30 minutes, allowing them to puff up and fill the tins.
11. While they proof, preheat your oven to 375°F (190°C), ensuring it’s hot enough to create a crispy exterior.
12. Bake the cruffins on the middle rack for 20–25 minutes, until they turn golden brown and the edges are crisp to the touch.
13. Remove the tray from the oven and let the pastries cool slightly for 5–10 minutes so they hold their shape when you transfer them out.
14. Optionally, finish with a dusting of sugar or fill the center with your favorite jam for an extra pop of flavor before serving.
SERVING SUGGESTIONS FOR FLAKY BUTTERY BAKED CRUFFINS
Once your cruffins are out of the oven and still warm, it’s time to think about presentation and pairing. These flaky delights can be dressed up in so many ways, whether you’re brunching with friends or enjoying a solo coffee break. With their tender interior and crisp edges, cruffins act as the perfect vessel for sweet jams, creamy spreads, or even savory fillings. Setting up a small topping station can turn a simple morning into an interactive moment, letting guests choose their flavor adventure. From a light dusting of powdered sugar to a lavish smear of lemon curd, each approach adds its own twist to the buttery goodness. Below are a few of my favorite ways to serve these irresistible treats.
- Spread a layer of fruit jam inside the cavity for a burst of sweetness—strawberry or raspberry jam work beautifully. Warm the jam slightly for easier spreading and a glossy finish.
- Pair with a steaming cup of coffee or your favorite tea. The contrast between the hot beverage and the warm, flaky pastry elevates every bite, making your morning ritual feel extra special.
- Fill with pastry cream or custard to create a decadent dessert-style cruffin. Use a piping bag to gently inject the creamy filling into the center for a polished, bakery-quality look.
- Serve on a grazing board with fresh berries, sliced cheeses, and charcuterie. The cruffins add a touch of sweetness and flakiness that complements savory flavors, perfect for brunch gatherings or celebrations.
HOW TO STORE FLAKY BUTTERY BAKED CRUFFINS
Proper storage keeps your cruffins tasting just-baked, so you can enjoy them later without sacrificing texture or flavor. While these pastries are best the day they’re made, a few smart methods will extend their shelf life and keep those layers fresh and tender. Avoid airtight containers immediately after baking to prevent trapping moisture, but once they’ve cooled, sealing them properly is key. If you plan to reheat, gentle warming revives that crisp exterior while restoring the inner fluff. Below are tried-and-true options to maintain your cruffins’ allure beyond the first morning.
- Room Temperature in an Airtight Container: Once completely cooled, store cruffins in a sealed container for up to one day at room temperature. Placing a paper towel beneath them helps absorb any excess moisture and keeps the bottoms crisp.
- Refrigeration in a Zip-Top Bag: For storage up to three days, lightly wrap each cruffin in parchment paper and place in a zip-top bag. Chill to slow staling, and when you’re ready to enjoy, reheat in a warm oven at 300°F (150°C) for 5–7 minutes.
- Freezing Individually Wrapped: To keep cruffins fresh for up to one month, wrap each pastry tightly in plastic wrap, then slide into a freezer-safe bag. Thaw overnight in the fridge, then warm as described above for near–fresh-baked results.
- Quick Reheat on a Skillet: If you skipped pre-planning, reheat a day-old cruffin directly in a nonstick skillet over low heat for a few minutes per side. This method crisps the exterior quickly and warms the interior without drying it out.
CONCLUSION
Baking these flaky, buttery cruffins is more than just a recipe—it’s an invitation to bring bakery-quality pastries into your kitchen, infusing every morning or afternoon snack with layers of golden bliss. We covered everything from activating the yeast to shaping intricate spirals, and you now have all the tools and tips to master this delightful fusion of croissants and muffins. Whether you’re dusting them with sugar, filling them with jam, or pairing them with coffee and fresh fruit, these cruffins adapt beautifully to any occasion. As you practice and customize, feel free to experiment with cinnamon, nutmeg, or even a savory herb-infused butter for unique flavor twists that showcase your personal style.
Feel free to print this article or save it for future baking sessions, so the next time a craving strikes, you have the full guide right at your fingertips. You’ll also find a FAQ section below addressing common questions about proofing times, dough consistency, and troubleshooting tips that will ensure your cruffin journey is smooth and successful. If you give this recipe a try, I’d love to hear about your experience—share your questions, comments, or feedback so I can help you achieve perfect layers every time. Happy baking and here’s to flaky, buttery mornings!
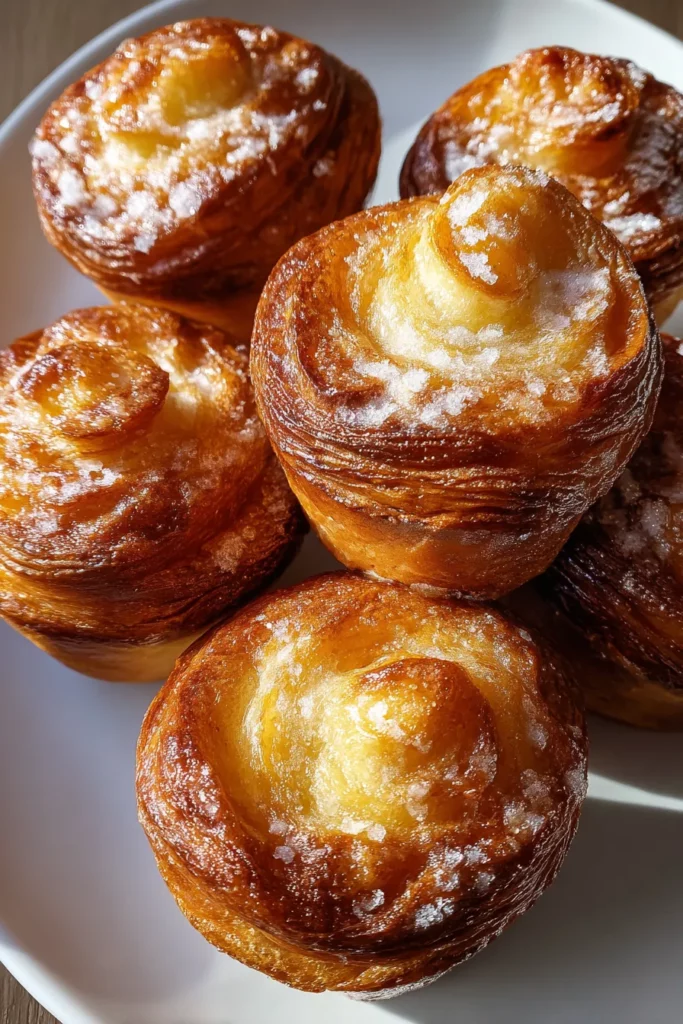

Flaky Buttery Baked Cruffins
Description
With layers of flaky dough and a tender crumb, these cruffins are perfect for brunch. Fill them with jam or enjoy them plain either way, they're irresistible!
Ingredients
Instructions
-
In a small bowl, dissolve the yeast and 1 teaspoon of sugar in warm water. Let it sit for about 5-10 minutes until it becomes frothy.
-
In a large mixing bowl, combine the flour, salt, melted butter, and 1/3 cup of sugar. Add the yeast mixture.
-
Mix until the dough starts to come together and knead it on a floured surface for about 6-8 minutes until smooth and elastic.
-
Place the dough in a lightly oiled bowl, cover it with a cloth, and let it rise in a warm place for about 1-2 hours or until it has doubled in size.
-
Punch down the dough and divide it into equal portions for as many cruffins as you desire (typically 8-12).
-
Roll each piece of dough into a thin rectangle, about 12 inches long.
-
Spread a thin layer of softened butter over each rectangle.
-
Roll each rectangle into a tight log, then cut the log lengthwise to reveal the layers.
-
With the layers facing outward, twist each half loosely to form a knot or spiral and place into well-buttered muffin tins.
-
Let the cruffins rise again for about 30 minutes.
-
Preheat your oven to 375°F (190°C).
-
Bake the cruffins for 20-25 minutes, or until they are golden brown and flaky.
-
Remove from the oven and allow them to cool slightly before removing them from the tins.
-
Optionally, dust with sugar or fill with jam for extra flavor.
Note
- Cruffins are versatile and can be filled with a variety of jams or even custard for a sweet treat.
- Ensure the butter is soft for easy spreading to create those flaky layers.
- These are best enjoyed fresh but can be stored in an airtight container for a day.
- Experiment with different flavorings like cinnamon or nutmeg in the dough for an aromatic twist.
- Perfect pairing with a hot cup of coffee or tea for a delightful afternoon snack.

