

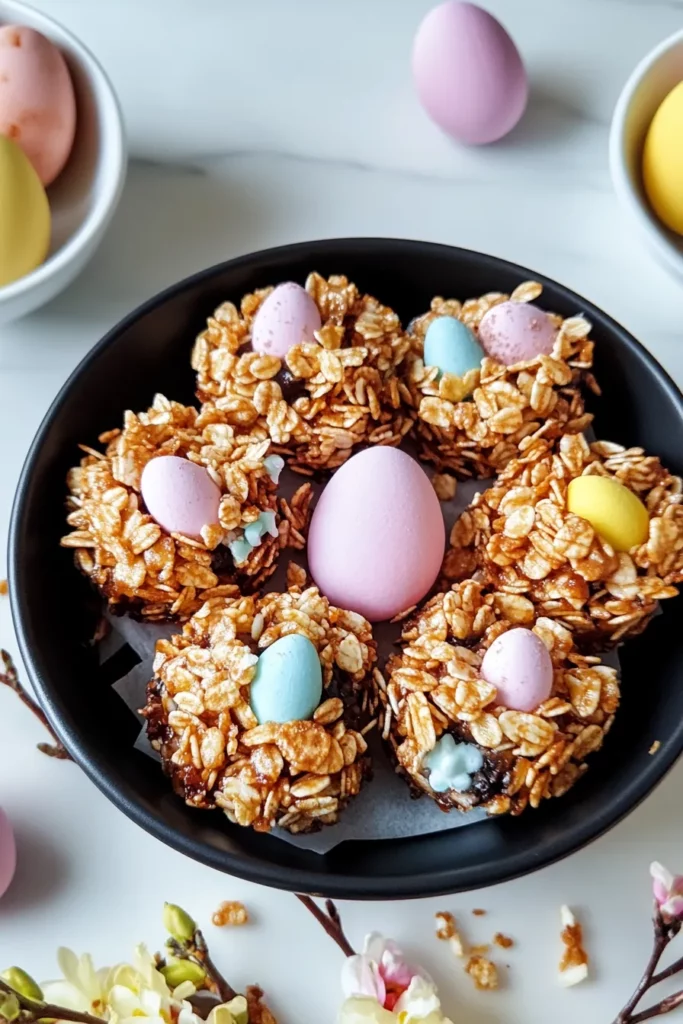
Spring is just around the corner, and there’s nothing quite like diving into the spirit of Easter with a sweet, playful treat that has both kids and grown-ups grinning from ear to ear. These Easter Nest Crispy Cakes are the perfect blend of crunchy rice cereal, velvety milk chocolate, and just the right touch of golden syrup to bring it all together in a sticky, satisfying hug for your taste buds. I love how, with no actual baking required, you can whip these up in about 25 minutes, then let them chill while you tackle the rest of your Easter prep—or sneak in a quick afternoon siesta. The nests themselves look impossibly cute once they’re filled with colorful mini chocolate eggs, making them a gorgeous addition to any dessert spread or brunch table. And because they’re so customizable, you can switch up toppings or even swap out the base for dark or white chocolate, tailoring the recipe to match your own flavor adventures.
What really makes these treats special is how they bring everyone into the kitchen together. One Easter a few years back, my niece insisted on measuring the cereal (and sneaking a handful every time she thought I wasn’t looking), while my partner handled the double boiler like a pro. By the time we’d coated every crispy flake and pressed the mixture into muffin cups, laughter was echoing through the house, and a few rogue chocolate drips had found their way onto our favorite apron. Those little moments—gleeful snacking, flour-free counters, and sticky fingers—are what I remember most. When the nests finally set and we nestled the candy eggs on top, it felt like we’d created tiny edible masterpieces. Whether you’re a seasoned kitchen champion or a total beginner, this recipe promises a fun, hands-on experience with delicious rewards. Gather your mixing bowls, recruit your favorite sous-chefs, and let’s dive into these irresistibly charming Easter Nest Crispy Cakes!
KEY INGREDIENTS IN EASTER NEST CRISPY CAKES
Before we get into the fun part of mixing and molding, let’s talk about the star players in this no-bake wonder. Each ingredient brings its own charm—some for flavor, some for texture, and all for transforming into those adorable little nests that steal the show.
- Milk Chocolate
This is the base of our nests, offering a creamy, sweet foundation. It melts down into a smooth pool that binds everything together and carries that classic chocolate flavor we all crave.
- Butter
A hint of richness that keeps the chocolate silky and helps it set just right. The butter also adds depth to the overall flavor, balancing the sweet notes with a subtle creaminess.
- Golden Syrup
Think of this as the sweet glue. It enhances the stickiness so your rice crisps stay in place and adds a warming, caramel-like undertone that makes each bite feel extra indulgent.
- Rice Crispy Cereal
The source of delightful crunch! These tiny puffs give the nests their signature crispy texture, creating the contrast between crunchy and gooey that makes this treat so irresistible.
- Mini Chocolate Eggs (or Small Candy for Decoration)
The cherry on top—well, the egg on top! These colorful candies nestle in the center, adding a playful pop of color and an extra burst of sweetness.
- Shredded Coconut (Optional, for Nest Effect)
If you want your nests to look even more lifelike, toss in some coconut flakes. They add a delicate texture and mimic twigs in a bird’s nest, bringing that extra touch of whimsy.
HOW TO MAKE EASTER NEST CRISPY CAKES
Get ready to roll up your sleeves and dive into a wonderfully simple set of steps that turn everyday ingredients into festive little nests. This no-bake recipe relies on some easy techniques—like melting, folding, and chilling—to achieve that perfect balance of gooey chocolate and crisp cereal.
1. Break the milk chocolate into small pieces and place them in a heatproof bowl. Set the bowl over a pot of gently simmering water, making sure the bottom of the bowl doesn’t touch the water. Use the double boiler method to melt the chocolate, stirring occasionally with a spatula until it’s fully melted and velvety smooth.
2. In a separate pan over low heat, combine the butter and golden syrup. Stir continuously until the butter is completely melted and the two ingredients are well combined into a glossy mixture. Keep the heat gentle to avoid burning the syrup.
3. Pour the buttery syrup into the bowl of melted chocolate. Use a gentle folding motion to stir everything together, ensuring the mixture remains smooth and shiny without deflating any of its silky texture.
4. Gradually fold in the rice crispy cereal, ensuring each puff is coated in the chocolatey mixture. If you’d like to enhance the nest effect, add the shredded coconut at this stage and gently fold until the texture is evenly distributed.
5. Spoon the mixture into a muffin tray, dividing it evenly among 12 cups. Use the back of your spoon to press the centers down, creating little wells that will cradle your mini eggs. Aim for a rustic, nest-like shape rather than perfectly smooth cups.
6. Transfer the tray to the refrigerator and chill the nests for at least 1 hour, allowing them to firm up completely. This rest time is crucial for the chocolate to set and hold its shape.
7. Once the nests are fully set and firm to the touch, press a mini chocolate egg (or your candy of choice) into the center of each nest. The candy should sit snugly in its little well.
8. Serve immediately, or keep chilled until you’re ready to share. Enjoy the delightful crunch and chocolatey goodness of these Easter Nest Crispy Cakes!
SERVING SUGGESTIONS FOR EASTER NEST CRISPY CAKES
When it comes to presenting your Easter Nest Crispy Cakes, a little styling goes a long way to make them look as delightful as they taste. Whether you’re hosting a big family brunch or tucking these treats into individual gift bags, there are so many creative ways to showcase their charm.
- Serve on a decorative platter lined with fresh spring greens or edible flowers. The contrast of bright foliage against the rich chocolate nests elevates the presentation and makes them feel extra festive.
- Pair with a hot beverage station featuring coffee, tea, or hot chocolate. Encourage guests to grab a nest while they customize their drink—it’s the perfect sweet nibble that complements warm sips.
- Place each nest in a mini cupcake liner or colored paper cup. This not only makes them easy to grab but also adds a pop of pattern or color that ties in with your Easter theme.
- Bundle them as party favors by stacking two nests in clear treat bags and tying them with pastel ribbons. Add a small tag with a cheerful greeting for an adorable, takeaway-friendly gift.
HOW TO STORE EASTER NEST CRISPY CAKES
Proper storage is key to maintaining the delightful crunch and creamy chocolate flavor of your Easter nests. Whether you’re prepping them a day ahead or saving leftovers, these tips will help you keep them in prime snacking condition.
Storing these treats properly ensures that the chocolate remains firm and the cereal stays crisp. Always keep them sheltered from heat and humidity to prevent melting or soggy textures.
- Refrigerator Storage: Place the nests in an airtight container lined with parchment paper, stacking them in a single layer if possible. Store in the coldest part of your refrigerator, and they’ll stay fresh for up to 5 days.
- Room Temperature: If your home is cool (below 20°C/68°F), you can keep the nests in an airtight container on the countertop for up to 2 days. Just ensure they’re away from direct sunlight or heat sources.
- Separate Decoration: For the crispiest texture, consider storing the mini chocolate eggs separately. Add them to the nests only just before serving to maintain that fresh, snap-in-the-mouth sensation.
- Freezing Option: To extend shelf life, freeze the undecorated nests in a single layer on a baking sheet. Once frozen solid, transfer them to a freezer-safe bag. Thaw in the refrigerator for 1–2 hours before decorating and serving.
CONCLUSION
Bringing Easter Nest Crispy Cakes to your kitchen is like inviting a little bit of springtime joy into every bite. We’ve covered everything from the key ingredients—like creamy chocolate, buttery richness, and crispy rice cereal—to simple, no-bake steps that anyone can follow. Whether it’s your first time melting chocolate over a double boiler or you’re a seasoned pro, these nests are designed for beginners and pros alike. With a quick 15-minute prep, 10 minutes of hands-on “cooking,” and just an hour of chill time, you’ll have a dozen colorful, crunchy nests perfect for a gathering big or small. Don’t forget to print this article and save it for your Easter festivities, and keep an eye out for the FAQ below to troubleshoot any questions you might have as you go.
If you decide to give these Easter treats a whirl, I’d love to hear how they turn out! Share your thoughts, tweaks, or creative spins—maybe you tried dark chocolate, added a sprinkle of sea salt, or used candy-coated chocolate eggs instead. Your feedback helps other home cooks adapt and experiment confidently in the kitchen. Feel free to drop a comment with questions, suggestions, or even just to let me know how your family and friends reacted when they saw those first chocolatey nests appear. Happy cooking, and may your Easter be filled with sweet moments and crunchy delights!

Easter Nest Crispy Cakes
Description
These fun and chocolatey nests are filled with crispy rice cereal and topped with colorful mini chocolate eggs, perfect for sharing with family and friends this Easter.
Ingredients
Instructions
-
Start by melting the milk chocolate. Break it into pieces and place it in a heatproof bowl. Put the bowl over a pot of simmering water (double boiler method), ensuring the bowl doesn’t touch the water. Stir occasionally until the chocolate is fully melted and smooth.
-
In another pan, melt the butter and golden syrup together on low heat. Stir until the butter is completely melted, and the mixture is well combined.
-
Add the melted butter and syrup mixture to the melted chocolate. Stir gently to combine.
-
Gradually fold in the rice crispy cereal. Make sure the cereal is well coated with the chocolate mixture. If you'd like to create a nest effect, you can also fold in the shredded coconut at this stage, as it will add a texture that mimics a nest.
-
Spoon the chocolate-cereal mixture into a muffin tray, filling each cup to create a nest-like shape. Press the center of each nest slightly to form a little well for the chocolate eggs to rest.
-
Chill the nests in the refrigerator for at least 1 hour to allow them to firm up.
-
Once the nests have set, place a mini chocolate egg or any candy of your choice into the center of each nest.
-
Serve and enjoy your Easter Nest Crispy Cakes!
Note
- These Easter nests are a fun, customizable treat perfect for kids and adults alike. You can switch up the toppings by using different kinds of chocolate eggs, jelly beans, or even edible flowers for a more festive touch. To make the nests even more unique, you can use dark or white chocolate instead of milk chocolate.

