

These melt-in-your-mouth peppermint meringues whisk egg whites into thin ribbons of peppermint-scented foam that whip into glossy peaks. Slow-baked until snow-white with a crisp exterior and a tender, airy heart, each light kiss is dusted with festive candy cane sprinkles for a sweet crunch. The subtle minty sweetness and delicate texture will have you reaching for seconds—and you’ll love every moment of the journey from bowl to bite.
Key Ingredients
Before you whip up these airy delights, let’s make sure all your ingredients are ready to go. Each one is essential for that perfect melt-in-your-mouth texture and festive flavor.
- 4 large egg whites, at room temperature: Light base that whips into airy peaks and gives structure to the meringues.
- 1 cup granulated sugar: Sweetens and stabilizes the foam, ensuring a glossy sheen and crisp finish.
- 1/4 teaspoon cream of tartar: Acidic stabilizer that helps strengthen egg white proteins and prevent collapse.
- 1/4 teaspoon salt: Balances the sweetness and enhances the overall flavor profile.
- 1 teaspoon peppermint extract: Infuses a refreshing minty aroma and cooling flavor throughout.
- 1/2 teaspoon vanilla extract: Adds warm, rich undertones for depth and complexity.
- 2 tablespoons crushed peppermint candies or candy canes: Colorful garnish that delivers crunchy bursts of peppermint.
- Food coloring (optional, for a festive touch): Creates whimsical swirls and festive hues in your meringue peaks.
How To Make Delicate Whipped Peppermint Meringues with a Crisp Finish
With a gentle hand and a patient oven, you’ll transform simple egg whites into delicate peppermint kisses. Follow these steps closely—each technique is key to achieving those stiff, glossy peaks and a snowy-white, crisp exterior that hides a pillowy center.
1. Preheat your oven to 200°F (93°C) and line two baking sheets with parchment paper to ensure easy release and even baking.
2. In a clean, dry mixing bowl, begin to whip the egg whites on medium speed using an electric mixer until they become foamy.
3. Gradually add the cream of tartar and salt, continuing to whip until soft peaks form and the mixture holds a gentle point.
4. Increase the mixer speed to high and slowly add the granulated sugar, one tablespoon at a time, making sure each addition dissolves fully before adding more. Whip for about 5–7 minutes until the meringue is glossy and holds stiff peaks.
5. Gently fold in the peppermint and vanilla extracts until just combined. If using food coloring, add a few drops now and fold in minimal strokes to create marbled swirls.
6. Transfer the meringue to a piping bag fitted with a large star tip (or a zip-lock bag with the corner snipped off) for charming swirls.
7. Pipe small dollops or swirls onto the prepared sheets, spacing them about an inch apart so they bake evenly.
8. Sprinkle the crushed peppermint candies on top of each meringue to add color and texture before baking.
9. Bake for 1.5 to 2 hours, or until meringues are completely dry and lift easily off the parchment. They should sound hollow when tapped.
10. Once baked, turn off the oven and leave the meringues inside to cool completely, allowing them to dry out further and firm up.
Serving Suggestions
Delicate whipped peppermint meringues make any gathering feel extra special. Whether you’re hosting friends or gifting these treats, here are a few fun ways to present them:
- Hot Chocolate Companion: Serve alongside mugs of rich hot cocoa, letting guests dunk a crisp minty kiss into steaming chocolate.
- Elegant Dessert Platter: Arrange on a tiered stand with chocolate truffles and biscotti for a beautiful holiday display.
- Festive Gift Boxes: Layer meringues between parchment in decorative tins, tied with ribbon for a charming homemade present.
- Light Afternoon Treat: Plate with a sprig of fresh mint and a dusting of cocoa powder for a simple, elegant finish.
Tips For Perfect Delicate Whipped Peppermint Meringues with a Crisp Finish
Making flawless meringues can feel like magic, but with a few insider tricks, you’ll nail the perfect texture every time. Keep your kitchen tools spotlessly clean—even a hint of grease can deflate your foam. Whisper words of encouragement to your egg whites (just kidding), but do treat them gently during folding to keep all that lovely air inside. Patience is key: low-and-slow baking and gradual sugar additions make all the difference.
- For a lighter texture, be sure to use fresh egg whites and avoid any yolk contamination.
- Store your meringues in an airtight container at room temperature to maintain their crispness.
- Experiment with different flavors by substituting the peppermint extract with lemon, almond, or chocolate extracts for unique variations.
- Meringues can be made in advance and are perfect for holiday gifting or dessert tables!
How To Store It
Once your peppermint meringues are cooled and crisp, proper storage will keep them delightful for days—or even weeks. The main goal is to protect them from moisture and crushing, so choose containers and methods that lock out humidity while preserving their delicate shape.
- Airtight container at room temperature: Seal in a clean, dry container to shield from air and humidity.
- Single layers with parchment paper: Place a sheet of parchment between layers to prevent sticking and maintain shape.
- Avoid high humidity: Store in a cool, dry spot—warmer, damp environments can cause chewiness.
- Food-safe silica gel packets: Add one or two packets to absorb stray moisture and help keep meringues crisp.
Frequently Asked Questions
Have a question? Here are the answers to the most common meringue mysteries!
- Q: How long does it take to prepare and bake the Delicate Whipped Peppermint Meringues?
A: Preparation takes about 15–20 minutes, including whipping the egg whites, folding in extracts, and piping. Baking requires 1.5 to 2 hours at 200°F (93°C), plus additional cooling time in the turned-off oven of about 30–60 minutes. Overall, plan for roughly 2.5 to 3 hours from start to finish.
- Q: What is the best way to achieve stiff, glossy peaks in the meringue?
A: Ensure egg whites are at room temperature and completely free of any yolk or grease. Use a clean, dry bowl and beaters. First whip on medium until foamy, then add cream of tartar and salt to stabilize. Increase to high speed and add sugar one tablespoon at a time, waiting for each to dissolve before the next. Properly dissolved sugar and steady whipping yield stiff, glossy peaks.
- Q: Can I substitute peppermint extract with other flavors?
A: Yes. Swap the 1 teaspoon peppermint extract for 1 teaspoon of other extracts, such as lemon, almond, or chocolate, for unique variations. If using stronger flavors (e.g., almond), you may want to reduce to ¾ teaspoon to avoid overpowering. Retain the garnish step by using complementary crushed candies or nuts.
- Q: How do I add color without deflating the meringue?
A: After reaching stiff peaks, gently fold in a few drops of gel or liquid food coloring. Use a silicone spatula and minimal strokes, folding just until swirls appear. Overmixing will deflate the meringue, so stop as soon as color is distributed in ribbons.
- Q: Why are my meringues sticky or chewy all the way through?
A: If oven temperature is too high or baking time too short, meringues won’t fully dry. Confirm your oven reads 200°F (93°C) accurately with an oven thermometer. Bake for the full 1.5–2 hours and cool them inside the turned-off oven to continue drying. Humidity can also affect dryness—aim to bake on a low-humidity day or use a dehumidifier.
- Q: How should I store the baked meringues to keep them crisp?
A: Once completely cooled and dried, transfer meringues to an airtight container at room temperature. Insert a small packet of dry rice or silica gel (food-safe) to help absorb moisture. Stored this way, they stay crisp for up to two weeks.
- Q: Can I make these in advance for a party or as gifts?
A: Absolutely. Meringues can be baked up to two weeks ahead and stored properly in airtight containers. For gifting, layer them in a decorative tin or box with parchment paper between layers to prevent sticking. They hold shape and flavor beautifully.
- Q: What piping tips and techniques work best for uniform meringues?
A: A large star tip (e.g., Wilton 1M) creates classic swirls with defined ridges. Fill a piping bag about two-thirds full, squeeze gently from the center outward, and lift straight up to finish each cookie. For a simpler shape, use a round tip or snipped corner on a zip-lock bag. Keep consistent dollop sizes by applying the same pressure and time per cookie.
What Makes This Special
There’s a reason these peppermint meringues steal the show: light-as-air kisses with crisp exteriors hiding a tender, melt-in-the-mouth center, all dusted with festive candy cane sprinkles. Thin ribbons of minty foam whip into glossy peaks and bake to a snowy crisp that gives way to a soft, airy heart—every bite is a little dance of texture and flavor. Print this recipe out, tuck it in your holiday binder, and come back whenever you need a sweet, minty pick-me-up. I’d love to hear how they turn out or help with any questions—drop a comment below!
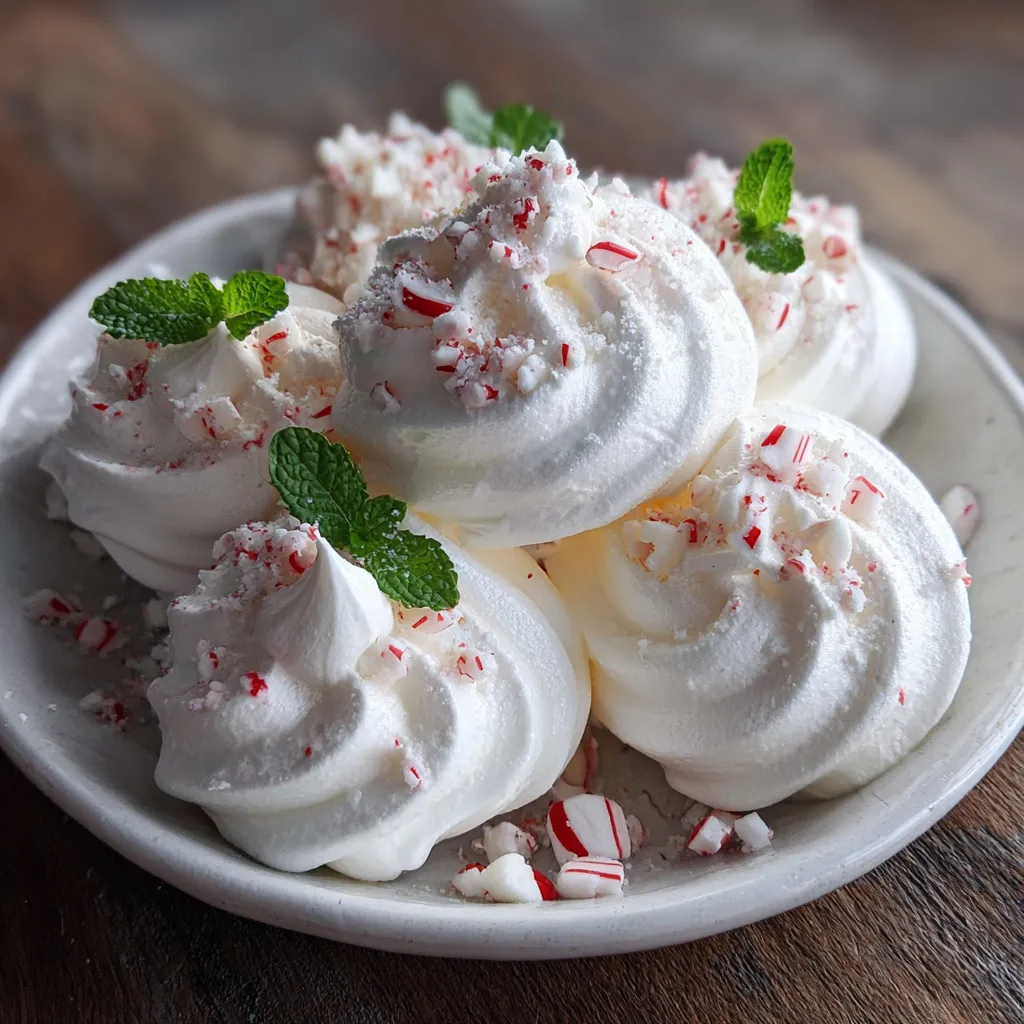

Delicate Whipped Peppermint Meringues with a Crisp Finish
Description
Thin ribbons of peppermint-scented meringue whip into glossy peaks, baked to a snowy crisp that gives way to a soft, airy heart. Light minty sweetness and crunchy candy bits make each bite dance.
Ingredients
Instructions
-
Preheat your oven to 200°F (93°C) and line two baking sheets with parchment paper.
-
In a clean, dry mixing bowl, begin to whip the egg whites on medium speed using an electric mixer until they become foamy.
-
Gradually add the cream of tartar and salt, continuing to whip until soft peaks form.
-
Increase the mixer speed to high and slowly add the granulated sugar, one tablespoon at a time, ensuring each addition is fully incorporated before adding more. Continue whipping until the mixture is glossy and stiff peaks form, approximately 5-7 minutes.
-
Gently fold in the peppermint and vanilla extracts until just combined. If you wish to add color, incorporate a few drops of food coloring at this stage, folding gently to create a swirled effect.
-
Transfer the meringue mixture to a piping bag fitted with a large star tip or a zip-lock bag with the corner snipped off.
-
Pipe small dollops, or swirls onto the prepared baking sheets, spacing them about an inch apart.
-
Sprinkle the crushed peppermint candies on top of each meringue before placing them in the oven.
-
Bake in the preheated oven for about 1.5 to 2 hours, or until the meringues are completely dry and can be easily lifted off the parchment paper. The texture should be crisp on the outside and slightly chewy on the inside.
-
Once baked, turn off the oven and leave the meringues inside to cool completely, allowing them to dry out further and firm up.
Note
- For a lighter texture, be sure to use fresh egg whites and avoid any yolk contamination.
- Store your meringues in an airtight container at room temperature to maintain their crispness.
- Experiment with different flavors by substituting the peppermint extract with lemon, almond, or chocolate extracts for unique variations.
- Meringues can be made in advance and are perfect for holiday gifting or dessert tables!

