

There’s something exceptionally indulgent about sinking your fork into a cake that marries two of the world’s most beloved desserts: a rich red velvet sponge and a creamy cheesecake layer, all cloaked in a velvety cream cheese frosting. This Decadent Red Velvet Cheesecake Layer Cake is far from your everyday birthday cake—it’s a showstopper that brings together bright ruby hues, subtle cocoa notes, and the tangy silkiness of classic cheesecake. With an intermediate difficulty level, you’ll spend about one hour prepping and another hour and ten minutes in the oven, followed by a restful four-hour chill (or overnight for peak flavor). The effort pays off in twelve generous slices that average around 620 calories each—totally worth it when you see those perfectly defined layers gleaming under a shower of cake crumbs or fresh berries.
Every bite is a symphony of textures and tastes: the red velvet gives a tender crumb thanks to vegetable oil and buttermilk, while the cheesecake layer—studded with softened cream cheese and just the right amount of sour cream—adds a dreamy contrast. The finishing touch is a smooth cream cheese frosting whipped with unsalted butter and heavy cream, making it easy to spread or pipe decorative swirls on top. Whether you’re celebrating a special occasion or simply treating yourself to an extraordinary dessert, this cake feels like a luxurious embrace of sweet and tangy, soft and creamy—a truly memorable treat you can prep ahead and keep perfectly chilled until the moment of glory.
KEY INGREDIENTS IN DECADENT RED VELVET CHEESECAKE LAYER CAKE
Before diving into the step-by-step baking instructions, let’s take a closer look at the star ingredients that create those stunning layers and unforgettable flavors. Each component plays a unique role, from structure and moisture to tang and sweetness. Here’s what you’ll need:
- All-purpose flour
Provides the sturdy framework for the red velvet layers, giving the cake its tender but stable crumb.
- Granulated sugar
Sweetens both the cake and cheesecake layers while helping to create a light, airy texture in the sponge.
- Baking soda
Works with the acidic buttermilk to lighten and leaven the red velvet cake, ensuring it rises beautifully.
- Baking powder
Adds additional lift, making sure the cake layers stay soft and fluffy without sinking in the center.
- Salt
Balances sweetness, enhances chocolate undertones, and prevents the cake from tasting one-dimensional.
- Vegetable oil
Guarantees a moist, tender cake that stays fresh longer than a butter-based sponge.
- Buttermilk
Adds a subtle tang and acidity that reacts with the baking soda for maximum rise and softness.
- Eggs
Bind ingredients together, add structure, and enrich both the cake and cheesecake with a smooth, velvety mouthfeel.
- Red food coloring
Creates the iconic ruby hue of the red velvet, elevating the dramatic presentation of each layer.
- Vanilla extract
Infuses sweet, aromatic notes that complement chocolate undertones in the cake and balance the cheesecake filling.
- White vinegar
Reacts with baking soda to boost lift and enhances the cake’s signature tangy finish.
- Cream cheese
Forms the silky base of the cheesecake filling and frosting, delivering that luscious, tangy creaminess.
- Sour cream
Lightens the cheesecake batter and adds richness while preventing cracking during baking.
- Unsalted butter
Blends with cream cheese in the frosting for a smooth, spreadable texture and rich flavor.
- Powdered sugar
Sweetens and stabilizes the frosting, allowing you to achieve a perfectly smooth, pipe-able consistency.
- Heavy cream
(Optional) Incorporated into the frosting for extra silkiness and easier spreading or piping.
HOW TO MAKE DECADENT RED VELVET CHEESECAKE LAYER CAKE
Turning these ingredients into a stunning layered masterpiece is easier than it looks. Follow each step carefully to build your cake layers, whip up the cheesecake filling, and assemble everything into a show-stopping dessert.
1. Preheat your oven to 350°F (175°C). Grease and flour three 9-inch round cake pans, then line each bottom with parchment paper to prevent sticking and ensure clean releases.
2. In a large mixing bowl, sift together the sifted flour, granulated sugar, baking soda, baking powder, and salt. This ensures an even distribution of leaveners and removes any lumps for a tender crumb.
3. In a separate bowl, combine the vegetable oil, buttermilk (at room temperature), eggs, red food coloring, vanilla extract, and white vinegar. Whisk until fully emulsified and the batter takes on a uniform ruby-red hue.
4. Gradually add the wet ingredients to the dry mixture, mixing until just combined. Use gentle strokes to avoid overmixing; keeping a few small lumps helps the cake rise evenly without becoming tough.
5. Divide the red velvet batter evenly among the three prepared pans. Place them in the oven and bake for 25–30 minutes, or until a toothpick inserted into the centers comes out clean. Let the cakes cool in the pans for 10 minutes, then transfer to wire racks to cool completely.
6. While the cakes are cooling, prepare the cheesecake filling. Preheat the oven to 325°F (160°C) and grease a 9-inch round cake pan to prevent sticking.
7. In a large bowl, beat the softened cream cheese until smooth. Gradually add the sugar and continue beating until well blended. Add the vanilla extract, then incorporate the eggs one at a time, ensuring each is fully mixed before adding the next. Finish by stirring in the sour cream until the filling is silky and lump-free.
8. Pour the cheesecake batter into the prepared pan. Bake for 40–45 minutes, or until the edges are set and the center still jiggles slightly. Turn off the oven and leave the cheesecake inside, door ajar, to cool for 1 hour. Remove and refrigerate for at least 4 hours, preferably overnight.
9. Once the cake layers and cheesecake are completely cooled, level the top of the cheesecake if needed. Place one red velvet layer on a serving platter, then spread a layer of cream cheese frosting over its surface. Gently top with the chilled cheesecake layer.
10. Repeat the frosting and layer process with the second red velvet cake. Add the final third cake layer on top, then frost the entire exterior with the remaining cream cheese frosting, smoothing it with an offset spatula or piping decorative rosettes.
11. Decorate the top with leftover cake crumbs for a rustic finish, or elevate the look with fresh berries or chocolate shavings for extra flair and a pop of color.
12. Chill the assembled cake in the refrigerator for at least 30 minutes before slicing to allow the frosting to set and make clean, beautiful cuts.
SERVING SUGGESTIONS FOR DECADENT RED VELVET CHEESECAKE LAYER CAKE
When your masterpiece is perfectly chilled and glistening under soft kitchen lights, it’s time to think about how to present each slice in the loveliest way. This cake pairs beautifully with a simple garnish or complementary beverage that enhances its tangy-sweet profile. Whether you’re serving this at a dinner party, holiday gathering, or a lazy weekend treat, the right accompaniments will showcase those layers and textures to perfection.
- Fresh Berry Medley
Arrange a handful of raspberries, strawberries, and blueberries around each slice to add a burst of natural sweetness and contrasting color. The tartness of the berries accentuates the cheesecake layer beautifully.
- Mint Sprigs
Tuck a few fresh mint leaves alongside your serving plates for an aromatic, palate-cleansing touch. The gentle mint fragrance pairs elegantly with the rich cream cheese frosting.
- Powdered Sugar Dusting
Use a fine mesh sieve to lightly dust the top of the cake with extra powdered sugar just before serving. This creates a snowy, elegant finish and highlights the vibrant red hue underneath.
- Coffee or Espresso Shot
Serve each slice with a small espresso or strong coffee. The slight bitterness of coffee cuts through the sweetness, creating a classic café-style experience in your own home.
HOW TO STORE DECADENT RED VELVET CHEESECAKE LAYER CAKE
Proper storage is key to keeping your Red Velvet Cheesecake Layer Cake moist, flavorful, and fresh for days. Since both cream cheese and cheesecake fillings require refrigeration, treat the assembled cake like any other creamy dessert. With the right techniques, you can prepare well in advance and still delight guests with that irresistible texture and flavor.
- Refrigerated, Covered
Place the entire cake on a cake stand or plate and cover with a cake dome or large bowl. Store in the refrigerator for up to 5 days; this keeps the frosting from drying out and preserves the cheesecake’s creaminess.
- Individual Slices
Wrap each slice in plastic wrap or place in an airtight container. This prevents the cake from absorbing other odors and makes grabbing a single portion quick and easy. Consume within 3–4 days for best taste.
- Freezing for Longer Storage
For extended storage, slice the cake and freeze individual portions on a parchment-lined tray. Once frozen, wrap tightly in plastic wrap and seal in freezer bags. Store for up to 2 months. Thaw overnight in the fridge before serving.
- Avoid Room Temperature
Never leave the cake out at room temperature for more than 2 hours. The cheesecake layer and cream cheese frosting need consistent cold to stay safe and maintain their ideal texture.
CONCLUSION
This Decadent Red Velvet Cheesecake Layer Cake brings together the best of two beloved desserts for a show-stopping finale to any meal. From the vibrant red layers of moist, tender cake to the silky, tangy cheesecake filling, each bite is a harmonious blend of flavors and textures. The smooth cream cheese frosting wraps everything in a creamy embrace that’s both luxurious and comforting. With an intermediate difficulty level, the recipe guides you through a step-by-step process—from sifting and mixing to baking, chilling, and decorating—so you’ll feel confident creating this masterpiece even if it’s your first multi-layer cake. Don’t forget that you can print or save this article for easy reference while you bake, and revisit it whenever you’re seeking a showy, make-ahead dessert that impresses every time.
Take a moment to scroll back and find the FAQ section right below (without needing to search through links), then get started on gathering your ingredients. I’d love to hear about your results—drop a comment if you have any questions, feedback, or tweaks you discovered along the way. Whether you’re celebrating a birthday, holiday, or simply rewarding yourself after a long week, this Red Velvet Cheesecake Layer Cake is sure to become a new favorite. Happy baking, and may every forkful be as delightful as you imagined!
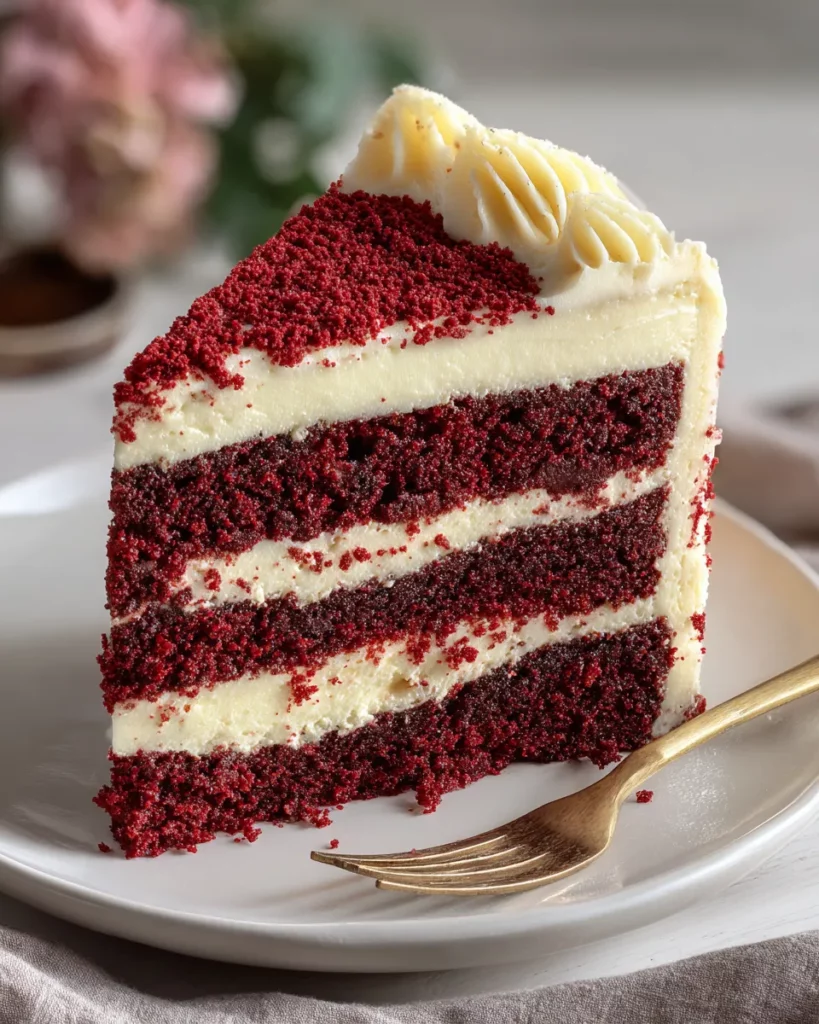

Decadent Red Velvet Cheesecake Layer Cake
Description
Experience the perfect balance of flavors with this decadent red velvet cheesecake layer cake, featuring moist cake, luscious cheesecake filling, and a smooth cream cheese frosting that will leave you wanting more.
Ingredients
Instructions
-
Preheat your oven to 350°F (175°C). Grease and flour three 9-inch round cake pans and line the bottoms with parchment paper.
-
In a large mixing bowl, sift together the flour, sugar, baking soda, baking powder, and salt.
-
In a separate bowl, mix the vegetable oil, buttermilk, eggs, red food coloring, vanilla extract, and white vinegar until well combined.
-
Gradually add the wet mixture to the dry ingredients, mixing until just combined. Be careful not to overmix; a few lumps are okay.
-
Divide the batter evenly among the prepared cake pans. Bake for 25-30 minutes, or until a toothpick inserted into the center comes out clean. Allow the cakes to cool in the pans for 10 minutes before transferring to wire racks to cool completely.
-
While the cakes are cooling, prepare the cheesecake filling. Preheat the oven to 325°F (160°C) and grease a 9-inch round cake pan.
-
In a large bowl, beat the softened cream cheese until smooth. Gradually add in the sugar and mix until well blended, then add the vanilla extract, followed by the eggs, one at a time, mixing well after each addition. Finally, add the sour cream and mix until smooth.
-
Pour the cheesecake batter into the prepared cake pan. Bake for 40-45 minutes, or until the edges are set and the center has a slight jiggle. Turn off the oven and let the cheesecake cool for 1 hour inside with the door slightly open. Remove from the oven and refrigerate for at least 4 hours, preferably overnight.
-
Once the cake layers and cheesecake are completely cooled, level the top of the cheesecake if necessary. Place one layer of red velvet cake on a serving platter. Spread a layer of cream cheese frosting on top, then add the cheesecake layer.
-
Repeat the process with the second red velvet layer and top with more frosting. Place the final red velvet layer on top and frost the entire cake with the cream cheese frosting, smoothing it out as desired.
-
Decorate the top with crumbs from the leftover cake or any desired toppings such as berries or chocolate shavings.
-
Chill the cake for at least 30 minutes before slicing to allow the frosting to set.
Note
- This cake is best enjoyed chilled, making it a perfect make-ahead dessert.
- The red food coloring can be adjusted based on your desired shade, or natural alternatives can be used.
- You can substitute half of the cream cheese in the frosting with mascarpone cheese for a different flavor profile.
- This cake pairs beautifully with a glass of cold milk or a cup of warm coffee.

