

Nothing beats the satisfying crackle of a perfectly baked chocolate biscuit, especially when that first bite reveals a delightfully crunchy interior studded with melty chips. These Decadent Crunchy Baked Chocolate Biscuits are like the ultimate hug for your taste buds—rich, cocoa-forward, and irresistibly crisp. They start with a simple blend of all-purpose flour and unsweetened cocoa powder, then transform into buttery rounds that brim with semisweet chocolate chips and optional chopped nuts. Every bite delivers a delicate balance of chew and crunch, making these treats an ideal companion for an afternoon coffee break or a late-night snack. And the best part? You don’t need to be a pastry chef to whip them up. This beginner-level dessert requires just 15 minutes of hands-on prep, 15 minutes in the oven, and a relaxing 5-minute rest before the magic truly unfolds on your taste buds.
Whether you’re baking for a cozy family gathering, a holiday cookie swap, or simply craving a sweet pick-me-up, these biscuits rise to the occasion. With an easy-to-follow process—cream the butter and sugar, whisk the dry ingredients, fold in chocolate chips and nuts, shape the dough, and bake—you’ll have 24 perfectly crisp, 120-calorie treats in no time. Their rich cocoa notes pair beautifully with a cold glass of milk or a steaming cup of tea, and once they cool on the wire rack, the slight crackle on top is just begging to be admired. From the first crumb to the last, these chocolate biscuits are sure to become your go-to recipe whenever you need a crunchy, cocoa-packed delight.
KEY INGREDIENTS IN DECADENT CRUNCHY BAKED CHOCOLATE BISCUITS
Before diving into the baking fun, let’s take a look at the star players in this recipe. Each ingredient brings something special to the table, ensuring these biscuits achieve the perfect texture and flavor.
- All-purpose flour
Provides the structure and base for the biscuits. Its moderate protein level creates a tender yet sturdy crumb that holds in the chocolate chips and nuts.
- Unsweetened cocoa powder
Delivers that deep, chocolatey flavor and dark hue. Using Dutch-processed cocoa will deepen the taste even more, but natural cocoa works beautifully too.
- Baking soda
Acts as a leavening agent, giving the biscuits a gentle lift and just enough height so they don’t feel too dense.
- Salt
Enhances the sweetness and brings out the rich cocoa notes, balancing all the flavors in each crunchy bite.
- Unsalted butter
Contributes a smooth, creamy richness. When creamed with sugar, it traps air that helps create a light texture.
- Granulated sugar
Sweetens and adds crunch. As it melts in the oven, sugar helps form those slight cracks on top that are oh-so-satisfying.
- Egg
Binds all ingredients together and adds moisture, ensuring the biscuits hold their shape while staying pleasantly tender.
- Vanilla extract
Lifts and brightens the chocolate flavor, adding a subtle aromatic warmth in every bite.
- Semisweet chocolate chips
Provide bursts of gooey chocolate throughout each biscuit, turning every mouthful into a little celebration.
- Chopped nuts (optional)
Introduce extra crunch and a savory counterpoint to the sweet chocolate—pecans, almonds, or walnuts all work wonders.
HOW TO MAKE DECADENT CRUNCHY BAKED CHOCOLATE BISCUITS
Let’s walk through this recipe step by step so you can achieve flawless, crunchy chocolate biscuits right in your kitchen. From preheating the oven to cooling on the rack, each technique is straightforward and beginner-friendly.
1. Preheat your oven to 350°F (175°C) and line a baking sheet with parchment paper. This ensures even baking and easy cleanup.
2. In a medium-sized bowl, whisk together the flour, cocoa powder, baking soda, and salt. This dry mix creates the foundation for consistent texture and flavor. Set aside.
3. In a large bowl, cream together the softened butter and granulated sugar until the mixture is light and fluffy. This step incorporates air, giving your biscuits a tender lift.
4. Beat in the egg, followed by the vanilla extract, mixing until well combined. The egg adds structure and moisture, while the vanilla brings out the chocolate’s depth.
5. Gradually add the dry ingredients into the wet ingredients, mixing just until a dough forms. Overmixing can lead to tough biscuits, so stop as soon as it comes together.
6. Fold in the semisweet chocolate chips and optional chopped nuts, ensuring an even distribution of these delightful mix-ins throughout the dough.
7. Roll tablespoons of the dough into balls and place them on the prepared baking sheet, spacing them about 2 inches apart to allow for gentle spreading.
8. Bake in the preheated oven for 12–15 minutes, or until the biscuits are firm to the touch and have a slight crack on top. Keep an eye on them; pulling them out a minute or two earlier yields a softer center.
9. Allow the biscuits to cool on the baking sheet for a few minutes before transferring them to a wire rack to cool completely. This brief rest helps them set and retain their signature crunch.
SERVING SUGGESTIONS FOR DECADENT CRUNCHY BAKED CHOCOLATE BISCUITS
Once these golden-edged, crackled-top biscuits are ready, you’ll want to showcase them in ways that highlight their rich cocoa flavor and satisfying crunch. Here are some fun and delicious ways to enjoy them:
- Serve alongside a tall glass of icy cold milk for the ultimate comfort snack. The contrast between cold milk and warm, crisp biscuits enhances their chocolatey richness.
- Pair with a steaming cup of espresso or coffee for a decadent pick-me-up. The bittersweet notes of coffee deepen the chocolate experience, creating a café-worthy treat at home.
- Present on a dessert platter with a scoop of vanilla bean ice cream for a scrumptious cookie sundae. Crumble a few biscuits on top to add a crunchy texture that contrasts with the creamy ice cream.
- Box them as homemade gifts, wrapping stacks of biscuits in decorative bags tied with ribbon. Include a handwritten tag with baking tips or flavor variations to make the gesture extra special.
HOW TO STORE DECADENT CRUNCHY BAKED CHOCOLATE BISCUITS
Proper storage is key to preserving that delightful crunch and fresh-baked flavor. Whether you’re saving extras for later or planning to gift a batch, these methods will help maintain perfection:
- Airtight container at room temperature
Place fully cooled biscuits in a container sealed tightly. Store on the counter away from direct sunlight for up to five days without losing their crispness.
- Layer with parchment paper
If stacking biscuits in a container, separate each layer with parchment or wax paper. This prevents sticking and preserves the crackled tops.
- Freezer storage
For longer keeping, flash-freeze baked biscuits on a tray, then transfer to a freezer-safe bag or container. They’ll stay fresh for up to two months. Thaw at room temperature before serving.
- Re-crisping technique
If biscuits soften over time, pop them in a preheated 300°F (150°C) oven for 3–4 minutes. Let them cool briefly, and they’ll regain their original crunch.
CONCLUSION
From the very first step—gathering flour, cocoa, and sugar—to that triumphant moment when the timer dings and you savor the first crunchy, chocolate-laced bite, this recipe is all about simple pleasures. Whether you’re new to baking or a seasoned home cook, these Decadent Crunchy Baked Chocolate Biscuits deliver a gourmet feel with beginner-friendly steps. Remember, practice makes perfect: experiment with Dutch-processed cocoa for a deeper flavor, tweak bake times for softer centers, or swap in your favorite nuts to put a personal stamp on the recipe. Don’t forget that this guide is yours to print and save for future baking adventures; you can even find a handy FAQ below to troubleshoot common questions.
By following the detailed instructions and tips provided here, you’ll be well on your way to creating batches of chocolate biscuits that disappear as quickly as you bake them. I’d love to hear how your baking journey goes—any comments, questions, or feedback are always welcome. If you give this recipe a try, drop a note about your favorite mix-ins or your secret trick for extra crispiness. Happy baking and crunchy chocolate bliss to you!
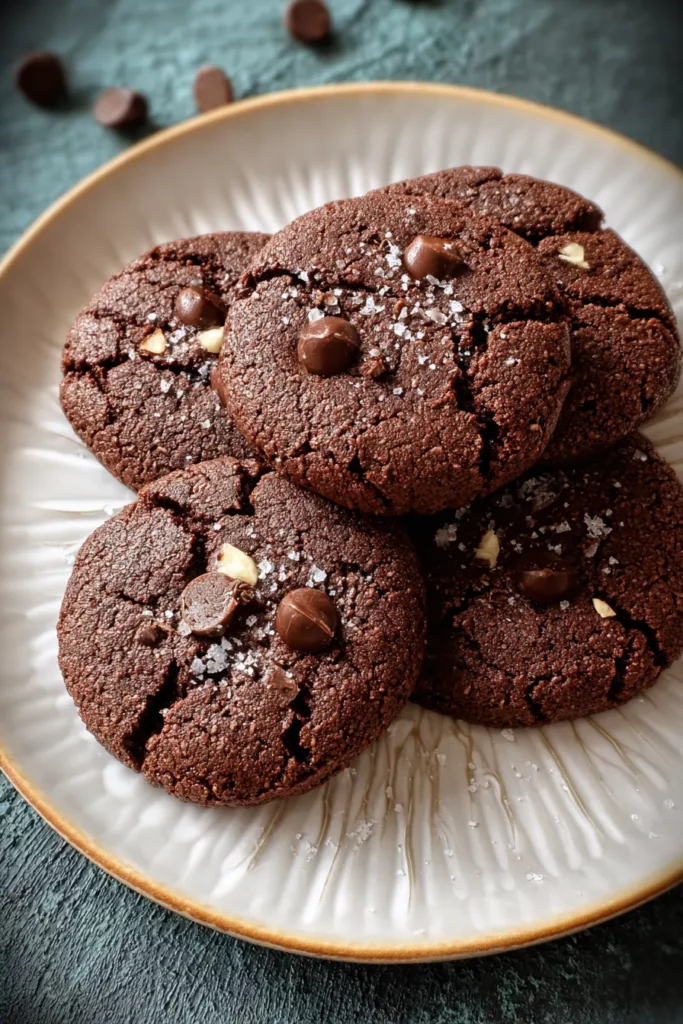

Decadent Crunchy Baked Chocolate Biscuits
Description
These baked chocolate biscuits offer a rich cocoa flavor paired with delightful crunch from chocolate chips and optional nuts. Perfect as a snack or dessert.
Ingredients
Instructions
-
Preheat your oven to 350°F (175°C) and line a baking sheet with parchment paper.
-
In a medium-sized bowl, whisk together the flour, cocoa powder, baking soda, and salt. Set aside.
-
In a large bowl, cream together the softened butter and granulated sugar until the mixture is light and fluffy.
-
Beat in the egg, followed by the vanilla extract, mixing until well combined.
-
Gradually add the dry ingredients into the wet ingredients, mixing until a dough forms.
-
Fold in the chocolate chips and optional chopped nuts, ensuring even distribution throughout the dough.
-
Roll tablespoons of the dough into balls and place them on the prepared baking sheet, spacing them about 2 inches apart.
-
Bake in the preheated oven for 12-15 minutes, or until the biscuits are firm to the touch and have a slight crack on top.
-
Allow the biscuits to cool on the baking sheet for a few minutes before transferring them to a wire rack to cool completely.
Note
- For a deeper chocolate flavor, consider using Dutch-processed cocoa powder.
- If you prefer softer biscuits, reduce the baking time by 2-3 minutes.
- Experiment with different types of nuts, like pecans or almonds, for added texture and flavor.
- Store these biscuits in an airtight container to retain their crunchiness.
- These biscuits are perfect for gifting; wrap them in decorative bags or boxes for a delightful treat.

