

There’s something undeniably magical about blending the rich, velvety melt of chocolate with the gentle warmth of pumpkin spice. These Dairy Free Chocolate Pumpkin Butter Cups capture that magic in every bite. They’re like mini treasures of seasonal goodness that sneak sweetness into your day without weighing you down. With each mouthful, you’ll experience a silky chocolate shell giving way to a creamy pumpkin filling, lightly sweetened and kissed by cinnamon, nutmeg, and ginger. I remember the first time I whipped up a batch of these gems on an unexpected rainy afternoon—I had the windows cracked, listening to the pitter-patter of raindrops while stirring pumpkin and almond butter together. It felt almost ritualistic, like channeling cozy autumn vibes into edible form. Even after the drizzle cleared and the sun peeked back out, those butter cups held onto a whisper of that rainy-day comfort, reminding me that the smallest indulgences can lift your spirits.
Over the years, I’ve found these cups are the perfect conversation starter at any gathering. Last holiday season, I brought a platter of them to a friend’s cookie swap and watched them vanish in record time. Everyone raved about the smooth filling and how they never suspected it was dairy-free! These little cups also make fantastic treats for lunchboxes or surprise after-school snacks—you’ll catch the kids grinning in anticipation when they spot that familiar orange hue beneath the glossy chocolate coating. Best of all, they’re so simple to make that you can whip up a batch in under an hour, including chilling time. Whether you’re craving something chocolatey, craving something spiced, or just craving pure happiness in a bite-sized package, these butter cups deliver. Let’s dive into the details and bring a little pumpkin-chocolate joy to your kitchen today!
KEY INGREDIENTS IN DAIRY FREE CHOCOLATE PUMPKIN BUTTER CUPS
To make these irresistible butter cups, we keep things straightforward with pantry staples you probably have on hand. Each ingredient has a starring role: the chocolate creates a glossy, crisp shell, while the pumpkin filling brings a creamy, warmly spiced center. Here’s what you’ll need and why each element matters:
- Dairy-Free Chocolate Chips
These melt into a smooth, glossy coating that sets into a firm shell around the filling. Using dairy-free chips ensures everyone, including lactose-sensitive friends, can indulge.
- Canned Pumpkin Puree
The heart of our filling, pumpkin puree adds a creamy texture and natural sweetness. Make sure it’s pure pumpkin and not pie filling to control the sugar level.
- Almond Butter
This nut butter lends a rich, nutty depth and helps bind the pumpkin mixture so it holds together perfectly in each cup.
- Maple Syrup
A drizzle of maple syrup adds just the right amount of natural sweetness and a hint of caramel-like flavor that complements the spices.
- Vanilla Extract
A splash of vanilla brings out the chocolate’s complexity and enhances the overall flavor profile with aromatic warmth.
- Pumpkin Pie Spice
This blend of cinnamon, nutmeg, and ginger infuses the filling with those classic fall flavors that make pumpkin treats so comforting.
- Salt
A pinch of salt rounds out the sweetness and heightens the chocolate’s richness, creating a balanced taste sensation.
- Mini Cupcake Liners (Optional)
These liners make for easy handling and charming presentation, so your butter cups look as cute as they taste.
HOW TO MAKE DAIRY FREE CHOCOLATE PUMPKIN BUTTER CUPS
Below is a step-by-step guide to crafting these little delights. Follow along, and you’ll have a batch of luscious butter cups ready in no time!
1. Begin by melting the dairy-free chocolate chips. Place them in a microwave-safe bowl and heat in 30-second intervals, stirring between each burst, until fully melted and silky smooth. Alternatively, set up a double boiler on the stove—gently melt the chocolate over simmering water to avoid scorching.
2. Prepare a mini muffin tin or a regular-sized muffin tin. If you’d like to use mini cupcake liners, place one liner in each slot to make removal and presentation a breeze.
3. Next, take about 1 to 2 teaspoons of the melted chocolate and spoon it into the bottom of each cupcake liner or muffin cup. Spread it so the base is evenly coated. This layer forms the sturdy chocolate shell for your butter cups.
4. Place the muffin tin in the refrigerator for about 10 minutes to allow the chocolate base to set completely. This step is crucial for easy filling.
5. In a medium mixing bowl, combine the canned pumpkin puree, almond butter, maple syrup, vanilla extract, pumpkin pie spice, and a pinch of salt. Stir vigorously until all ingredients are well blended and the filling is smooth and creamy.
6. Once the chocolate bases have firmed up, retrieve the muffin tin from the fridge. Spoon roughly 1 tablespoon of the pumpkin mixture over each chocolate base, spreading it evenly into a neat layer.
7. Carefully pour another layer of the melted chocolate on top of the pumpkin filling. Use 1 to 2 teaspoons of chocolate per cup, making sure that the pumpkin layer is completely sealed within the chocolate.
8. Return the tin to the refrigerator and let everything chill for at least 30 minutes, or until the top layer of chocolate is fully set and provides that satisfying snap.
9. After the chocolate has hardened, gently pop each butter cup out of the tin and peel away the liners if you used them. Arrange on a plate and enjoy immediately, or keep them chilled until snack time!
SERVING SUGGESTIONS FOR DAIRY FREE CHOCOLATE PUMPKIN BUTTER CUPS
Serving these butter cups is half the fun—whether it’s a cozy afternoon pick-me-up or the grand finale of a fall dinner party. Here are some creative ways to showcase them and elevate the experience:
- Serve Chilled on a Rustic Platter
Arrange your butter cups on a wooden board or slate tray. The contrast between the dark chocolate and the warm wood tone makes these treats look even more inviting.
- Pair with Hot Beverages
Set up a coffee or tea station and let guests pick their favorite brew. A bold espresso or spiced chai harmonizes perfectly with the pumpkin filling and dark chocolate shell.
- Dust with Cinnamon Sugar
Right before serving, sprinkle a tiny pinch of cinnamon sugar on top of each cup. This adds a subtle sparkle and an extra layer of sweet-spicy aroma.
- Gift-Ready Packaging
Place a few butter cups in a small gift box or cellophane bag tied with a ribbon. These individual packages make for thoughtful, homemade presents for friends, neighbors, or co-workers.
HOW TO STORE DAIRY FREE CHOCOLATE PUMPKIN BUTTER CUPS
Proper storage ensures that your pumpkin butter cups maintain their texture, flavor, and glossy appearance. Here are some tried-and-true methods:
- Refrigerator Storage
Keep the cups in an airtight container lined with parchment paper. Store in the fridge for up to two weeks—this will keep them firm and preserve the freshness of the pumpkin filling.
- Freezer-Friendly Stash
If you want to stock up, freeze the cups in a single layer on a baking sheet until solid. Then transfer them to a freezer-safe bag or container. They’ll keep beautifully for up to three months. Thaw in the fridge before serving.
- Portion Control Packs
Divide the butter cups into small batches and wrap them individually in parchment or wax paper. Store wrapped cups in an airtight box to prevent sticking and to maintain shape.
- Avoid Moisture
Always use dry utensils when handling the cups and ensure the storage container is moisture-free. Excess humidity can soften the chocolate shell and affect the satisfying snap.
CONCLUSION
What began as a simple craving for something chocolatey and spiced has blossomed into one of my favorite make-ahead treats. These Dairy Free Chocolate Pumpkin Butter Cups are the epitome of seasonal indulgence—rich, creamy, and just sweet enough. From the first layer of glossy dairy-free chocolate to the pillow-soft pumpkin core, every component works in harmony to create a bite that feels both luxurious and comfortingly familiar. You’ll love how easy they are to assemble, yet they look and taste like a gourmet creation. The next time you’re planning a gathering, gift-giving, or just a quiet evening on the couch, remember that this recipe is your secret weapon for pleasing both vegan and non-vegan friends alike.
Feel free to print out this article and tuck it into your recipe binder, or save it digitally for those days when you need a quick pick-me-up. You’ll find an FAQ below to help troubleshoot any lingering questions, but I also welcome your comments. Did you try a different nut butter? Maybe you added a pinch of cayenne? Drop your feedback or ask away if you need a hand with any step. I’m always here to chat about kitchen adventures and help you make your most delicious creations yet!
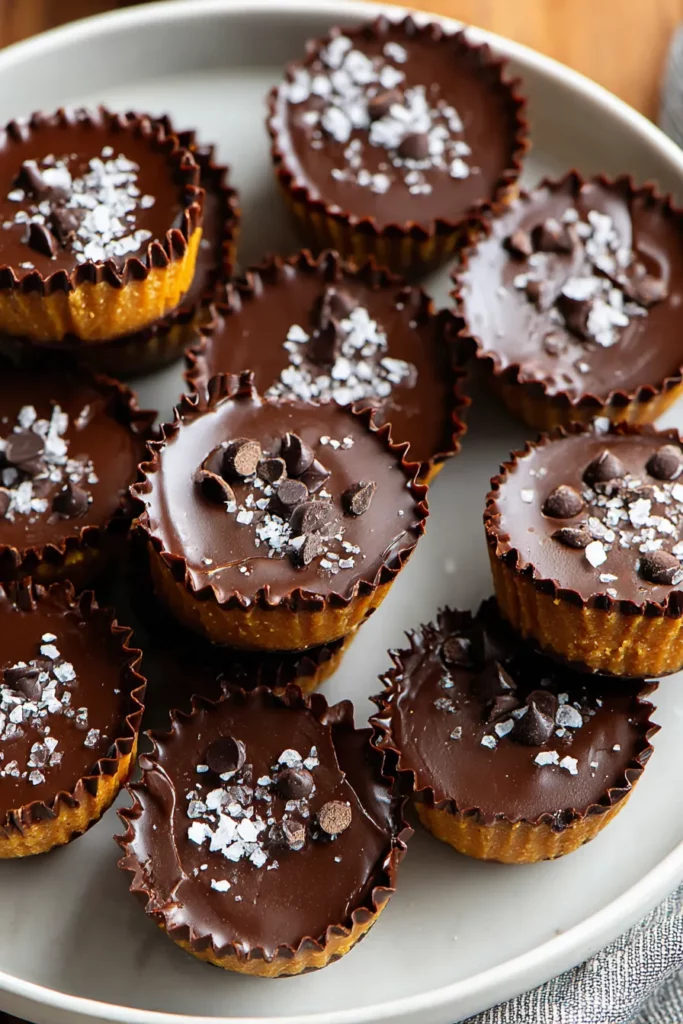

Dairy Free Chocolate Pumpkin Butter Cups
Description
Rich dairy-free chocolate envelops a smooth pumpkin filling with hints of warm spices. These buttery cups are a delightful treat year-round, combining seasonal flavors with a twist.
Ingredients
Instructions
-
Begin by melting the dairy-free chocolate chips. You can do this by placing them in a microwave-safe bowl and heating in 30-second intervals, stirring in between, until fully melted and smooth. Alternatively, use a double boiler on the stove to melt the chocolate gently.
-
Prepare a mini muffin tin or a regular-sized muffin tin. If using mini cupcake liners, place one liner in each slot of the muffin tin.
-
Next, take about 1 to 2 teaspoons of melted chocolate and spoon it into the bottom of each cupcake liner or muffin cup. Ensure that the bottom is evenly covered. This will be the base of your chocolate cups.
-
Place the muffin tin in the refrigerator for about 10 minutes to let the chocolate set.
-
In a medium mixing bowl, combine the pumpkin puree, almond butter, maple syrup, vanilla extract, pumpkin pie spice, and a pinch of salt. Stir until all the ingredients are well blended and smooth.
-
Once the chocolate bases have set, take the muffin tin out of the refrigerator. Spoon about 1 tablespoon of the pumpkin mixture over the chocolate layer in each cup, spreading it out evenly.
-
Pour another layer of melted chocolate on top of the pumpkin mixture. Cover the pumpkin layer completely with chocolate, ensuring that the filling is sealed inside. Use about 1 to 2 teaspoons of chocolate for this layer.
-
Return the muffin tin to the refrigerator and let it chill for at least 30 minutes, or until the chocolate is fully set.
-
After the chocolate has hardened, gently remove the pumpkin butter cups from the muffin tin and peel off the liners if used. They are now ready to enjoy!
Note
- These butter cups can be stored in an airtight container in the refrigerator for up to 2 weeks.
- Feel free to experiment with different nut butters, such as cashew or sunflower seed butter, to alter the flavor profile.
- You can add toppings like chopped nuts or a sprinkle of sea salt on top of the melted chocolate before it sets for an extra crunch.
- For a spicier kick, add a dash of cayenne pepper to the pumpkin mixture.

