

Hey there, cookie lovers and baseball fans! There’s something so uplifting about bringing a little bit of America’s pastime right into your own kitchen, transforming simple sugar cookies into playful baseball treats that are as adorable as they are delicious. These Cute and Easy Baseball Cookies bring that stadium excitement home—the crack of the bat, the cheer of the crowd, and the thrill of a good game, all wrapped up in a buttery, soft cookie decked out in bright red icing. Whether it’s a big game day celebration or a weekend baking session with the kiddos, these cookies deliver that perfect combo of sweetness and sportiness in every bite.
When I first made them for my nephew’s Little League victory party, I was blown away by how quickly they disappeared—small hands reached for that bright red stitching and declared them “the best cookies ever.” And let me tell you, folks, the flavor here is pure magic: each cookie is tender, with a hint of vanilla and just enough sugar to satisfy, while the crisp edges cradle the soft center. Decorating them is half the fun—piping that signature red baseball stitch felt like channeling my inner sports commentator, cheering on each line. If you’re ready to knock your next baking project out of the park, lace up those aprons and let’s get started on these game-day stars!
KEY INGREDIENTS IN CUTE AND EASY BASEBALL COOKIES
Before we step up to the plate, let’s introduce our All-Star lineup of ingredients that make these cookies a home run.
- All-purpose flour
The sturdy foundation of our cookie dough, giving structure and that classic soft-but-slightly-chewy texture.
- Baking powder
The leavening agent that ensures your cookies puff up just enough to stay light and tender.
- Salt
A small pinch enhances the sweetness and balances all the flavors so nothing tastes flat or one-dimensional.
- Unsalted butter, softened
Provides that rich, creamy base. Softened butter creates air pockets when creamed with sugar, resulting in a light, fluffy dough.
- Granulated sugar
Sweetens the dough and helps with gentle crispness around the edges, giving the cookies a delightful snap.
- Large egg
Binds everything together and lends moisture, helping these cookies maintain that melt-in-your-mouth softness.
- Vanilla extract
Infuses a warm, floral note that complements the buttery flavor and makes each bite more aromatic.
- Milk
Adds just enough liquid to bring the dough together without making it too sticky, ensuring perfect rolling and shaping.
- Red food coloring
The MVP of decorating—turns your royal icing into the vibrant red stitching that makes these cookies unmistakably baseball-themed.
- White chocolate chips (optional)
A fun finishing touch that adds extra sweetness and a bit of texture contrast on top of the icing.
- Royal icing (or store-bought white icing)
Creates a smooth, glossy surface to pipe your baseball stitching. Dries firm, so the details stay sharp.
- Piping bag or ziplock bag
Essential for precision when piping those classic curved stitches onto each cookie.
HOW TO MAKE CUTE AND EASY BASEBALL COOKIES
Now that our roster of ingredients is ready, let’s walk through each step to craft these adorable sugar cookies. From mixing the dough to piping the perfect red stitches, every play-by-play instruction will ensure a flawless batch.
1. Preheat the oven to 350°F (175°C) and line a baking sheet with parchment paper. This step guarantees even baking and prevents sticking, so your cookies slide right off when they’re done.
2. In a medium bowl, whisk together the flour, baking powder, and salt. This ensures the leavening is evenly distributed and your dough has consistent texture.
3. In a large mixing bowl, cream the softened butter and sugar together until light and fluffy, using an electric mixer or a stand mixer on medium speed. This aerates the mixture, giving your cookies a tender crumb.
4. Add the egg and vanilla extract to the creamed butter mixture and mix until combined, scraping down the sides of the bowl as needed to incorporate every bit of flavor.
5. Gradually add the dry ingredients to the wet ingredients and mix until a soft dough forms. Don’t overmix—stop as soon as you see a smooth, cohesive dough.
6. Add the tablespoon of milk and mix again just until everything comes together, so the dough is pliable but not sticky.
7. Roll the dough into small balls, about 1 inch in diameter, and place them on the prepared baking sheet, spacing them about 2 inches apart to allow room for slight spreading.
8. Gently flatten each dough ball using the bottom of a glass or your hands into a small, round cookie shape, creating a perfect canvas for decoration.
9. Bake for 8–10 minutes, or until the edges of the cookies are just slightly golden. Resist the urge to overbake—they’ll firm up as they cool. Remove from the oven and allow to cool completely on a wire rack.
10. Once the cookies are cooled, prepare the royal icing by adding a few drops of red food coloring. Stir gently until you achieve a vibrant, baseball-ready red hue.
11. Transfer the colored royal icing to a piping bag or ziplock bag (snip a tiny corner off) and pipe the classic “baseball stitching” design onto each cookie with steady pressure.
12. If desired, place a few white chocolate chips on top of each cookie for a playful extra touch. Let the icing harden completely before serving to keep those stitches intact.
SERVING SUGGESTIONS FOR CUTE AND EASY BASEBALL COOKIES
Sharing these sweet little gems is half the fun, and presenting them well makes the experience even more memorable. Whether you’re tailgating, hosting a neighborhood watch party, or sending your kids off to school with a treat in their lunchbox, a thoughtful display adds extra cheer.
- Game-Day Platter
Arrange your cookies on a large wooden cutting board or baseball-themed serving tray. Scatter a few extra white chocolate chips around the edges for a decorative “infield” feel.
- Cupcake Liner Cups
Use red-and-white striped cupcake liners to hold individual cookies, making them easy to grab and go. It also keeps the icing safe from smudges.
- Pair with Game-Day Drinks
Offer tall glasses of iced lemonade or root beer floats alongside these cookies. The bubbly sweetness pairs perfectly with the buttery dough and red icing.
- Gift in Treat Bags
Load three to four decorated cookies into clear treat bags tied with red twine. Hand them out as party favors or small thank-you gifts for coaches and teammates.
HOW TO STORE CUTE AND EASY BASEBALL COOKIES
Proper storage means you can save these ballpark beauties for days without losing that soft texture or crisp frosting. Whether you’re prepping ahead or looking to enjoy them throughout the week, follow these tips to keep every cookie fresh.
- Airtight Container at Room Temperature
Place completely cooled and hardened cookies in a single layer inside an airtight container. If you need layers, separate them with parchment paper to prevent sticking. Store at room temperature for up to one week.
- Refrigeration for Icing Stability
If your kitchen is warm or the royal icing seems too soft, store the cookies in an airtight container in the refrigerator. This helps the icing stay firm and vibrant; just bring cookies back to room temperature before serving.
- Freezing for Longer Storage
Wrap cookies individually in plastic wrap and store them in a sealed freezer bag. They’ll keep for up to three months. Thaw at room temperature for about 30 minutes before enjoying.
- Parchment Layering
When stacking cookies—whether storing at room temperature or freezing—always place a layer of parchment paper between them. This simple trick prevents the icing from sticking and losing its crisp detail.
CONCLUSION
Thanks for sticking with me through this grand slam of a recipe! We’ve covered everything from gathering the perfect ingredients to piping those signature red stitches, and even shared storage and serving tips to keep your Cute and Easy Baseball Cookies in their prime. These sugar cookies are not only crowd-pleasers for baseball fans of any age—they’re also a fantastic beginner-friendly project to express your creativity and love for the game. Feel free to print this article out or bookmark it so you can swing back to it whenever you’re ready for another batch of these charming, buttery delights.
I hope you feel as excited as I do to try out this recipe. Whether you’re baking solo or making it a family event, these cookies are sure to bring smiles and evoke warm memories of cheering from the bleachers. If you give them a whirl, or if you have any questions, comments, or suggestions—maybe you tried a different color scheme or added a secret ingredient—please drop a note below. I’d love to hear your feedback and stories. Don’t forget, there’s an FAQ section just down below this article, ready to answer any extra questions you might have. Happy baking, and here’s to hitting it out of the park every time you bake these fun, festive cookies!
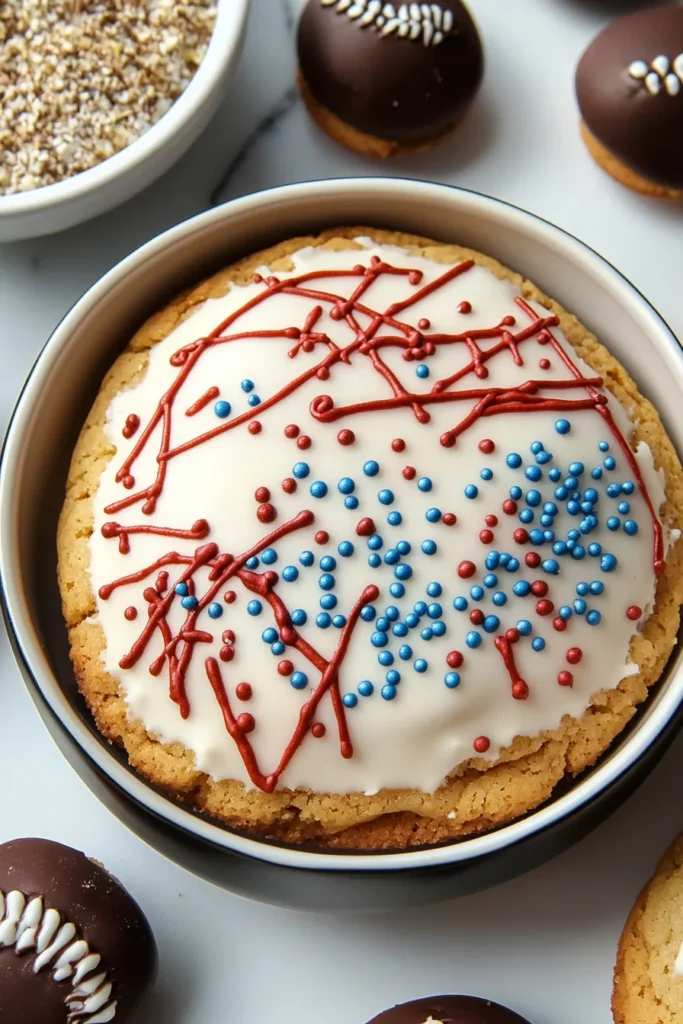

Cute and Easy Baseball Cookies
Description
Soft, buttery sugar cookies baked to golden perfection and topped with bright red royal icing baseball stitches. Fun and festive, these treats are slam-dunks for game day gatherings!
Ingredients
Instructions
-
Preheat the oven to 350°F (175°C) and line a baking sheet with parchment paper.
-
In a medium bowl, whisk together the flour, baking powder, and salt. Set aside.
-
In a large mixing bowl, cream the softened butter and sugar together until light and fluffy, using an electric mixer or a stand mixer.
-
Add the egg and vanilla extract to the butter mixture and mix until combined.
-
Gradually add the dry ingredients to the wet ingredients and mix until a soft dough forms.
-
Add the tablespoon of milk and mix again to bring the dough together.
-
Roll the dough into small balls, about 1 inch in diameter, and place them on the prepared baking sheet, spacing them about 2 inches apart.
-
Gently flatten each dough ball using the bottom of a glass or your hands to create a small, round cookie shape.
-
Bake for 8-10 minutes, or until the edges of the cookies are slightly golden. Remove from the oven and allow to cool completely on a wire rack.
-
Once the cookies are completely cooled, prepare the royal icing by adding a few drops of red food coloring to it. Stir to achieve a vibrant red color.
-
Transfer the royal icing to a piping bag or a ziplock bag with a small hole cut in the corner. Use this to pipe the classic "baseball stitching" design onto each cookie.
-
If desired, place a few white chocolate chips on top of the cookies for a fun, extra touch. Allow the icing to harden completely before serving.
Note
- These cookies can be made ahead of time and stored in an airtight container for up to a week.
- Add more or less food coloring depending on how bold you want the stitching to appear.
- You can also use a cookie cutter shaped like a baseball if you prefer a more uniform look.
- These cookies are perfect for a baseball-themed party or celebration!

