

Crunchy Zucchini Chips are a snack revelation that proves healthy choices don’t have to be bland or boring. In my kitchen arsenal, there’s one munchie that has completely stolen the show: thin zucchini rounds baked to golden perfection until they turn into crispy, cheesy bites of joy. Each slice curls up just so, catching every grain of savory Parmesan, a hint of garlic powder, and a dash of paprika. These chips deliver a satisfying crunch without any of the guilt—just 335 calories for the entire batch! Whether you’re gearing up for movie night, hosting a casual get-together, or simply craving a flavorful afternoon pick-me-up, these chips fit the bill. And the best part? They’re naturally gluten-free, low-carb, and beginner-friendly, so even if you’ve never preheated an oven before, you’ll feel like a pro.
With a subtitle that proudly touts “Crispy, cheesy, and oh-so-easy!”, this recipe checks every box. You’ll spend just 20 minutes on prep, then let the oven work its magic for around 2 hours, followed by a brief 10-minute rest to lock in peak crunch. What emerges are wafer-thin zucchini slices, each kissed with olive oil to coax out natural sweetness, balanced by kosher salt and freshly ground black pepper. As pantry spices swirl in a savory dance—garlic powder meets warm paprika—you’ll realize this appetizer is anything but ordinary. It’s a versatile crowd-pleaser that elevates simple vegetables to an addictive snack experience. Effortless enough for a weeknight nibble, impressive enough to grace a party spread, these Crunchy Zucchini Chips are poised to become your new favorite healthy indulgence.
KEY INGREDIENTS IN CRUNCHY ZUCCHINI CHIPS
Every unforgettable recipe starts with stellar ingredients, and our Crunchy Zucchini Chips are no exception. Each component brings a unique contribution, from texture and flavor to the essential crisp factor. Here’s a closer look at what you’ll need:
- Zucchini
Fresh medium zucchinis provide a mild, slightly sweet base. Their high water content softens during baking, then dries out to deliver that coveted crunch.
- Olive oil
A light coating of olive oil helps the zucchini slices brown evenly and ensures the seasonings stick. It also adds a hint of fruity richness.
- Kosher salt
Enhances the zucchini’s natural sweetness and balances the sharpness of the cheese. Its coarse crystals grip the surface for immediate flavor.
- Freshly ground black pepper
Offers a gentle heat and aromatic kick that wakes up every bite without overpowering the subtle vegetable notes.
- Garlic powder
Infuses the chips with savory depth and a hint of umami, creating a delicious backbone for the Parmesan cheese.
- Paprika
Adds a warm, smoky undertone and a vibrant pop of color that makes these chips as pleasing to the eyes as they are to the taste buds.
- Parmesan cheese
Grated Parmesan brings a salty, nutty tang that crisps to golden perfection, delivering an irresistible bite with each chip.
HOW TO MAKE CRUNCHY ZUCCHINI CHIPS
Let’s get ready to transform those fresh zucchinis and pantry spices into a tray of irresistible chips. Follow these detailed steps to ensure every slice emerges perfectly crisp and flavorful.
1. Preheat your oven to 225°F (110°C) and line two baking sheets with parchment paper. This prevent sticks and promotes even airflow for consistent crisping.
2. Slice the zucchinis into thin rounds, about 1/8-inch thick. Use a mandoline slicer if you have one—uniform thickness is key for even baking.
3. Place the zucchini slices in a large bowl and drizzle with olive oil. Toss gently to coat every round, ensuring a light, even layer.
4. In a small bowl, combine the kosher salt, freshly ground black pepper, garlic powder, and paprika. Sprinkle this spice blend over the zucchini and toss again until each slice is seasoned.
5. Arrange the zucchini slices in a single layer on the prepared baking sheets. Be sure they don’t overlap, so each piece bakes into a chip rather than steams.
6. Sprinkle the grated Parmesan cheese evenly over the zucchini. The cheese will melt and crisp, creating that signature cheesy crunch.
7. Place the baking sheets in the preheated oven and bake for 1.5 to 2 hours, or until the chips are crisp and golden brown. Rotate the sheets halfway through to guarantee uniform browning.
8. Remove the pans from the oven and allow the chips to cool on the baking sheets for a few minutes. This resting time helps them firm up even more.
9. Transfer the cooled zucchini chips to a serving bowl and enjoy immediately, or store in an airtight container for up to a week.
SERVING SUGGESTIONS FOR CRUNCHY ZUCCHINI CHIPS
Once you’ve mastered the art of baking these golden bites, it’s time to explore delightful ways to serve them. Whether you’re aiming for casual snacking or an elevated appetizer display, these ideas will help you present your chips with flair and flavor.
- Serve with a herbed Greek yogurt dip: Whip Greek yogurt with chopped fresh dill, chives, a squeeze of lemon juice, and a pinch of salt. The cool, tangy dip perfectly complements the warm, crispy chips.
- Pair alongside a spicy marinara sauce: Warm a simple tomato-garlic sauce and place it in a shallow bowl. The acidity and heat heighten the savory Parmesan notes in each chip.
- Add to a cheese and charcuterie board: Scatter your zucchini chips around wedges of soft cheeses like brie or goat cheese, dried fruits, and cured meats for a colorful, textural contrast.
- Pack as a healthy lunchbox snack: Layer a handful of chips in a small container with a separate compartment of hummus or guacamole for an on-the-go crunch that’s both nutritious and satisfying.
HOW TO STORE CRUNCHY ZUCCHINI CHIPS
To preserve that perfect crunch and keep your snack stash delicious, proper storage is essential. These guidelines will help you maintain crispness and flavor long after they leave the oven.
- Store in an airtight container at room temperature. Use a rigid container—rather than a flexible bag—to prevent chips from being crushed and keep out excess moisture.
- Place a paper towel layer on the bottom of the container to absorb any residual humidity. This simple trick prevents sogginess and maintains texture.
- Keep the container in a cool, dry spot away from direct sunlight or heat sources. Excess warmth can accelerate the loss of crispiness.
- For longer-term storage, freeze the chips in a single layer on a baking sheet until solid, then transfer to a freezer-safe bag. When you’re ready to snack, let them thaw at room temperature for a few minutes to regain their crunch.
CONCLUSION
There you have it: a complete guide to creating, serving, and storing your very own Crunchy Zucchini Chips. From the moment you slice those vibrant green zucchinis to the triumphant reveal of golden, cheesy perfection, this recipe is designed to deliver maximum flavor with minimal fuss. You’ve learned how each ingredient—from the humble zucchini base to the nutty Parmesan topping—plays a crucial role in crafting chips that are as healthy as they are addictive. With clear step-by-step instructions, you can confidently achieve the perfect crisp, whether you’re a kitchen newbie or an experienced cook. Feel free to print this article for easy access next time you’re craving a guilt-free crunch, and don’t forget you can find a FAQ below addressing common questions about baking, seasoning tweaks, and more.
We love hearing from fellow home cooks, so please leave your comments, questions, or feedback if you give this recipe a try. Did you experiment with extra spices like cayenne pepper or a sprinkling of lemon zest? How did your family react when you served these at your last gathering? Your insights help our community learn and grow together. Whether you need troubleshooting tips for achieving extra-crispy edges or suggestions for creative serving ideas, drop a note below—let’s keep the conversation going and make snack time even more delicious!
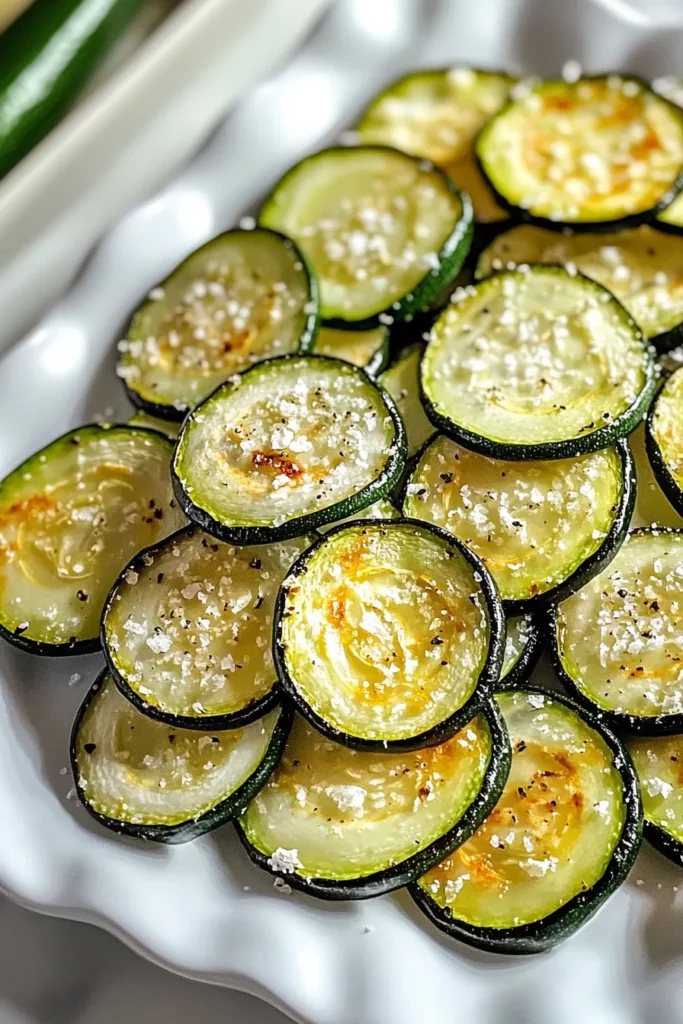

Crunchy Zucchini Chips
Description
Thin zucchini slices baked to golden, crispy perfection with savory Parmesan and spices. A guilt-free crunch that's utterly addictive and surprisingly simple!
Ingredients
Instructions
-
Preheat your oven to 225°F (110°C) and line two baking sheets with parchment paper.
-
Slice the zucchinis into thin rounds, about 1/8-inch thick. Use a mandoline slicer for uniform slices.
-
Place the zucchini slices in a large bowl and drizzle with olive oil. Toss to coat evenly.
-
In a small bowl, mix together the salt, pepper, garlic powder, and paprika. Sprinkle over the zucchini slices and toss again to coat.
-
Arrange the zucchini slices in a single layer on the prepared baking sheets, making sure they don't overlap.
-
Sprinkle grated Parmesan cheese evenly over the zucchini slices.
-
Place the baking sheets in the preheated oven and bake for 1.5 to 2 hours, or until the zucchini chips are crisp and golden brown. Rotate the baking sheets halfway through the cooking time.
-
Remove the baking sheets from the oven and allow the chips to cool on the pans for a few minutes.
-
Transfer the cooled zucchini chips to a serving bowl and enjoy immediately or store in an airtight container for up to a week.
Note
- Adjust the seasoning to your taste by experimenting with different spices such as cayenne pepper or onion powder.
- Make sure the zucchini slices are very thin to ensure they become crispy.
- These chips make a healthy and delicious snack alternative to potato chips.
- For extra flavor, try sprinkling the chips with a bit of lemon zest after baking.

