

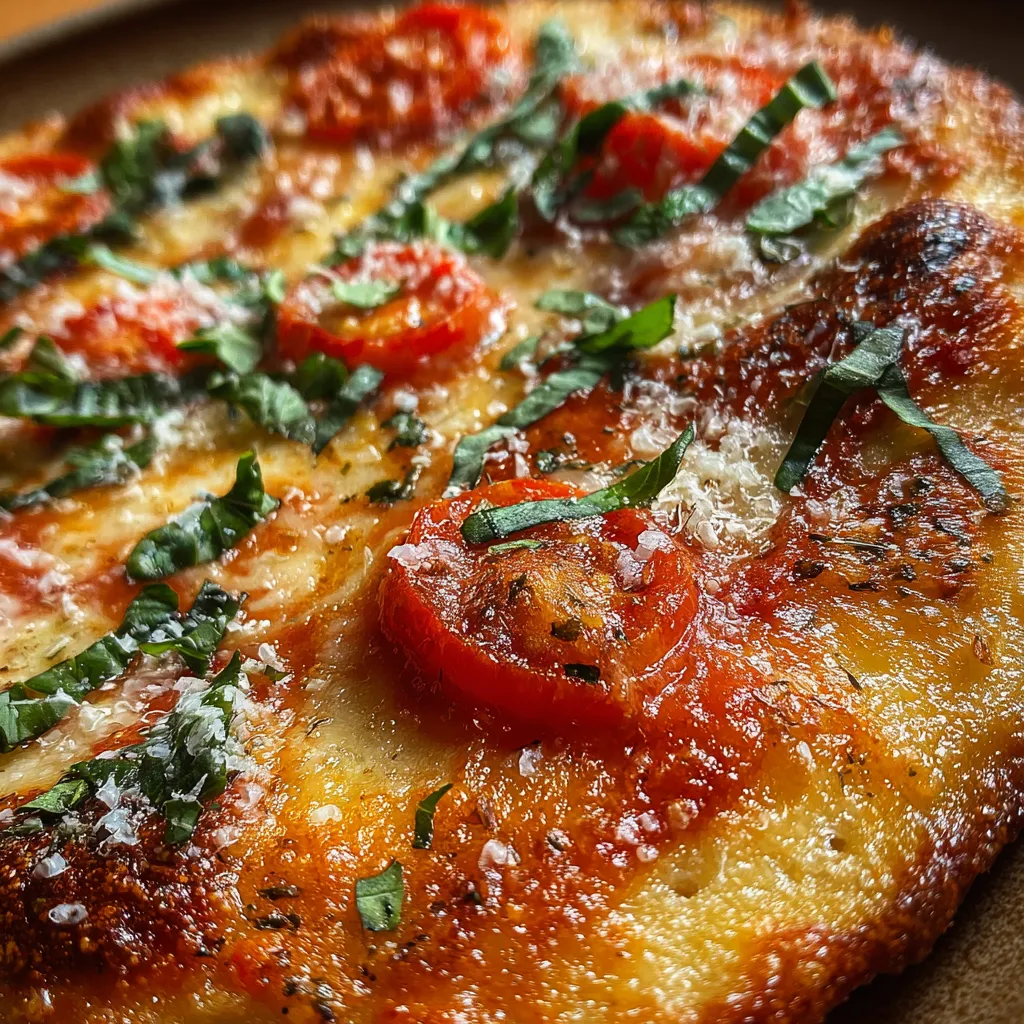
I still remember stepping up to a blistering wood-fired oven in a small Tuscan pizzeria, where the crackling crust of an authentic Italian pizza left me speechless. Now, you can recreate that magic at home with this Crispy Wood-Fired Italian Pizza, loaded with tangy San Marzano sauce, bubbling mozzarella, and smoky fire-kissed edges. With a light, airy crust from finely milled “00” flour and a burst of fresh basil, this recipe brings rustic Italy straight to your dinner table. Ready to dive in?
Key Ingredients
To craft this pizza, gather these high-quality ingredients—each one plays a key role in creating that signature blistered crust, tender crumb, and melty topping:
- 500 grams 00 flour: The finely milled base that gives you a light, airy crust with a delicate chew.
- 325 milliliters water: Hydrates the dough to a 65% hydration level for perfect extensibility and crispness.
- 2 grams instant yeast: Leavens the dough quickly, creating bubbles that result in an open, tender crumb.
- 10 grams fine sea salt: Enhances overall flavor and strengthens the gluten network for better structure.
- 15 milliliters extra-virgin olive oil: Tenderizes the dough and adds a fruity richness right into the crust.
- 200 grams San Marzano tomato sauce: Provides tangy sweetness that perfectly complements the charred edge.
- 200 grams fresh mozzarella cheese: Bubbles into creamy pockets, giving that classic, stretchy pizza experience.
- 10 grams grated Parmesan cheese: Sprinkles on a salty, nutty finish that elevates each bite.
- 5 grams fresh basil leaves: Offers bright, herbal notes for a refreshing flavor contrast.
- 15 milliliters extra-virgin olive oil: A finishing drizzle that brings a golden sheen and extra depth of taste.
How To Make Crispy Wood-Fired Italian Pizza
Bringing together dough-making, high-heat baking, and perfect topping assembly, this recipe shows you every step to nail that authentic wood-fired finish. From mixing and kneading your dough to mastering the peak temperature of a 450°C oven, you’ll learn how to coax out maximum flavor, texture, and visual appeal in just a few minutes under intense heat. Let’s break down the process:
1. In a large bowl, combine the 00 flour and instant yeast thoroughly, then slowly pour in the water while stirring with a wooden spoon until a shaggy dough forms.
2. Add the fine sea salt and extra-virgin olive oil to the shaggy dough, then knead it on a lightly floured surface for 8 to 10 minutes until it becomes smooth, elastic, and springs back when poked.
3. Place the kneaded dough in a lightly oiled bowl, cover it with a clean cloth, and let it rise at room temperature for about 2 hours, or until it has doubled in size and feels pillowy.
4. Meanwhile, preheat your wood-fired oven to its highest setting (around 450°C), making sure the baking surface heats thoroughly for at least 30 minutes to guarantee rapid charring.
5. Once the dough has risen, divide it into two equal portions, shape each into a tight ball, and let them rest under a cloth for 15 minutes to relax the gluten.
6. On a generously floured work surface, gently stretch one dough ball into a 30 cm circle, using your fingertips to push the center outward while leaving a slightly thicker edge for the crust.
7. Evenly spread 100 grams of San Marzano tomato sauce over the dough, leaving a 1–2 cm border free, then top with 100 grams of fresh mozzarella and sprinkle 5 grams of grated Parmesan.
8. Drizzle 7.5 milliliters of extra-virgin olive oil over the toppings, transfer the pizza onto a well-floured peel, and slide it onto the scorching baking surface in the wood-fired oven.
9. Bake for 90 seconds to 2 minutes, rotating halfway using the peel to ensure even charring, until the crust is blistered and the cheese is melted and bubbling.
10. Carefully remove the pizza, garnish with fresh basil leaves, and let it rest for a minute before slicing to allow the cheese to set slightly.
Serving Suggestions
Once your pizza emerges from the flames with that trademark leopard spotting and molten cheese, these serving ideas will elevate the experience even further (and impress anyone lucky enough to join you!):
- Serve with a handful of fresh arugula tossed in a splash of lemon juice and olive oil for a peppery, bright contrast.
- Drizzle a little extra extra-virgin olive oil over each slice and finish with a sprinkle of flaky sea salt to heighten the flavors.
- Pair with a chilled glass of Chianti or your favorite Italian red wine to cut through the richness.
- Offer alongside a simple green salad dressed with balsamic vinegar and a touch of honey for a balanced meal.
Tips For Perfect Crispy Wood-Fired Italian Pizza
Getting that flawless crust and melty topping is all about technique and quality ingredients. Here are some friendly pointers to ensure yours comes out picture-perfect every time:
- Use “00” flour for the lightest, crispiest crust texture.
- Ensure the oven and baking surface are extremely hot to achieve rapid charring.
- Letting the dough rest after shaping helps prevent it from shrinking.
- For authentic flavor, use San Marzano tomatoes and high-quality extra-virgin olive oil.
How To Store It
After you’ve enjoyed a slice (or three), these storage tips will help keep any leftovers tasting fresh and delicious:
- Refrigerate slices in an airtight container for up to 2 days to maintain moisture and flavor.
- Freeze individual slices wrapped in parchment paper and aluminum foil for up to 1 month—thaw gradually in the fridge before reheating.
- Reheat in a preheated oven at 200°C for 5–7 minutes on a baking sheet or pizza stone to restore that perfect crisp.
- Store dough by balling any extra portions and placing them in a lightly oiled, sealed container in the fridge for up to 2 days—bring to room temperature before stretching.
Frequently Asked Questions
Here are quick answers to common questions so you can master this pizza without a hitch:
- Q: Why is it important to use “00” flour in this recipe?
“00” flour has a finely milled texture and the optimal gluten content to yield a light, airy and crisply blistered crust when baked at high temperatures. Substitutes produce a denser result.
- Q: What is the hydration level of this dough and why does it matter?
The dough uses 325 milliliters of water per 500 grams of flour, giving approximately 65% hydration, which balances extensibility and strength. It helps develop a supple dough that stretches easily and forms an open crumb with a thin crust.
- Q: How can I tell when the dough has properly risen to double in size?
After kneading, you let the dough rest in a lightly oiled bowl at room temperature for about 2 hours. Proper rise is indicated when the dough’s volume approximately doubles, the surface appears domed with air bubbles visible under the cloth, and it feels pillowy to the touch.
- Q: What is the purpose of the 15-minute rest after dividing and shaping the dough?
Resting the two dough portions under a cloth for 15 minutes relaxes the gluten network, making them easier to stretch into a 30-centimeter circle and preventing the dough from springing back or tearing.
- Q: Why does the oven and baking surface need to be preheated for at least 30 minutes?
Preheating the wood-fired oven to around 450°C and letting the baking surface heat thoroughly for at least 30 minutes ensures it’s hot enough to rapidly char the crust, producing the characteristic blistered texture in just 90 seconds to 2 minutes.
- Q: How do I stretch the dough into a 30-centimeter circle without tearing it?
Lightly flour your work surface and fingertips, gently press the dough from the center outward, then lift and rotate it while applying even outward pressure. This technique preserves the edge for a thicker crust rim and prevents holes.
- Q: Why is the pizza baked at such a high temperature for only 90 seconds to 2 minutes?
Baking at around 450°C for 90 seconds to 2 minutes yields a thin, crispy base with a lightly charred crust and fully melted mozzarella without drying out the toppings. Rotating halfway ensures even cooking and charring.
What Makes This Special
This Crispy Wood-Fired Italian Pizza works because it balances high-heat roasting with premium ingredients—“00” flour for feather-light dough, San Marzano tomatoes for that bright tang, and mozzarella that bubbles like a dream. The rapid char and tender center create a satisfying crunch that’ll have you grinning from the first bite. Feel free to print this recipe, save it for pizza night, and drop a comment below if you give it a go or need a hand perfecting your crust!

Crispy Wood-Fired Italian Pizza
Description
This pizza boasts a blistered crust that crunches at first bite, giving way to a tender center brushed with golden olive oil. Each slice reveals bubbling mozzarella, bright basil, and smoky fire-kissed edges for a true Italian feast.
Ingredients
Instructions
-
In a large bowl combine 00 flour and instant yeast, then slowly pour in water while mixing until a shaggy dough forms.
-
Add fine sea salt and extra-virgin olive oil to the dough, then knead on a lightly floured surface for 8 to 10 minutes until smooth and elastic.
-
Place the dough in a lightly oiled bowl, cover with a clean cloth, and let it rise at room temperature for 2 hours or until doubled in size.
-
Preheat the wood-fired oven to its highest temperature (around 450°C) and let the baking surface heat thoroughly for at least 30 minutes.
-
Divide the dough into two equal portions, shape each into a tight ball, then let rest for 15 minutes under a cloth.
-
On a floured work surface, stretch one dough ball into a 30-centimeter circle, creating a slightly thicker edge for the crust.
-
Spread 100 grams of tomato sauce over the stretched dough, leaving a 1–2 centimeter border, then distribute 100 grams of fresh mozzarella and sprinkle 5 grams of grated Parmesan.
-
Drizzle 7.5 milliliters of extra-virgin olive oil over the toppings, transfer the pizza onto a well-floured peel, and slide it onto the hot baking surface in the wood-fired oven.
-
Bake for 90 seconds to 2 minutes, rotating halfway to ensure even charring, until the crust is blistered and cheese is melted.
-
Remove the pizza, garnish with fresh basil leaves, and let rest for a minute before slicing.
Note
- Use “00” flour for the lightest, crispiest crust texture.
- Ensure the oven and baking surface are extremely hot to achieve rapid charring.
- Letting the dough rest after shaping helps prevent it from shrinking.
- For authentic flavor, use San Marzano tomatoes and high-quality extra-virgin olive oil.

