

If you’re on the hunt for the ultimate crispy chicken wings that deliver a satisfying crunch with every bite, you’ve come to the right place. There’s something undeniably exciting about biting into golden-brown wings that have been coated in a perfectly balanced dry rub—salt, garlic, onion, smoked paprika, and just the right hint of chili powder and cayenne. Whether you’re gearing up for game day, hosting a casual gathering, or simply craving a flavor-packed dinner treat, these wings are the answer. They practically beg to be dunked in your favorite dipping sauce—think creamy ranch, tangy barbecue, or bold blue cheese—so you get that extra dimension of flavor that makes snacking feel like a celebration.
What makes this recipe extra special is its simplicity and accessibility for cooks of all levels. With a total prep time of just 15 minutes, followed by about an hour and ten minutes in the oven, including that crucial resting period, you can plan this snack or appetizer well in advance. At around 400 calories per serving, these wings strike a satisfying balance between indulgence and portion control. Even if you’ve never tackled chicken wings before, our step-by-step approach is designed for beginners. By using baking powder (never baking soda) to raise the pH of the chicken skin, we unlock that coveted super-crisp texture without a drop of oil. Get ready to fall in love with your new favorite snack—these crispy, flavor-packed wings might just become a weekly tradition in your kitchen!
KEY INGREDIENTS IN CRISPY DRY RUB CHICKEN WINGS
Every great recipe starts with top-notch ingredients, and these crispy dry rub wings are no exception. You don’t need a long list—just a handful of pantry staples and fresh chicken wings to make something extraordinary. Here’s what you’ll need and why each component plays a crucial role:
- Chicken Wings
The star of the show—fresh, split wings ensure each piece gets maximum exposure to heat, allowing the skin to render and crisp beautifully.
- Baking Powder
The secret weapon for unbeatable crunch. By raising the pH level of the skin, baking powder helps proteins break down more readily, promoting browning and crisping without greasiness.
- Salt
A basic yet essential seasoning that enhances all the flavors, tenderizes the meat, and helps draw out moisture for a crispier finish.
- Garlic Powder
Adds a gentle, savory depth that complements the natural richness of chicken and works in harmony with the other spices.
- Onion Powder
Contributes a subtle sweetness and a layer of umami, building complexity without overpowering the primary flavors.
- Smoked Paprika
Infuses a mild smokiness and a warm red hue, reminding you of outdoor barbecues and fire-kissed grilling.
- Chili Powder
Provides earthy, mildly spicy notes that boost flavor without overwhelming. It’s the bridge between paprika and cayenne.
- Black Pepper
Offers sharp, aromatic heat that cuts through the richness and brightens each mouthful.
- Cayenne Pepper (Optional)
For those who crave extra fire, a small pinch goes a long way in elevating the spice level and making every bite more thrilling.
HOW TO MAKE CRISPY DRY RUB CHICKEN WINGS
This recipe is perfect for cooks at any skill level—just follow these steps to transform simple wings into an extraordinary appetizer or dinner. We’ve designed the process to maximize flavor and achieve that ideal texture: crispy on the outside, juicy on the inside.
1. Preheat your oven to 250°F (120°C). Line a baking sheet with aluminum foil and place a wire rack on top. This setup ensures hot air circulates around each wing, promoting even crisping without the need for frying.
2. Pat the chicken wings completely dry with layers of paper towels. Removing surface moisture is critical for crispiness, as water in the skin will steam and prevent that coveted crunch.
3. In a large mixing bowl, combine the baking powder, salt, garlic powder, onion powder, smoked paprika, chili powder, black pepper, and cayenne pepper (if using). Stir thoroughly to create a uniform dry rub—this ensures every wing gets an even spice coating.
4. Add the wings to the bowl and use tongs or clean hands to toss them until each piece is generously and uniformly coated with the dry rub mixture.
5. Arrange the wings in a single layer on the wire rack, spacing them apart so none are touching. This prevents steaming and allows each wing to develop its signature crisp exterior.
6. Bake at 250°F (120°C) for 30 minutes. This low-temperature phase renders the fat beneath the skin slowly, setting the stage for an ultra-crispy finish.
7. Increase the oven temperature to 425°F (220°C) and continue baking for an additional 40–50 minutes, or until the wings turn a rich, golden brown. Rotate the tray halfway through to ensure even browning on all sides.
8. Remove the wings from the oven and let them rest for a few minutes on the rack. This final pause allows residual heat to further crisp the skin and lock in juices before serving.
SERVING SUGGESTIONS FOR CRISPY DRY RUB CHICKEN WINGS
Once your wings have reached that perfect crisp, it’s time to plan how you’ll serve them. Whether you’re hosting friends, enjoying a cozy night in, or impressing family at dinner, these suggestions will help you present your crispy dry rub wings like a pro. Each idea is crafted to elevate your wings, complementing their zesty, savory profile and keeping every bite exciting.
- Classic Ranch Dip
Whip together creamy ranch with a squeeze of fresh lemon juice and chopped chives. The cool, herby dip beautifully contrasts the warm, spicy wings—perfect for dunking each piece without overwhelming the palate.
- Blue Cheese Drizzle
Crumble blue cheese into a blend of sour cream and Greek yogurt, then thin with a splash of milk to create a tangy sauce. The bold, salty cheese notes balance the smoky dry rub and add a gourmet flair.
- Fresh Veggie Platter
Serve your wings alongside crisp celery sticks, carrot batons, and sliced cucumbers. The crunchy vegetables provide a refreshing textural contrast and help cleanse the palate between spicy bites.
- Zesty Citrus Twist
Offer lime wedges or lemon slices for guests to squeeze over the wings just before eating. The bright citrus acidity cuts through the richness, highlighting the smoky paprika and chili flavors.
HOW TO STORE CRISPY DRY RUB CHICKEN WINGS
Whether you’ve made a big batch for meal prep or you simply have leftovers after a gathering, proper storage is key to preserving that fresh-baked taste and crisp texture. These wings can be stored and reheated with ease, ensuring they remain as delicious as when they first came out of the oven. Follow these guidelines to keep them tasting great for days or even weeks.
- Refrigerator Storage
Allow the wings to cool completely, then transfer them to an airtight container or a resealable bag. Store in the fridge for up to 4 days. Chilling helps the dry rub set, and you’ll still get good crispness when reheating.
- Freezer Method
Lay cooled wings on a cookie sheet in a single layer and freeze until firm, about 1 hour. Then, transfer to a freezer-safe bag or container. Frozen wings stay fresh for up to 3 months—perfect for quick snacks.
- Reheating for Crispiness
Preheat your oven to 400°F (200°C). Arrange wings on a wire rack set inside a baking sheet and bake for 10–15 minutes, flipping halfway through. This restores the crunch without drying them out.
- Avoid Microwave
Resist the urge to use a microwave, which will make the skin soggy. If you must, heat briefly and finish under the broiler for a minute or two to recapture that irresistible crisp.
CONCLUSION
From the first savory bite to the last crunchy morsel, these Crispy Dry Rub Chicken Wings are destined to become a staple in your culinary repertoire. We’ve covered everything from the secret role of baking powder in achieving that perfect pH balance to step-by-step instructions that guarantee success—even for beginners. This article is formatted for easy printing, so you can hang it in your kitchen or slip it into a recipe box and revisit it whenever wing cravings strike. Don’t forget, beneath this conclusion you’ll find a handy FAQ to troubleshoot common questions and ensure you feel confident at every stage of wing preparation.
I hope this guide has not only inspired you but also empowered you to experiment with flavors—tweaking the spice mix or trying new dipping sauces to make the recipe uniquely yours. If you give this recipe a try or have any questions along the way, I’d love to hear from you. Share your thoughts, ask for tips, or let me know how you customized the dry rub to suit your taste. Happy cooking, and here’s to many deliciously crispy wings in your future!
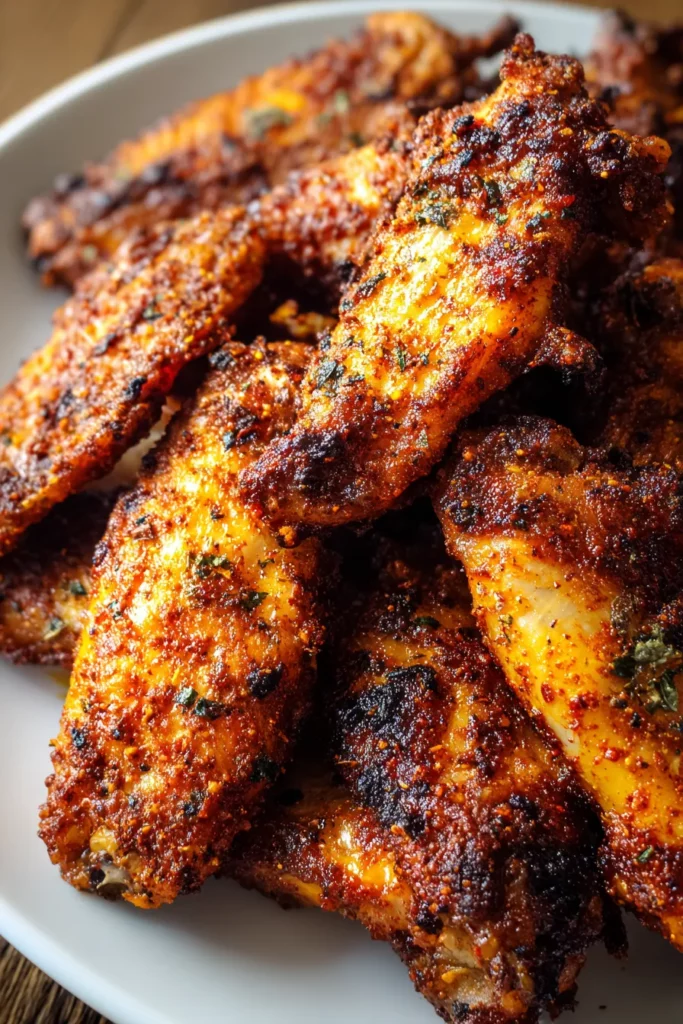

Crispy Dry Rub Chicken Wings
Description
Juicy chicken wings coated in a zesty dry rub and baked to perfection for maximum crunch. Perfect for game day or a tasty dinner treat!
Ingredients
Instructions
-
Preheat your oven to 250°F (120°C). Line a baking sheet with aluminum foil and place a wire rack on top. This will allow the wings to crisp up on all sides.
-
Pat the chicken wings dry with paper towels. Moisture will prevent them from getting crispy, so ensure they are as dry as possible.
-
In a large bowl, combine the baking powder, salt, garlic powder, onion powder, smoked paprika, chili powder, black pepper, and cayenne pepper. Mix well to create the dry rub.
-
Add the chicken wings to the bowl and toss them thoroughly until each wing is evenly coated with the dry rub mixture.
-
Arrange the wings in a single layer on the wire rack, making sure they do not touch each other. This allows for even air circulation and crispiness.
-
Bake in the preheated oven for 30 minutes, then increase the oven temperature to 425°F (220°C).
-
Continue baking for an additional 40-50 minutes, or until the wings are crispy and golden brown. You may want to rotate the tray halfway through the cooking time to ensure even browning.
-
Remove the wings from the oven and let them rest for a few minutes before serving. This resting period helps the wings to crisp up even further.
Note
- Baking powder is the secret ingredient that helps the wings become extremely crispy by raising the pH level of the chicken skin.
- For an added twist, try serving the wings with a dipping sauce like ranch, blue cheese, or a tangy barbecue sauce.
- If you like your wings less spicy, you can omit the cayenne pepper entirely.
- This recipe is a great base—feel free to adjust the spice mix to your taste by adding different herbs or spices.
- Always ensure chicken reaches an internal temperature of 165°F (74°C) for safe consumption.

