

There’s something undeniably comforting about a little dessert made just for you, especially when it comes together in under ten minutes of hands-on time. This Creamy No-Bake Vanilla Mug Cheesecake is the sweetest secret weapon for satisfying those late-night cravings without heating up the whole kitchen. Smooth cream cheese blends effortlessly with a hint of lemon juice and pure vanilla extract, giving you a rich, velvety filling that tastes like it came from a fancy bakery—only this one is ready in a fraction of the time. As it chills, the flavors marry into a dreamy melody of sweet and tangy, so when you finally take that first spoonful, you’ll be swooning over how light, airy, and indulgent it feels all at once.
I still remember the first time I whipped up this mug cheesecake on a random Tuesday evening when a sudden sugar craving hit. I had no desire to preheat an oven or pull out a springform pan, so I grabbed my trusty mug and two graham crackers from the pantry. Ten minutes later—and after letting it rest in the fridge while I binge–watched my favorite show—I discovered the perfect balance of crunchy crumbs and silken filling waiting for me. It felt like a little celebration in every bite, and I couldn’t wait to share that euphoria with friends. Whether you’re winding down after a busy day or need a quick treat before guests arrive, this no-bake vanilla mug cheesecake will become your go-to secret weapon for simple, satisfying sweetness.
KEY INGREDIENTS IN CREAMY NO-BAKE VANILLA MUG CHEESECAKE
To bring this delightful mug cheesecake to life, we rely on a handful of everyday ingredients that transform into something truly special. Each component plays its own part, from lending structure and sweetness to adding that irresistible creamy texture and crunchy base.
- Cream Cheese
This is the heart and soul of the cheesecake, providing that luxuriously smooth and tangy base. When softened and gently warmed, it blends seamlessly with the other ingredients to create that signature velvety mouthfeel.
- Granulated Sugar
A simple sweetener that balances the tang of the cream cheese and lemon juice. It dissolves quickly into the mixture, ensuring every spoonful is perfectly sweet without any grittiness.
- Vanilla Extract
Adds aromatic warmth and depth of flavor. A splash of vanilla transforms the filling from plain to wonderfully fragrant, making every bite taste like a celebration.
- Lemon Juice
A little acidity brightens the richness of the cream cheese and cuts through the sweetness, giving the cheesecake a refreshingly tangy lift that keeps it from feeling heavy.
- Whipped Cream
Folding in whipped cream lightens the filling, introducing airiness that mimics a soufflé-like texture. It’s what makes this dessert feel decadent yet feather-light.
- Graham Crackers
Crushed into crunchy crumbs, they form the classic cheesecake crust right in the mug. Their buttery, honeyed flavor pairs beautifully with the sweet filling.
- Fresh Fruit or Syrup
An optional finishing touch for extra color, flavor, and texture. Whether you choose juicy berries, tropical fruit, or a drizzle of caramel or chocolate syrup, this topping adds personality and flair.
HOW TO MAKE CREAMY NO-BAKE VANILLA MUG CHEESECAKE
Let’s walk through creating this no-bake marvel step by step. You’ll see how each technique builds layers of flavor and texture, from melting the cream cheese to folding in whipped cream and chilling for that perfect set.
1. Place the softened cream cheese in a microwave-safe mug and microwave on medium for about 10–15 seconds to soften further. Stir thoroughly until completely smooth, ensuring there are no lumps left behind.
2. Add the granulated sugar, vanilla extract, and lemon juice to the mug with the cream cheese. Mix vigorously until everything is well-combined and you have a silky mixture with flecks of vanilla throughout.
3. Gently fold in the whipped cream using a spatula. Take care to keep your motions light and airy—overmixing can deflate the whipped cream and make the filling less fluffy.
4. Sprinkle the crushed graham crackers evenly onto the top of the mixture in the mug. Press down slightly with the back of a spoon to form a compact, even crust layer.
5. Cover the mug with plastic wrap or place a small plate on top, then refrigerate for at least 2 to 3 hours. This rest time lets the cheesecake firm up and develop its lush, creamy texture.
6. Once set, remove the mug from the refrigerator and top with fresh fruit or a syrup of your choice. The contrast of juicy fruit or rich syrup against the smooth filling is simply divine.
7. Enjoy your creamy no-bake vanilla mug cheesecake straight from the mug with a small spoon—no forks or fancy dishes required.
SERVING SUGGESTIONS FOR CREAMY NO-BAKE VANILLA MUG CHEESECAKE
Serving this little gem is all about the perfect finishing touch and presentation. While it’s delightful on its own, a few extra details can elevate the experience and truly enchant anyone you share it with. Whether you’re impressing a date or indulging in a solo treat, these ideas will make every bite feel special.
- Layered Berry Medley
Alternate fresh raspberries, blueberries, and sliced strawberries atop the cheesecake to create a vibrant, colorful crown. The juicy berries add brightness and a natural pop of color that contrasts beautifully with the creamy white filling.
- Drizzled Caramel or Chocolate
Warm a spoonful of caramel sauce or chocolate syrup until it’s slightly pourable, then drizzle in a delicate pattern over the top. The sweet ribbons of sauce infuse each bite with gooey decadence and an extra layer of flavor.
- Mint and Zest Garnish
Finely zest a lemon or orange over the cheesecake, then add a couple of fresh mint leaves for herbaceous aroma and a hint of citrus. This garnish turns a simple dessert into an elegant treat worthy of any dinner party.
- Crushed Cookie Crunch
Scatter additional crushed cookies—such as Oreos or shortbread—over the filling before serving. The extra crunch and contrasting flavors introduce an exciting new texture that complements the silky cheesecake.
HOW TO STORE CREAMY NO-BAKE VANILLA MUG CHEESECAKE
Keeping your mug cheesecake tasting its freshest is easier than you might think. Proper storage not only preserves the creamy texture but also ensures that the flavors remain bright and enjoyable for as long as possible. Whether you have one mug or several stashed in your fridge, these tips will keep your dessert in tip-top shape.
- Refrigerator Storage
Cover each mug tightly with plastic wrap or transfer the cheesecake into an airtight container. Store on a stable shelf away from strong-smelling foods to prevent flavor transfer. It will stay fresh for up to 3 days.
- Freezing for Later
If you want to make these ahead, freeze the assembled cheesecake (without fresh fruit topping) in a freezer-safe container for up to one month. Thaw overnight in the refrigerator, then add fresh fruit or sauce before serving.
- Separate Toppings
To avoid soggy crusts, keep toppings like fruit, sauces, and extra crumbs in separate small containers. Add them just before serving to maintain optimal texture and flavor.
- Avoid Temperature Fluctuations
Try not to move the mugs in and out of the fridge repeatedly. Consistent cold temperature helps the cheesecake maintain its creamy set without partially melting and re-setting, which can affect texture.
CONCLUSION
This Creamy No-Bake Vanilla Mug Cheesecake is proof that you don’t need elaborate equipment or hours in the kitchen to enjoy a indulgent dessert. With just a handful of ingredients—cream cheese, sugar, vanilla, lemon juice, whipped cream, and graham crackers—you can whip up a personal-sized treat that feels luxurious yet delightfully simple. The ease of preparation, combined with a minimal clean-up (just one mug and a few utensils!), makes this recipe a true winner for busy weeknights, cozy movie nights, or anytime you need a little sweet lift. Whether you follow the classic version or experiment with cocoa powder for a chocolate twist, this mug cheesecake adapts beautifully to your cravings and pantry staples.
Don’t let those leftover ingredients go to waste—print this article and save it for the next time a spontaneous dessert craving strikes. You’ll find everything you need right here, including a handy FAQ below to troubleshoot any questions or tweaks you might want to try. If you give this recipe a whirl, I’d love to hear how it turned out! Leave a comment, share your favorite topping combinations, or ask any questions if you need a bit more guidance. Happy chilling and happier indulging!
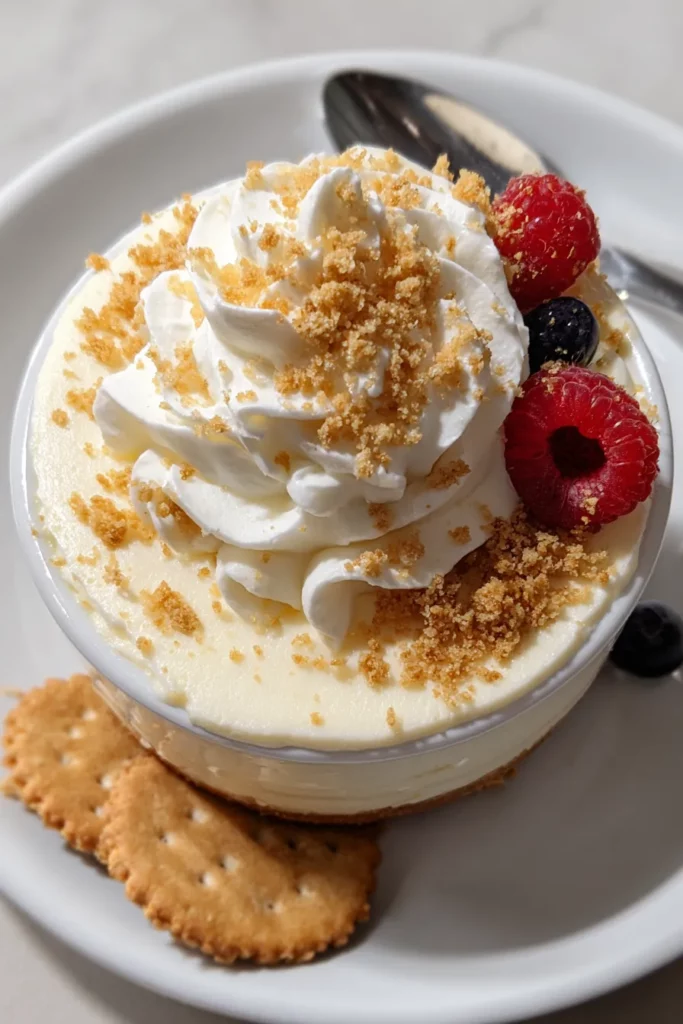

Creamy No-Bake Vanilla Mug Cheesecake
Description
This luscious mug cheesecake is rich with vanilla and cream cheese, topped with crunchy graham cracker crumbs and your favorite fruit or syrup. Perfect for a cozy treat!
Ingredients
Instructions
-
Place the softened cream cheese in a microwave-safe mug and microwave on medium for about 10-15 seconds to soften further. Stir until smooth.
-
Add the granulated sugar, vanilla extract, and lemon juice to the mug with the cream cheese. Mix everything together until it is well-combined and smooth.
-
Gently fold in the whipped cream to the cream cheese mixture until incorporated. Be careful not to overmix, as you want to keep it light and airy.
-
Sprinkle the crushed graham crackers onto the top of the mixture in the mug. Press down slightly to create an even layer.
-
Cover the mug with plastic wrap or a small plate and refrigerate for at least 2 to 3 hours, or until the cheesecake is firm and chilled.
-
Once set, remove from the refrigerator, and top with fresh fruit or a syrup of your choice for added flavor and presentation, if desired.
-
Enjoy your creamy no-bake vanilla mug cheesecake straight from the mug!
Note
- This recipe is perfect for a quick dessert craving as it requires no baking.
- Feel free to experiment with flavors by adding cocoa for a chocolate version or some caramel for a different twist.
- This dessert is easily adaptable to be made in larger quantities; simply multiply the ingredients accordingly.
- If you're not a fan of graham crackers, you can use any type of cookie or digestive biscuit as a base.

