

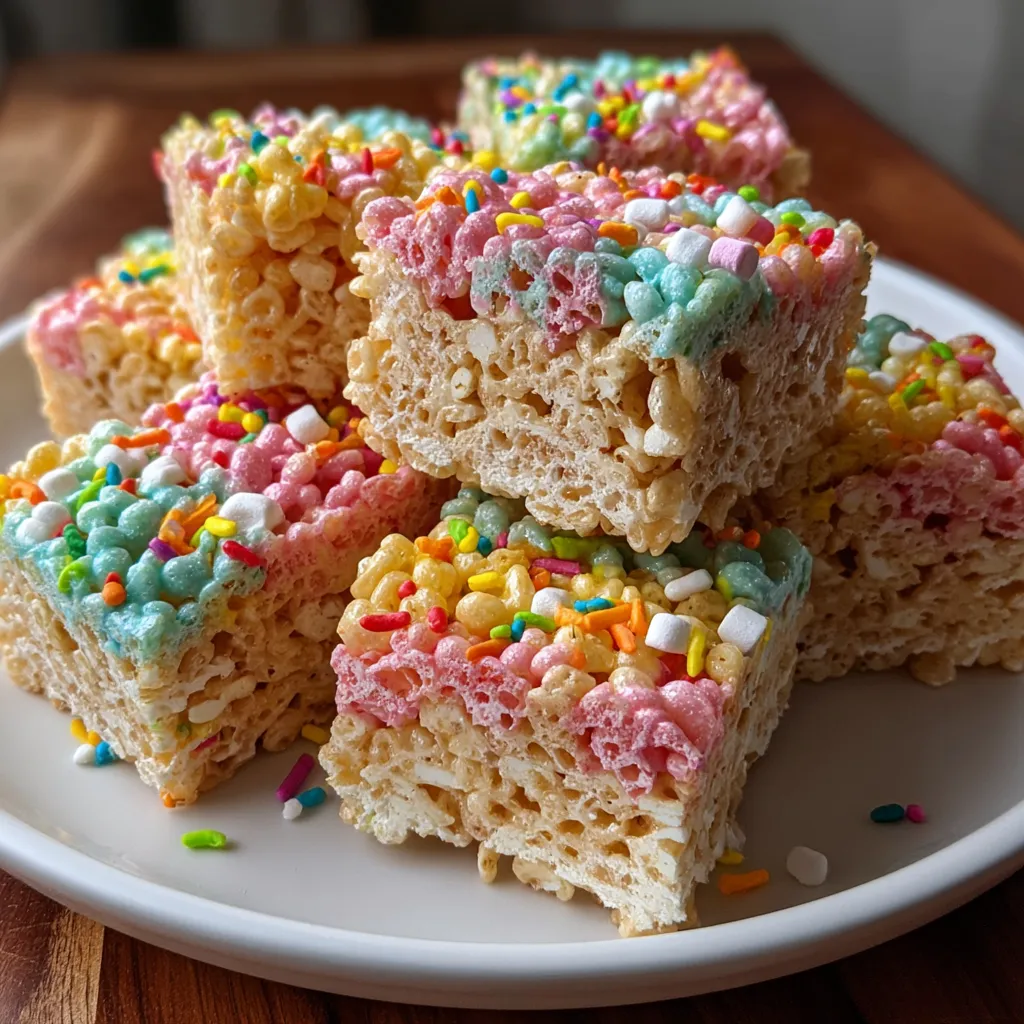
Colorful No-Bake Rice Krispie Bars put a playful twist on classic cereal treats, blending gooey marshmallow layers with swirling rainbow hues. With vibrant red, yellow, and green crispy rice cereal topped by rainbow sprinkles, these bars are as fun to make as they are to eat. Whether you’re planning a kid-friendly snack or a colorful party dessert, this easy beginner-friendly recipe promises chewy, airy bites of pure joy—no oven required!
Key Ingredients
Before diving in, let’s gather the simple ingredients that make these bars shine:
- 4 cups Rice Krispies cereal: The crispy backbone that delivers crunch and structure.
- 3 cups mini marshmallows: Provides the gooey binder that coats every cereal flake.
- 3 tablespoons unsalted butter: Adds richness and helps melt the marshmallows smoothly.
- 1 teaspoon vanilla extract: Infuses a warm, sweet aroma into the marshmallow mix.
- pinch salt: Balances sweetness and enhances all the flavors.
- a few drops red food coloring: Creates vibrant red swirls for a bold pop of color.
- a few drops yellow food coloring: Yields bright yellow layers that evoke sunshine vibes.
- a few drops green food coloring: Adds lively green hues for the full rainbow effect.
- 1/2 cup rainbow sprinkles: The festive finish that brings texture and extra color on top.
How To Make Colorful No-Bake Rice Krispie Bars
These no-bake bars come together in just a few simple steps. You’ll melt, color, and fold the marshmallow mixture into your Rice Krispies before layering or swirling them into a pan. The process is quick, hands-on, and perfect for cooks of any skill level. Let’s dive into each step and turn these classic treats into a rainbow delight!
1. Lightly grease a 9×13-inch pan with butter or cooking spray to ensure easy removal later.
2. In a large saucepan over low heat, melt the butter and mini marshmallows, stirring constantly until completely smooth and lump-free.
3. Remove the pan from heat and stir in the vanilla extract and salt, making sure the flavors are evenly distributed.
4. Divide the marshmallow mixture evenly into three bowls and mix a few drops of red, yellow, and green food coloring into each bowl respectively, stirring until uniformly colored.
5. Fold 1 1/3 cups of Rice Krispies cereal into each colored mixture until the cereal is evenly coated, then layer or swirl each colored cereal mixture in the prepared pan for a fun marbled effect.
6. Press the mixture firmly into the pan with a greased spatula, sprinkle the top with rainbow sprinkles, and let the bars cool completely before cutting into squares.
Serving Suggestions
Once your Colorful No-Bake Rice Krispie Bars have set, they’re ready to brighten up any table. Here are four playful ways to serve them:
- Serve alongside a tall glass of cold milk to balance the sweetness and accentuate the chewy texture.
- Pack individual bars in wax paper for a fun lunchbox surprise that travels well.
- Arrange them on a party platter with fresh fruit slices for a colorful snack display.
- Drizzle with melted white chocolate and extra sprinkles to create a fancy dessert twist.
Tips For Perfect Colorful No-Bake Rice Krispie Bars
With a few friendly pointers, you’ll achieve bars that look as stunning as they taste. Feel free to experiment, but these notes will help you nail the perfect texture and color every time:
- Store bars in an airtight container at room temperature for up to 3 days.
- For extra color variation use blue and purple food coloring.
- Press mixture gently to maintain a light and airy texture.
- Experiment with different shaped sprinkles for festive occasions.
How To Store It
After you’ve cut into these rainbow-hued squares, it’s easy to keep them fresh and chewy for days:
- Room temperature storage: Transfer bars to an airtight container and keep at room temperature for up to three days to retain their classic chew.
- Refrigeration: For a slightly longer shelf life (up to five days), store in an airtight container in the fridge—note that they may firm up a bit when chilled.
Frequently Asked Questions
Here are answers to common queries about making and serving your Rice Krispie bars:
- How can I ensure my Rice Krispie bars stay light and airy rather than ending up dense?
To keep the bars light, melt the butter and marshmallows over low heat, stirring constantly so you don’t overheat or scorch them. Gently fold in the cereal with a spatula—avoid stirring too vigorously—and when pressing the mixture into the pan, press only firmly enough to level it, not compact it, to maintain that airy texture.
- What’s the best way to melt the marshmallows without burning them?
Use a heavy-bottomed saucepan over the lowest heat setting. Start by melting the butter first, then add the mini marshmallows in batches, stirring constantly. Remove from heat as soon as the mixture is smooth—carrying residual heat in the pan finishes the melting without scorching.
- Can I add more or different food colors to make the bars even more vibrant?
Yes. After dividing the melted marshmallow mixture into bowls, you can introduce blue, purple, or any gel-based food coloring in addition to red, yellow, and green. Start with just a few drops and stir until you reach your desired shade. Remember that gel colorings tend to produce more vivid hues than liquid ones.
- How do I press the mixture into the pan properly so it doesn’t stick or become too flat?
Lightly grease your spatula or bench scraper with butter or cooking spray before pressing. Gently press each colored layer just enough to level it in the pan—overpressing squeezes out air pockets and makes the bars dense. A light, even layer preserves the bars’ springy bite.
- What’s the best way to cut these bars cleanly without them sticking to the knife?
Allow the bars to cool completely at room temperature—about 30 minutes to an hour. Use a sharp knife greased or dipped in hot water and wiped dry between cuts. This helps you slice through the marshmallow layers smoothly without dragging or tearing.
- How should I store the bars, and how long will they stay fresh?
Once cooled, transfer the bars to an airtight container and keep them at room temperature. They’ll remain fresh up to three days. If you need a longer shelf life, you can refrigerate the container for up to five days, though the bars may firm up slightly in the fridge.
- Can I adapt this recipe for vegan or gluten-free diets?
For gluten-free, use certified gluten-free Rice Krispies. For a vegan version, substitute the butter with a plant-based margarine and use vegan marshmallows made without gelatin. Everything else remains the same—colors and sprinkles should be checked to ensure they’re vegan-friendly.
What Makes This Special
These Colorful No-Bake Rice Krispie Bars stand out because they turn a beloved childhood snack into a vibrant, eye-catching treat without ever firing up the oven. The combination of soft marshmallow, crunchy cereal, and playful swirls of red, yellow, and green ensures every bite is cheerful and light. Feel free to print and save this recipe for future rainbow cravings—and don’t forget to leave a comment or question below if you whip up a batch or need any extra tips!

Colorful No-Bake Rice Krispie Bars
Description
These no-bake bars layer vibrant red, yellow, and green crispy rice cereal with gooey marshmallow, topped with rainbow sprinkles. Each bite offers a chewy, airy texture and a burst of playful color that's fun to make and share.
Ingredients
Instructions
-
Lightly grease a 9x13-inch pan with butter or cooking spray.
-
In a large saucepan over low heat melt the butter and mini marshmallows, stirring constantly until smooth.
-
Remove the pan from heat and stir in the vanilla extract and salt.
-
Divide the marshmallow mixture evenly into three bowls and mix a few drops of red, yellow, and green food coloring into each bowl respectively.
-
Fold 1 1/3 cups of Rice Krispies cereal into each colored mixture until evenly coated, then layer or swirl each colored cereal mixture in the prepared pan.
-
Press the mixture firmly into the pan with a greased spatula, sprinkle the top with rainbow sprinkles, and let the bars cool completely before cutting into squares.
Note
- Store bars in an airtight container at room temperature for up to 3 days.
- For extra color variation use blue and purple food coloring.
- Press mixture gently to maintain a light and airy texture.
- Experiment with different shaped sprinkles for festive occasions.

